Season Passes
AccelByte Cloud's Season Pass service provides a tiered reward structure that grants special rewards to players that participate in limited-time challenges. As a player earns XP in the challenge, they will unlock tiers and get to claim rewards.
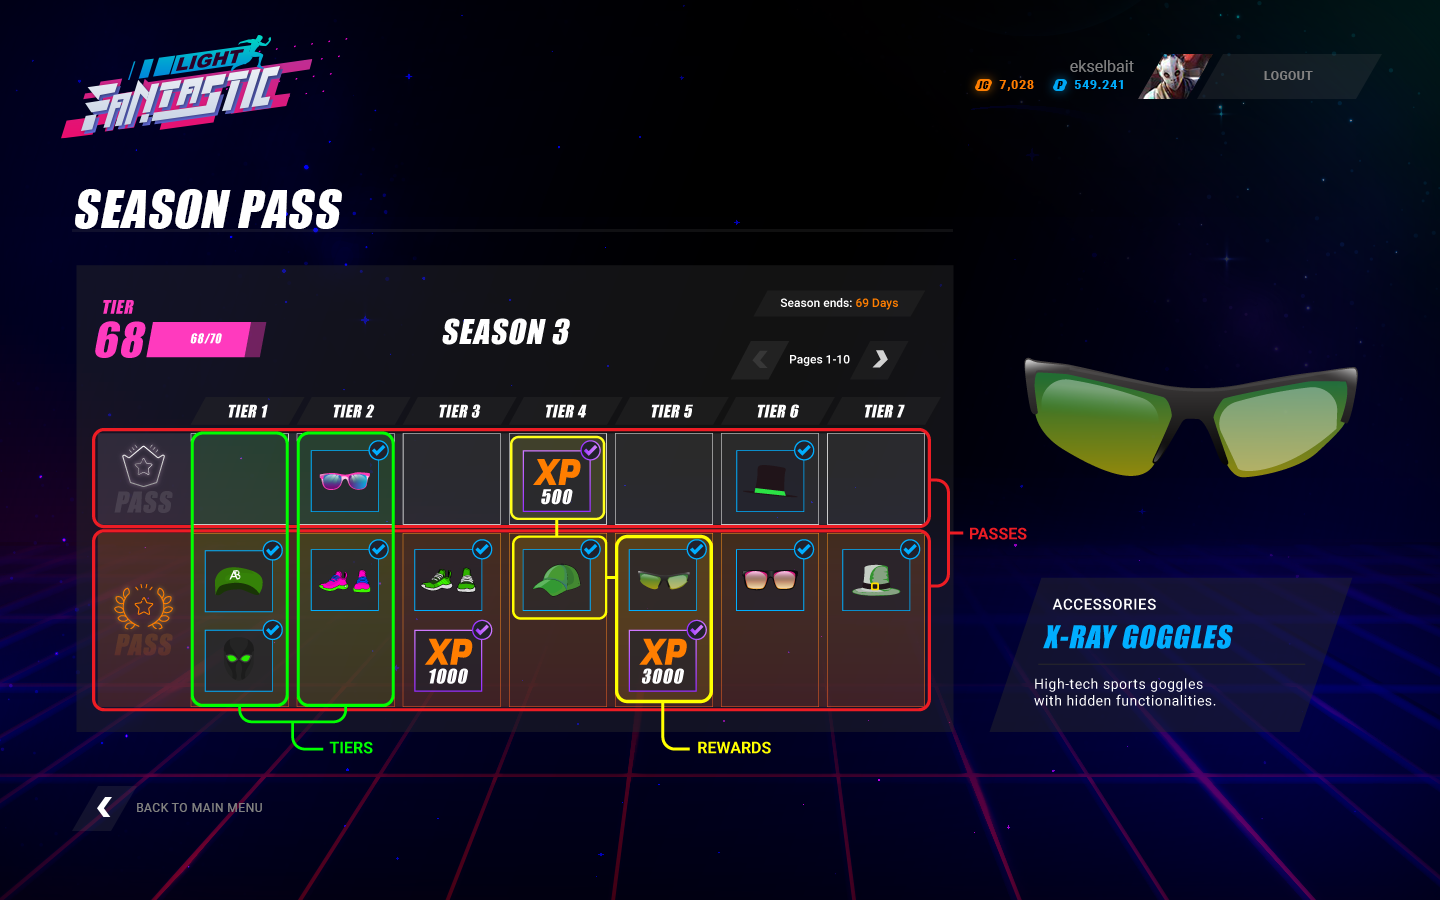
The Season Pass feature comprises four main components: Seasons, Passes, Tiers, and Rewards.
- A Season is a limited-time event that includes special challenges and rewards for players.
- A Pass is an item that grants players access to a certain class of rewards available during a season event. Passes can be freely granted to players, or can be made available for purchase. Passes are represented by items you create, but they do not have to be actual in-game items granted to players.
- A Tier is a level that players occupy during participation in a season event. Players can move up into new tiers by gaining XP or by purchasing access to higher tiers. Players will be granted a reward each time they clear a tier. Tiers are represented by items you create, but they do not have to be actual in-game items granted to players.
- A Reward is an entitlement that is granted to a player when they finish a tier. For example, if a player moves from Tier 1 to Tier 2, they will be granted the rewards from Tier 1. Rewards can be items, XP, or any other entitlement.
The in-game Season Pass experience will be managed by the game client, which will retrieve a season's structured data through the SDK that can then be cached for the player.
Season passes can be managed through the AccelByte Admin Portal. You can create seasons and their associated passes and tiers, as well as associate store items to rewards that players can unlock and then claim for each pass or tier.
Prerequisites and Permissions
Prerequisites
Create Season Pass Specific Items
Before you can create a Season event, make sure you make any pass or tier items you'll need for the event in a draft store. Season pass items do not have to be in a published store to be used by a Season; in fact, we recommend creating the items for them in a draft store so that you can edit or delete them easily. Of course, if you want to make premium passes or tier level-ups available for purchase, those pass and tier items will need to be available in your published store. To learn how to create season pass items, see the Catalog documentation.
Permissions
Permissions are used to grant access to specific resources within our services. Make sure your account has the following permissions before you attempt to manage season pass in the Admin Portal.
| Usage | Permission Tag | Action |
|---|---|---|
| Grant XP to the Player Using the Server API | ADMIN:NAMESPACE:{namespace}:USER:{userId}:SEASONPASS | Update |
| Level a Player Up in Tier | ADMIN:NAMESPACE:{namespace}:USER:*:SEASONPASS | Read, Update |
| Unlock a Premium Pass for a Player | ADMIN:NAMESPACE:{namespace}:USER:*:SEASONPASS [READ, UPDATE] | Read, Update |
Permissions work slightly differently depending on whether they are assigned to IAM Clients or Roles assigned to users. For more information, read the Authentication and Authorization documentation.
Manage Seasons in the Admin Portal
Create a Season
You can create a Season event by following the steps below:
In the AccelByte Admin Portal, choose the target Game Namespace. Then go to the Game Management section of the left navigation menu and click Season Pass.
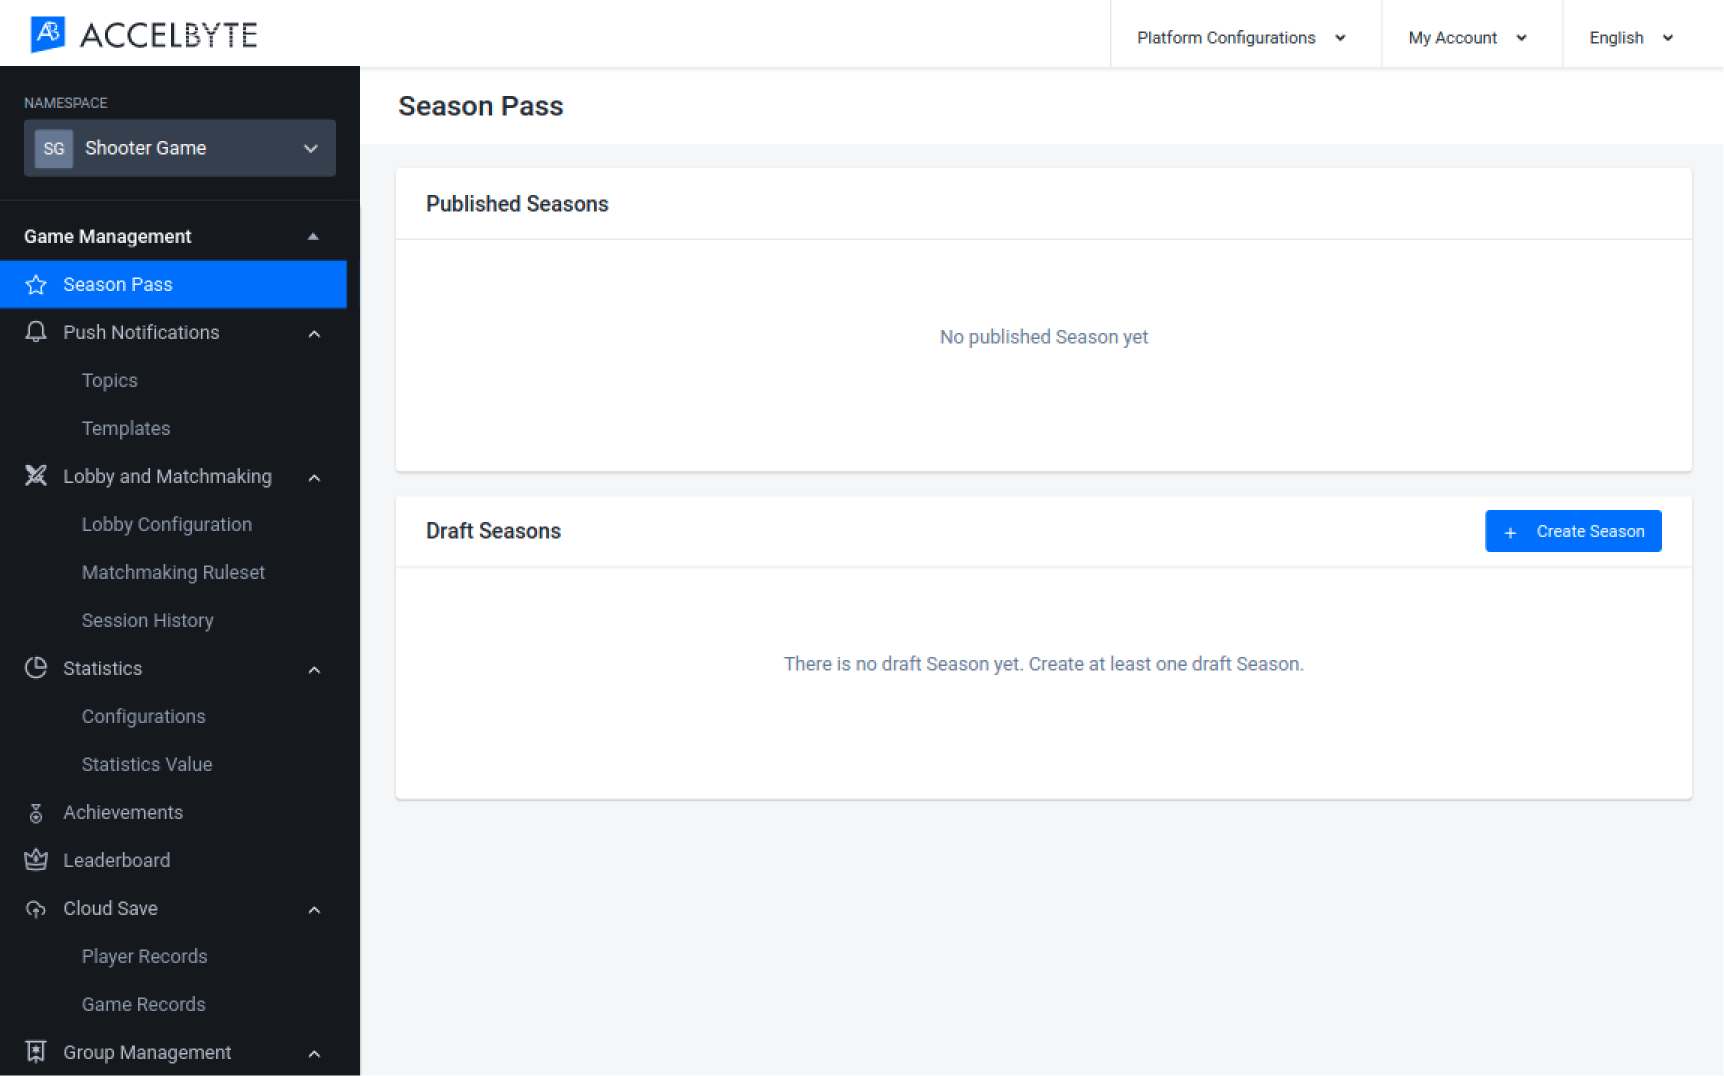
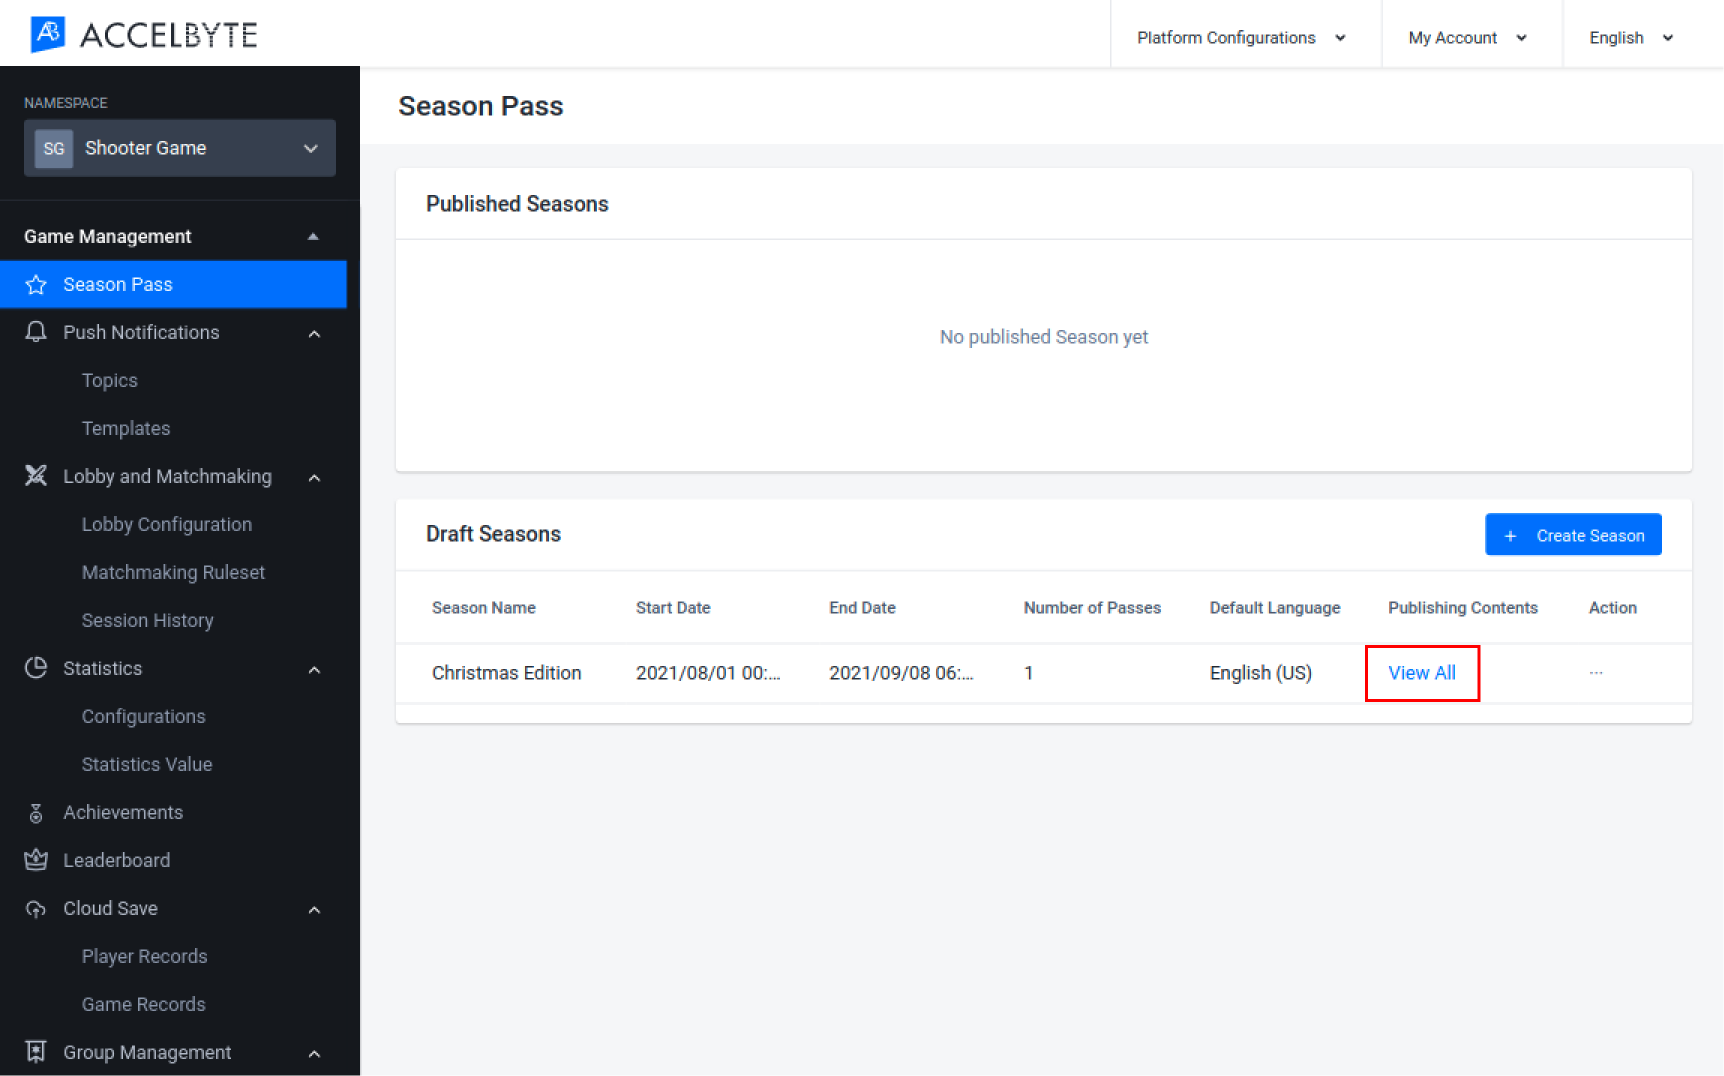
On the Season Pass page, create a new draft season by clicking the Create Season button.

The Create New Season form appears. Fill in the required fields:
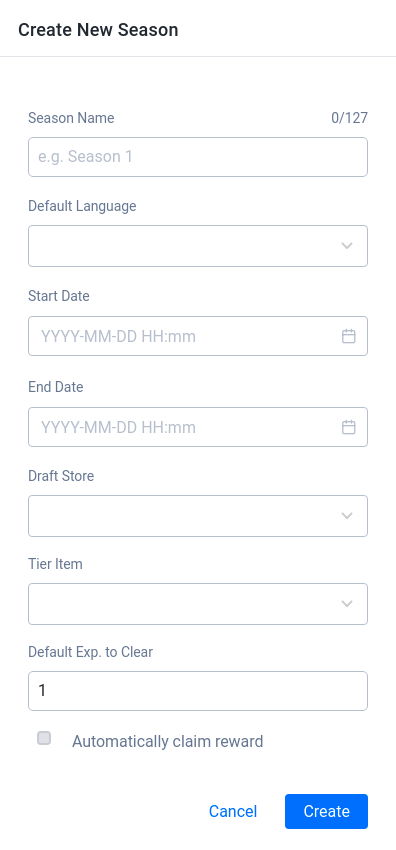
- Input the Season Name.
- Select the default language for the season in the Default Language field. After creating your season, you'll be able to add additional languages for localization.
- Input the date and time the season will begin in the Start Date field.
- Input the date and time the season will end in the End Date field.
- Choose the store that contains the tier related to this season in the Draft Store field.
- Choose the tier that will be used for this season in the Tier Item field.
- Input the amount of XP required to clear each tier in the Default Exp. to Clear field.
- Select the Automatically Claim Reward option if you want players to be automatically granted the rewards they earn during the season.
When you're finished, click the Create button. The new season will be added to the list.
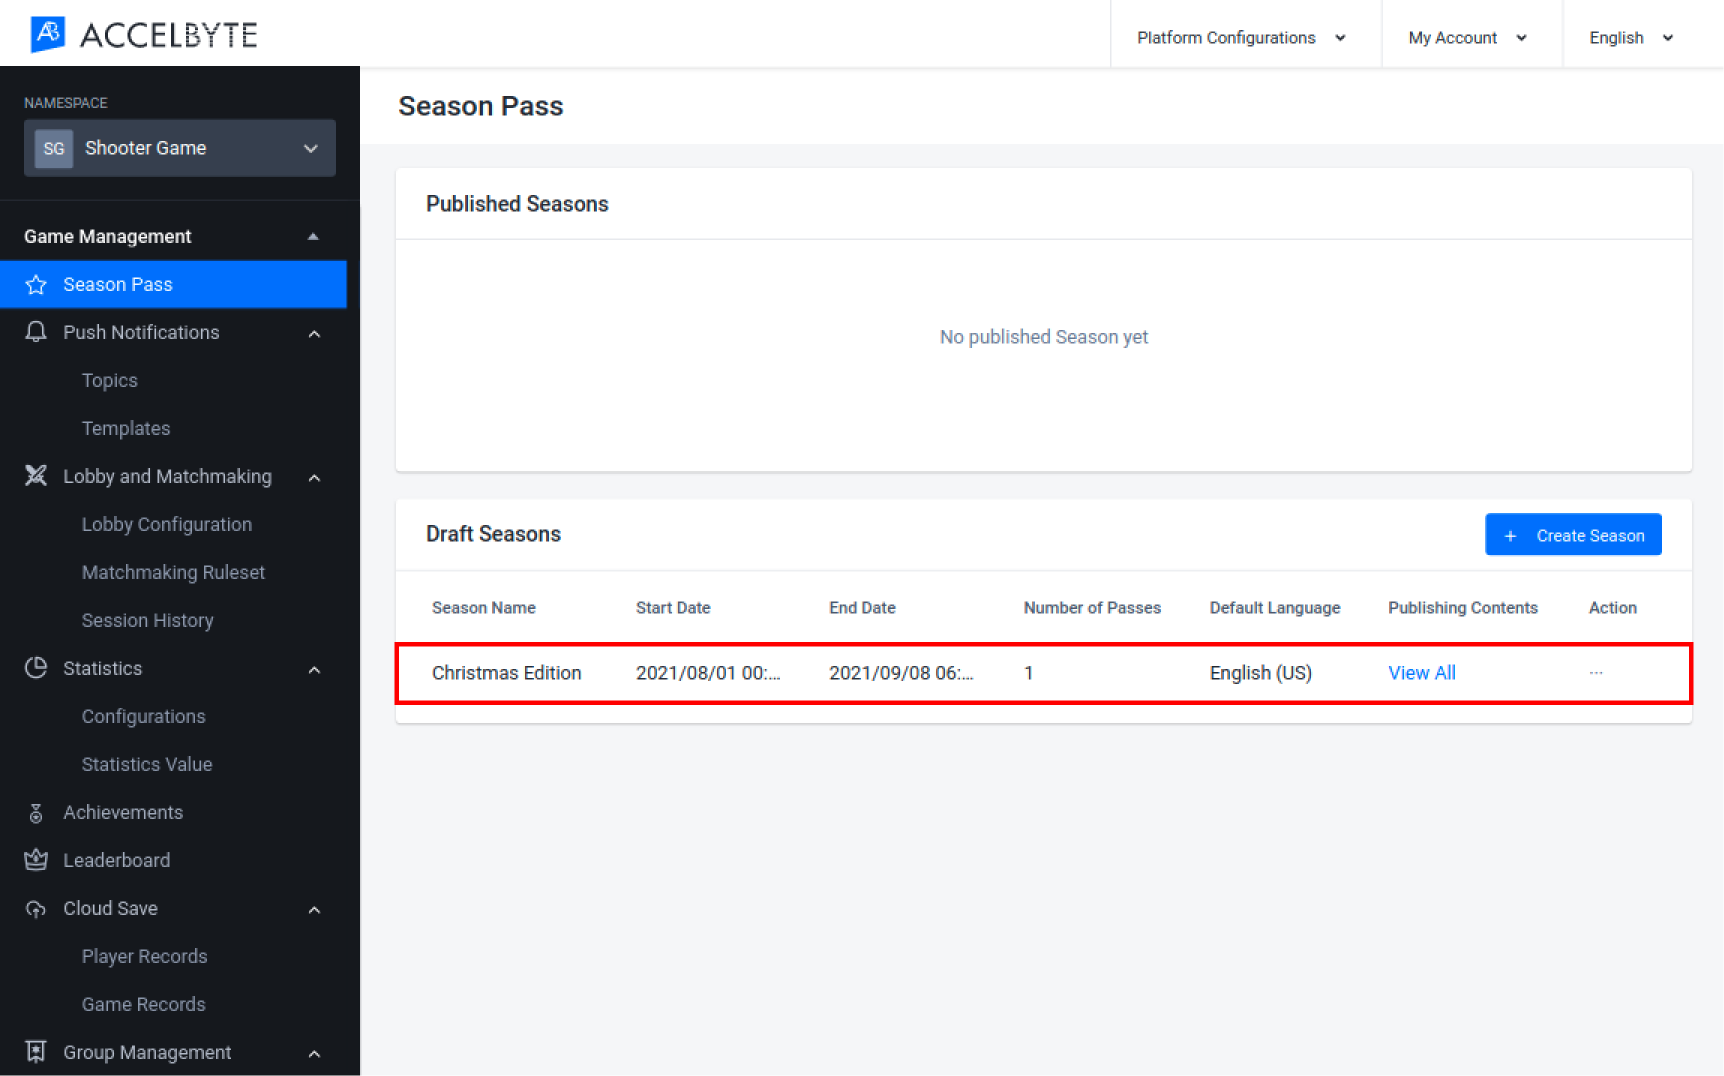
Once you created a Season, you can still View the Season, Edit or Delete when you no longer needed it. You can also Publish and Clone the Season.
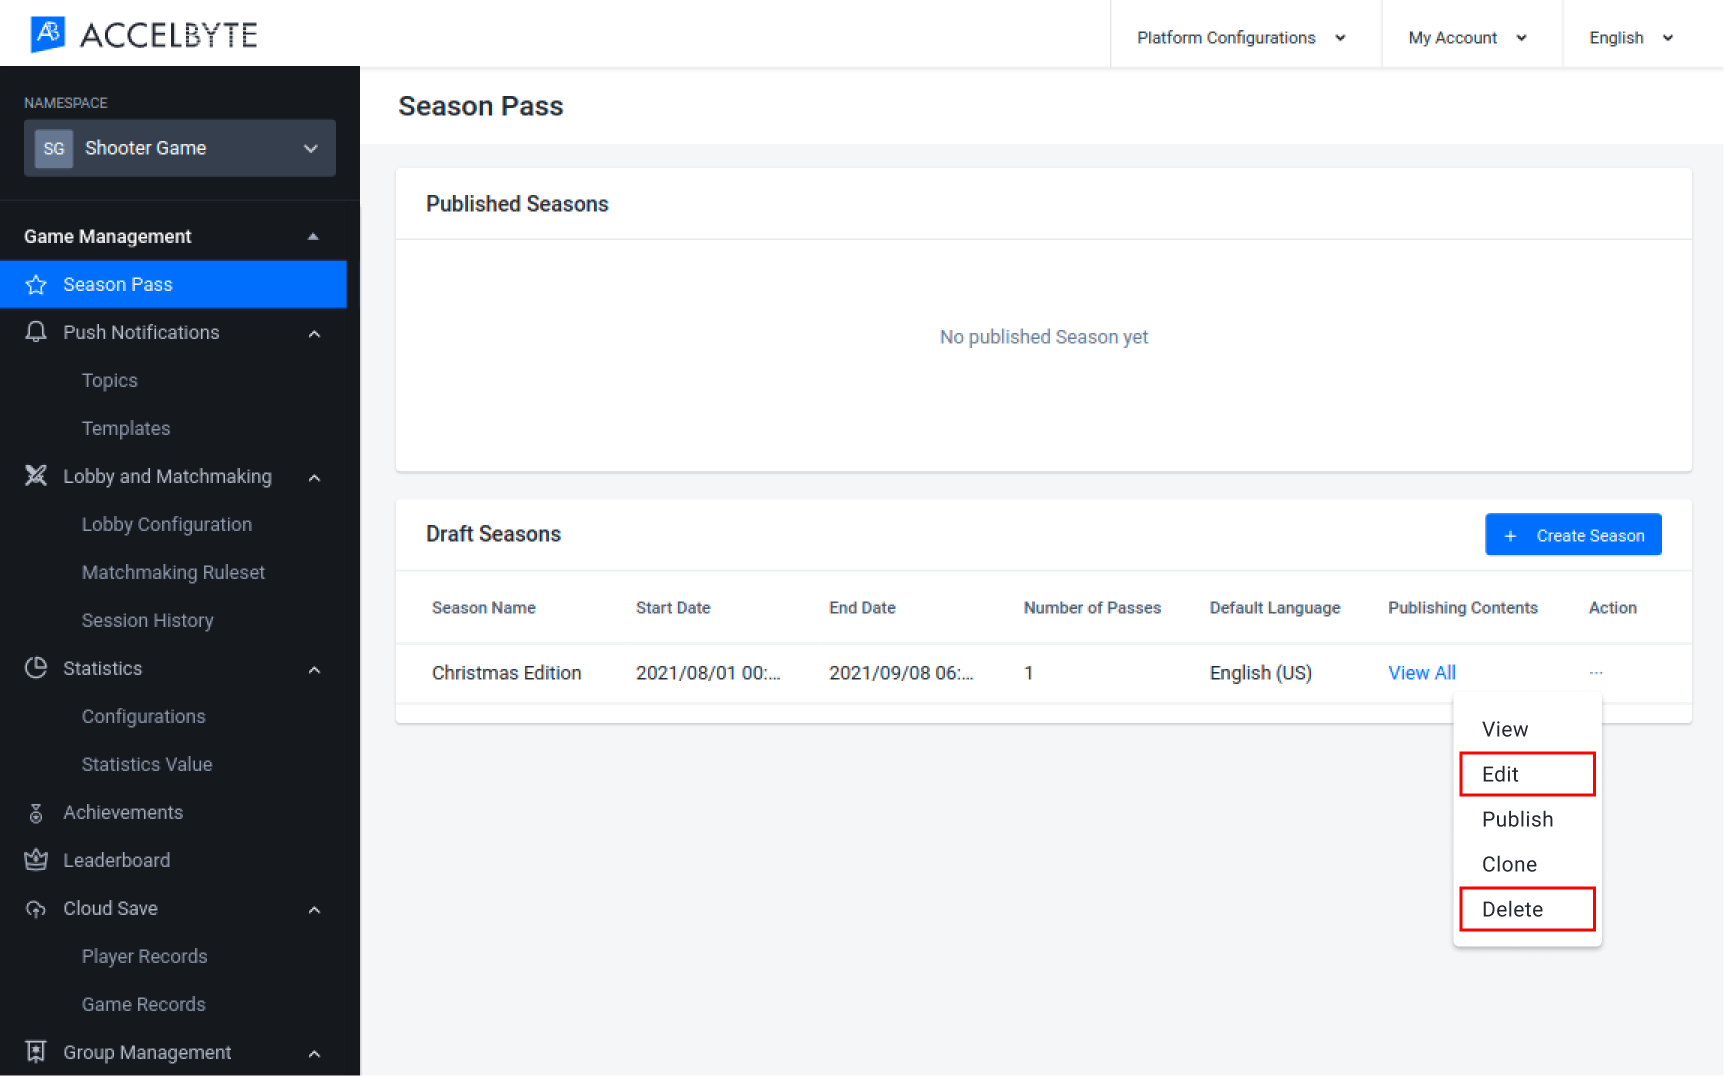
Clone a Season
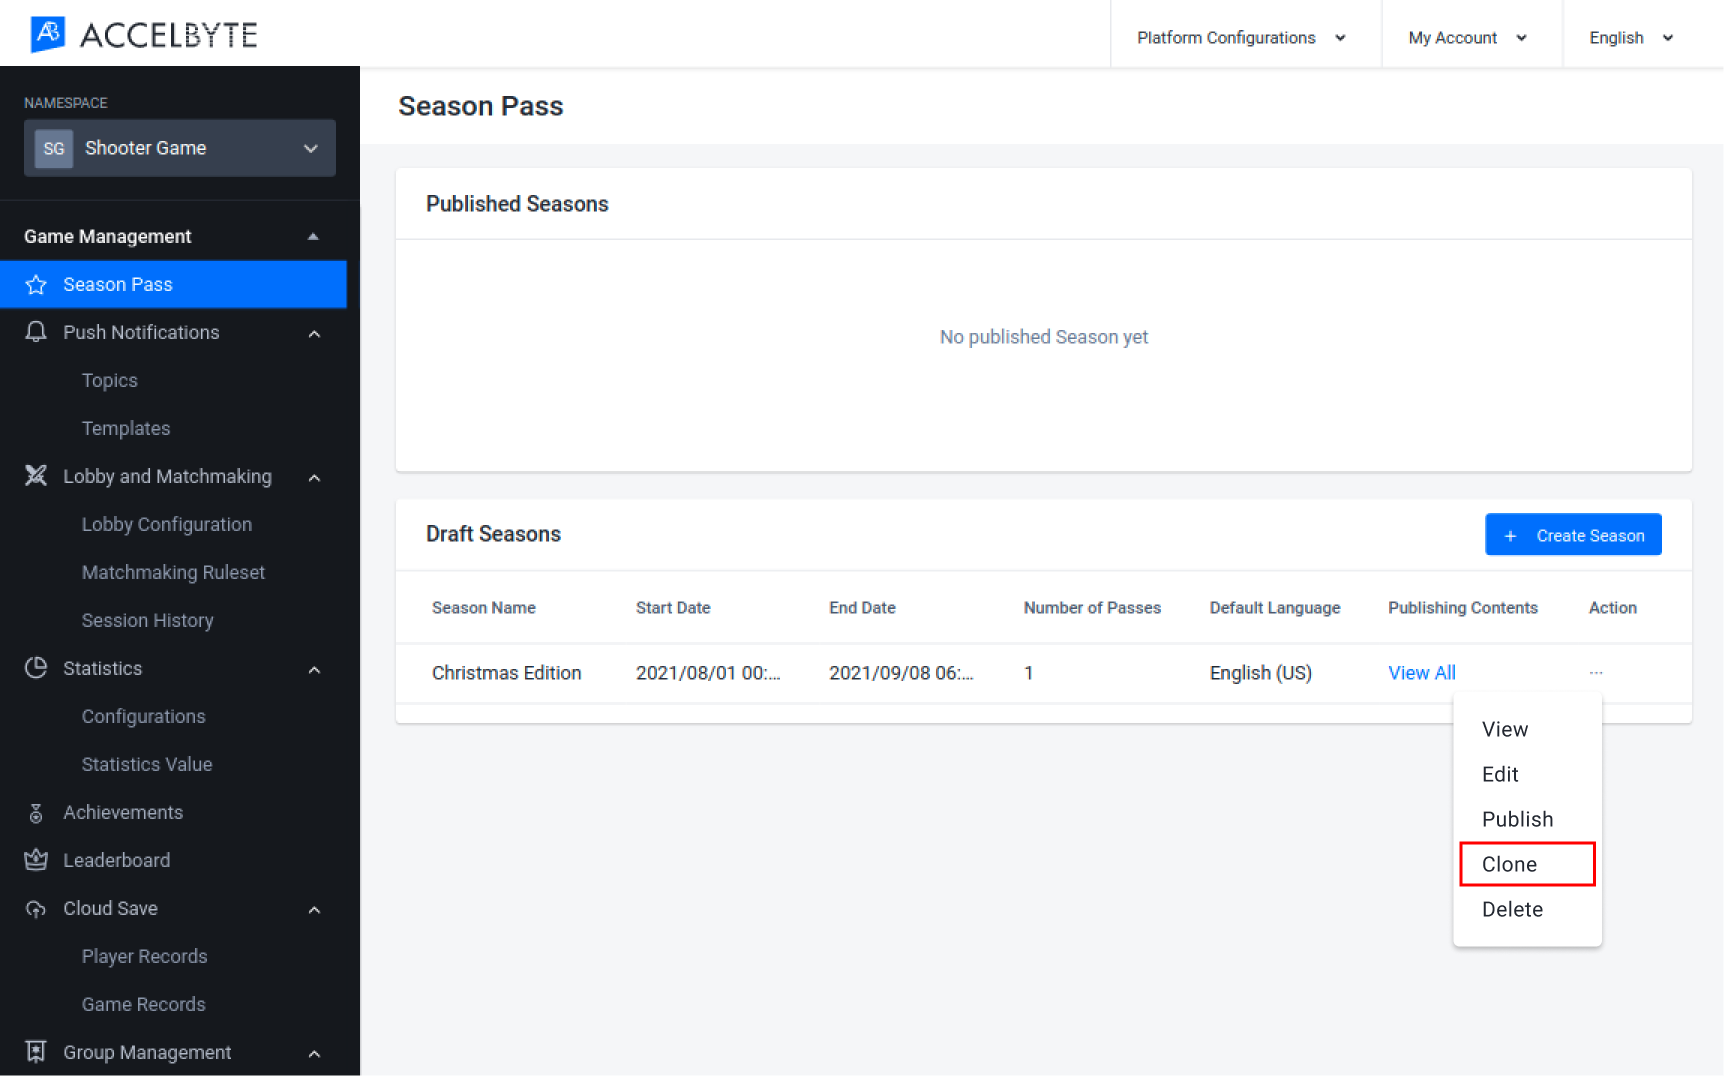
You can clone a Season by following the steps below:
In the Draft Season section, choose the draft season you want to clone by opening the season's Action menu and clicking Clone.
The Clone Season form appears. Fill in the required fields:
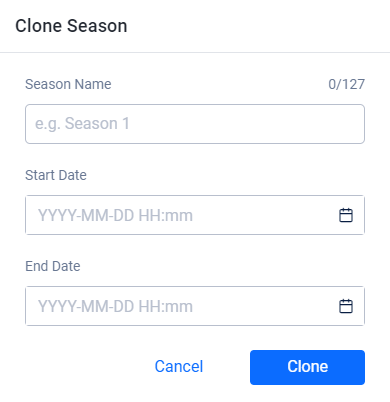
- Input a name for the new clone in the Season Name field.
- Input a start date for the new clone in the Start Date field.
- Input an end date for the new clone in the End Date field.
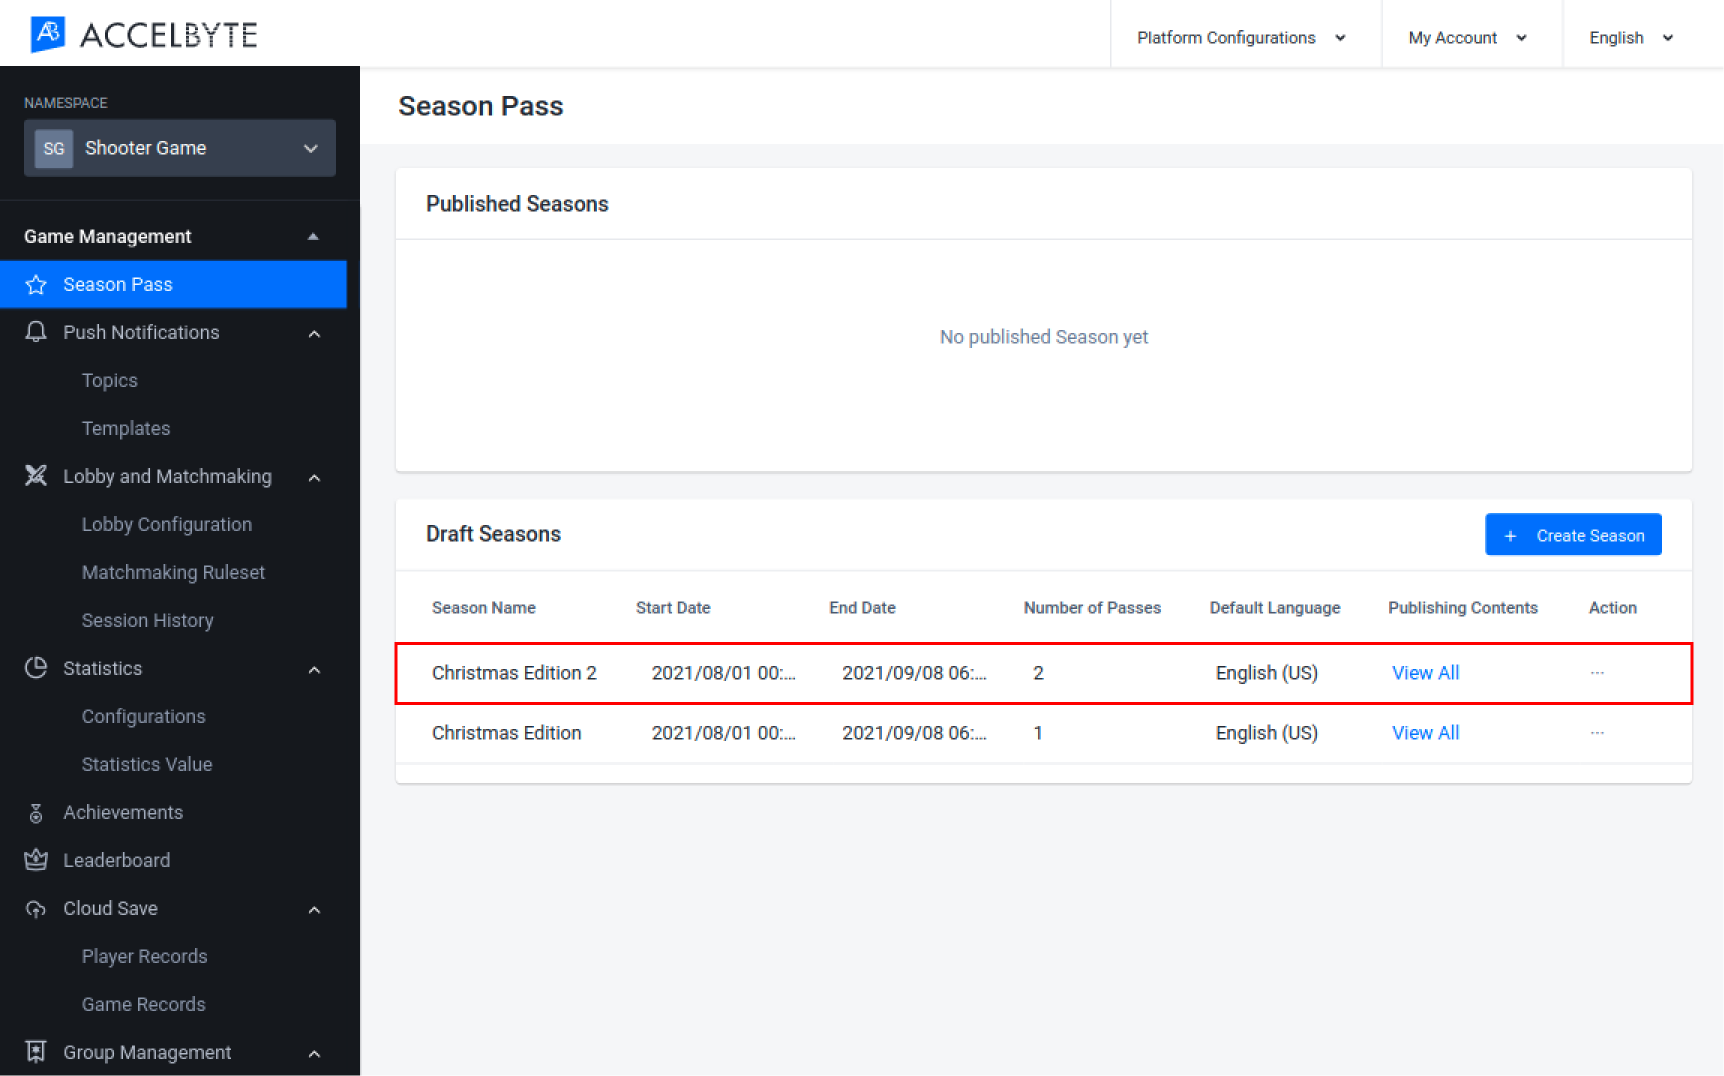
All other season data will be cloned from the target season. When you're finished, click Clone. A new draft season will be created in the list.
Add a Localization to a Season
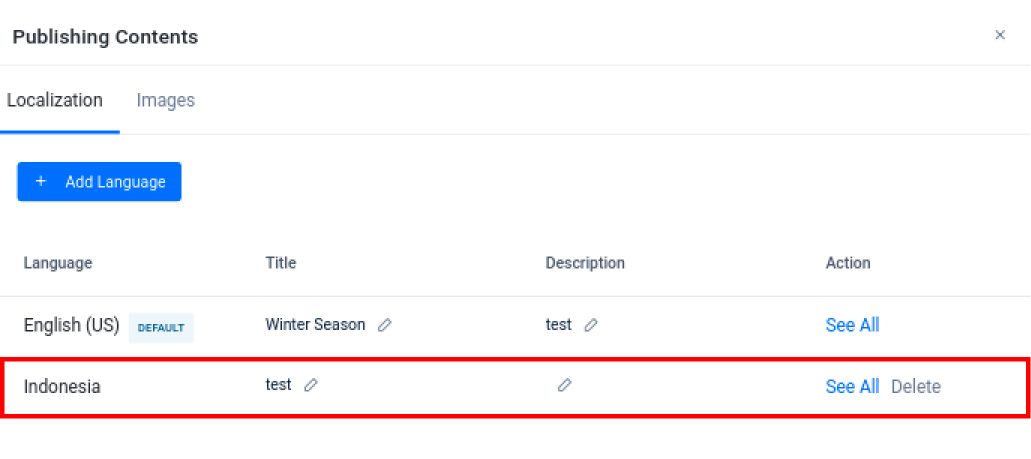
In the Draft Season section, choose the draft season you want to add localization to and click View All in the Publishing Contents column.
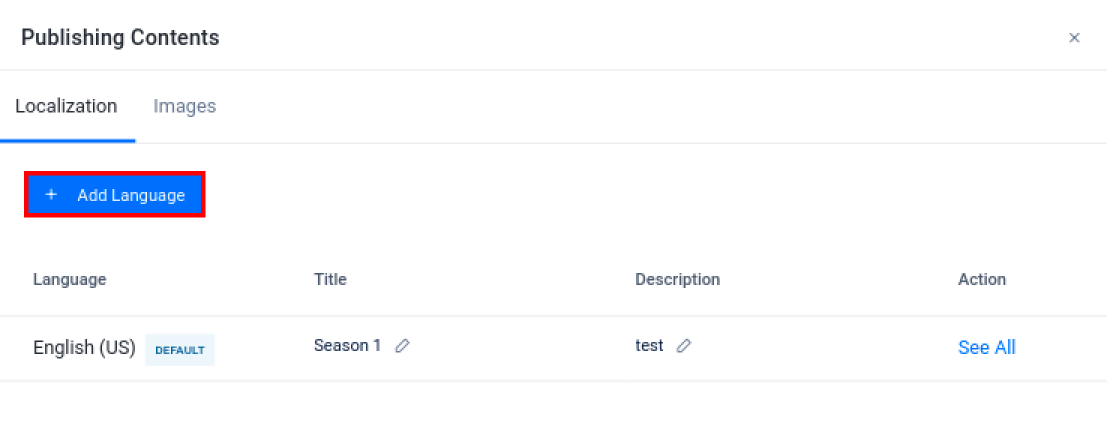
The Publishing Contents page for your season opens. To add a new localization, click the Add Language button at the top of the Localization tab.
The Add Localization form appears. Fill in the required fields:

- Select the language for the new localization in the Language field.
- Type the localized season name in the Title field.
- Type a localized description of the season in the Description field
When you're finished, click Add.
The localization will be added to the list.
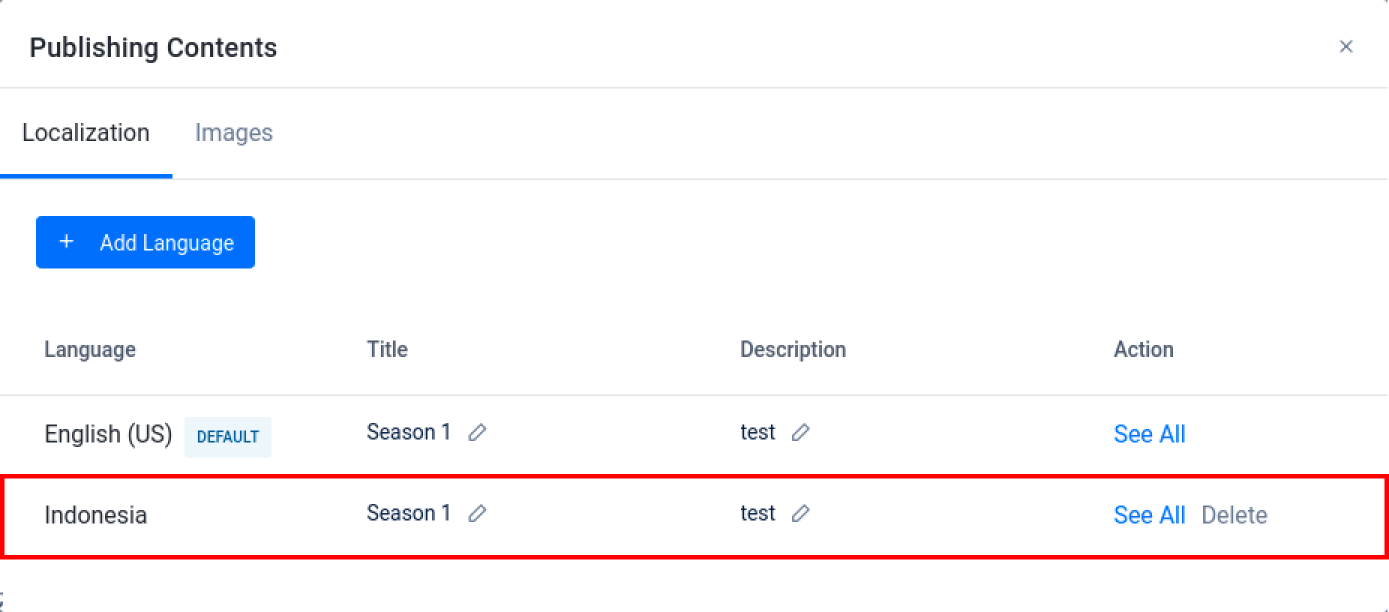
Once you've added the localization, you can still edit by clicking on the pencil button or delete when you no longer needed it.
Upload a Background Image for a Season
In the Draft Season section, choose the draft season you want to add an image to and click View All in the season's Publishing Contents column.

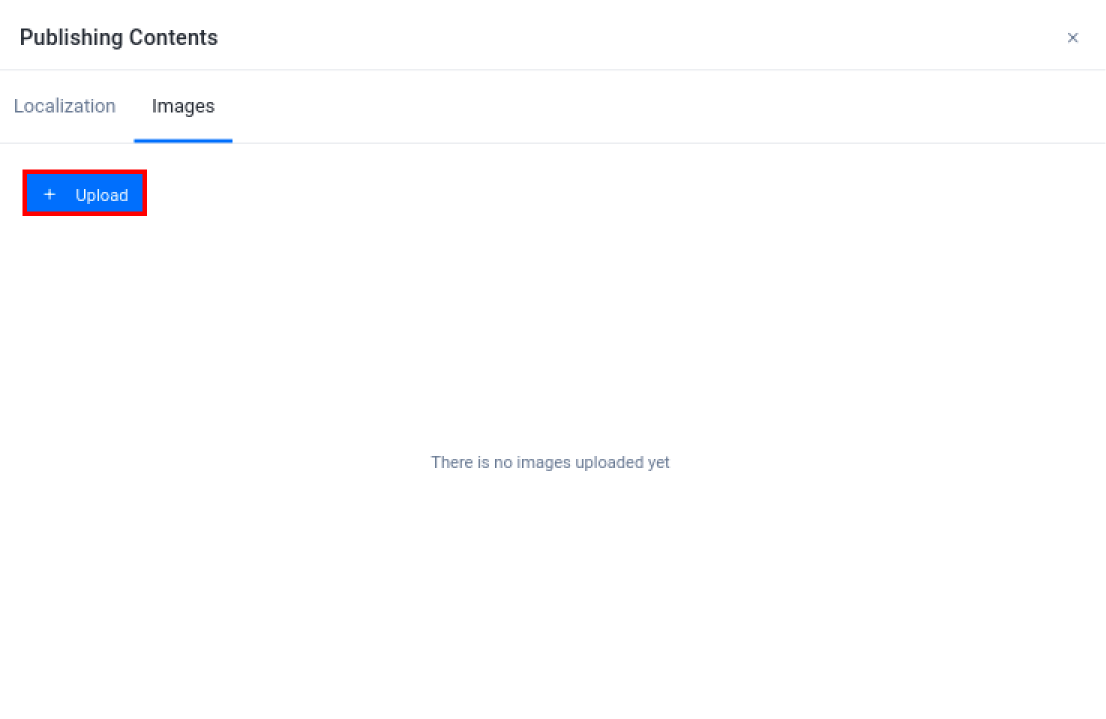
The Publishing Contents page for your season appears. Open the Images tab, then click the Upload button.

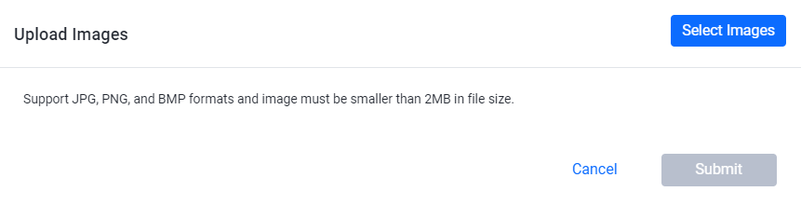
The Upload Images form appears. Click the *Select Images *button, select the desired image from your directory.

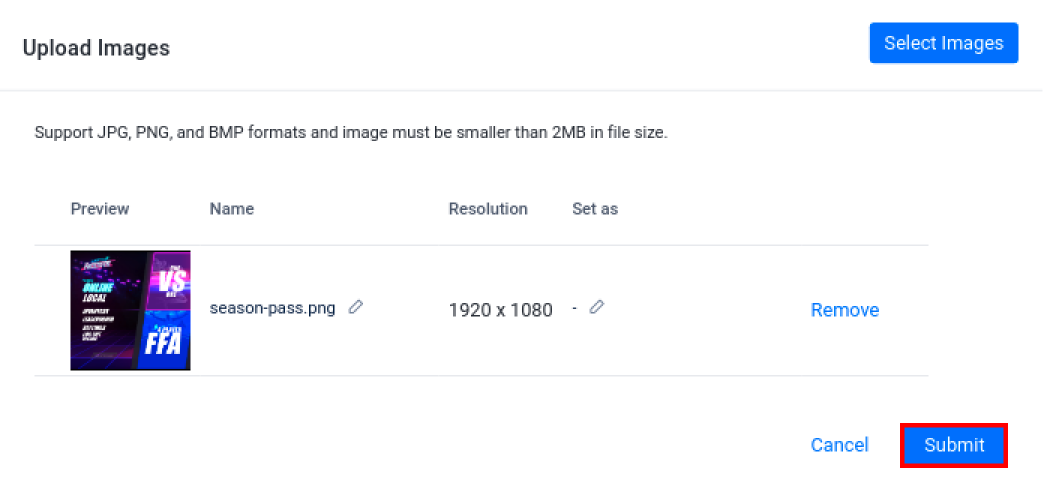
After the image is uploaded, make sure the image is correct. You can also change the name of the image. Once you've done, click Submit.

When you are finished, the background image will be uploaded.

Manage Passes in the Admin Portal
Create a Pass
You can create a Pass by following the steps below:
In the Draft Season section, choose the draft season you want to add a pass to and click View in that season's Action menu.

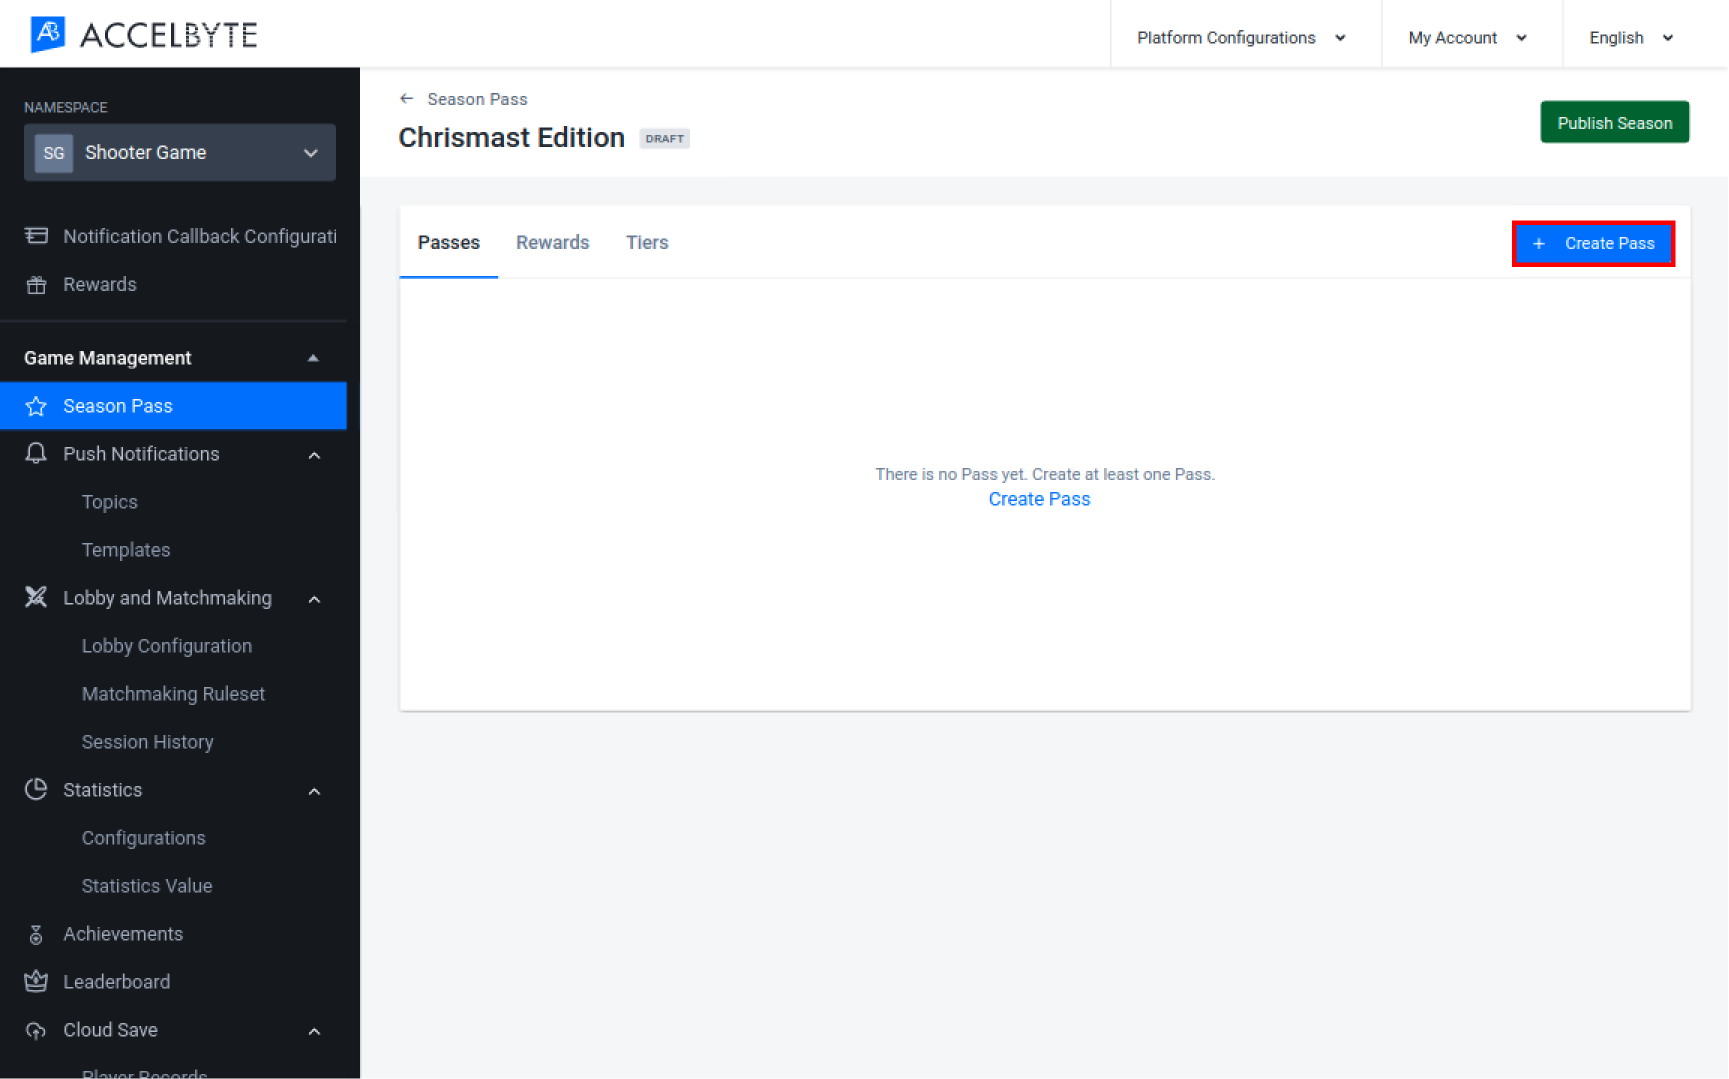
On the Season Details page, open the Passes tab and click the Create Pass button.
The Create New Pass form appears. Fill in the required fields:
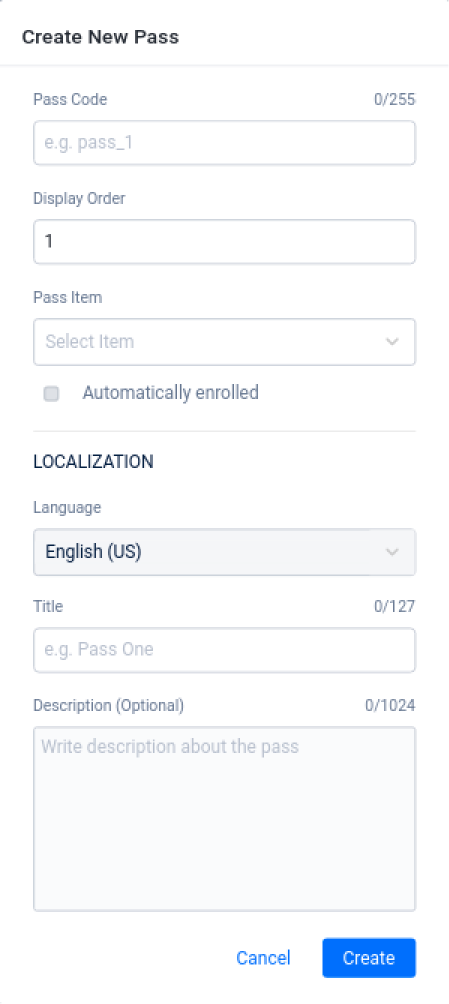
Input unique identifier for the pass in the Pass Code field.
Input the position you want this pass to occupy in-game in the Display Order field. The pass with the Display Order of 1 will appear at the top of the list, 2 will appear under 1, and so on.
Choose the item that you want to associate with this pass in the Pass Item field.
Select the Automatically enrolled option if you want all players who participate in the season event to be automatically granted this pass.
Input the default name for the pass in the Title field.
Input the default description of the pass in the Description field.
NOTE
The Language selection is the same as the default language for the related season and cannot be changed.
When you're finished, click the Create button.
Here the new Pass has been added to the list.

Once you created a Pass, you can still Edit or Delete it when you no longer needed it. Note that when you delete a pass, all rewards tied to the pass will be removed.
Add a Localization to a Pass
In the Draft Season section, choose the draft season that contains the pass you want to add a localization to, then click View in that season's Action menu.

On the Season Details page, click the Passes tab and then click View All next to the pass you want to add a localization to.
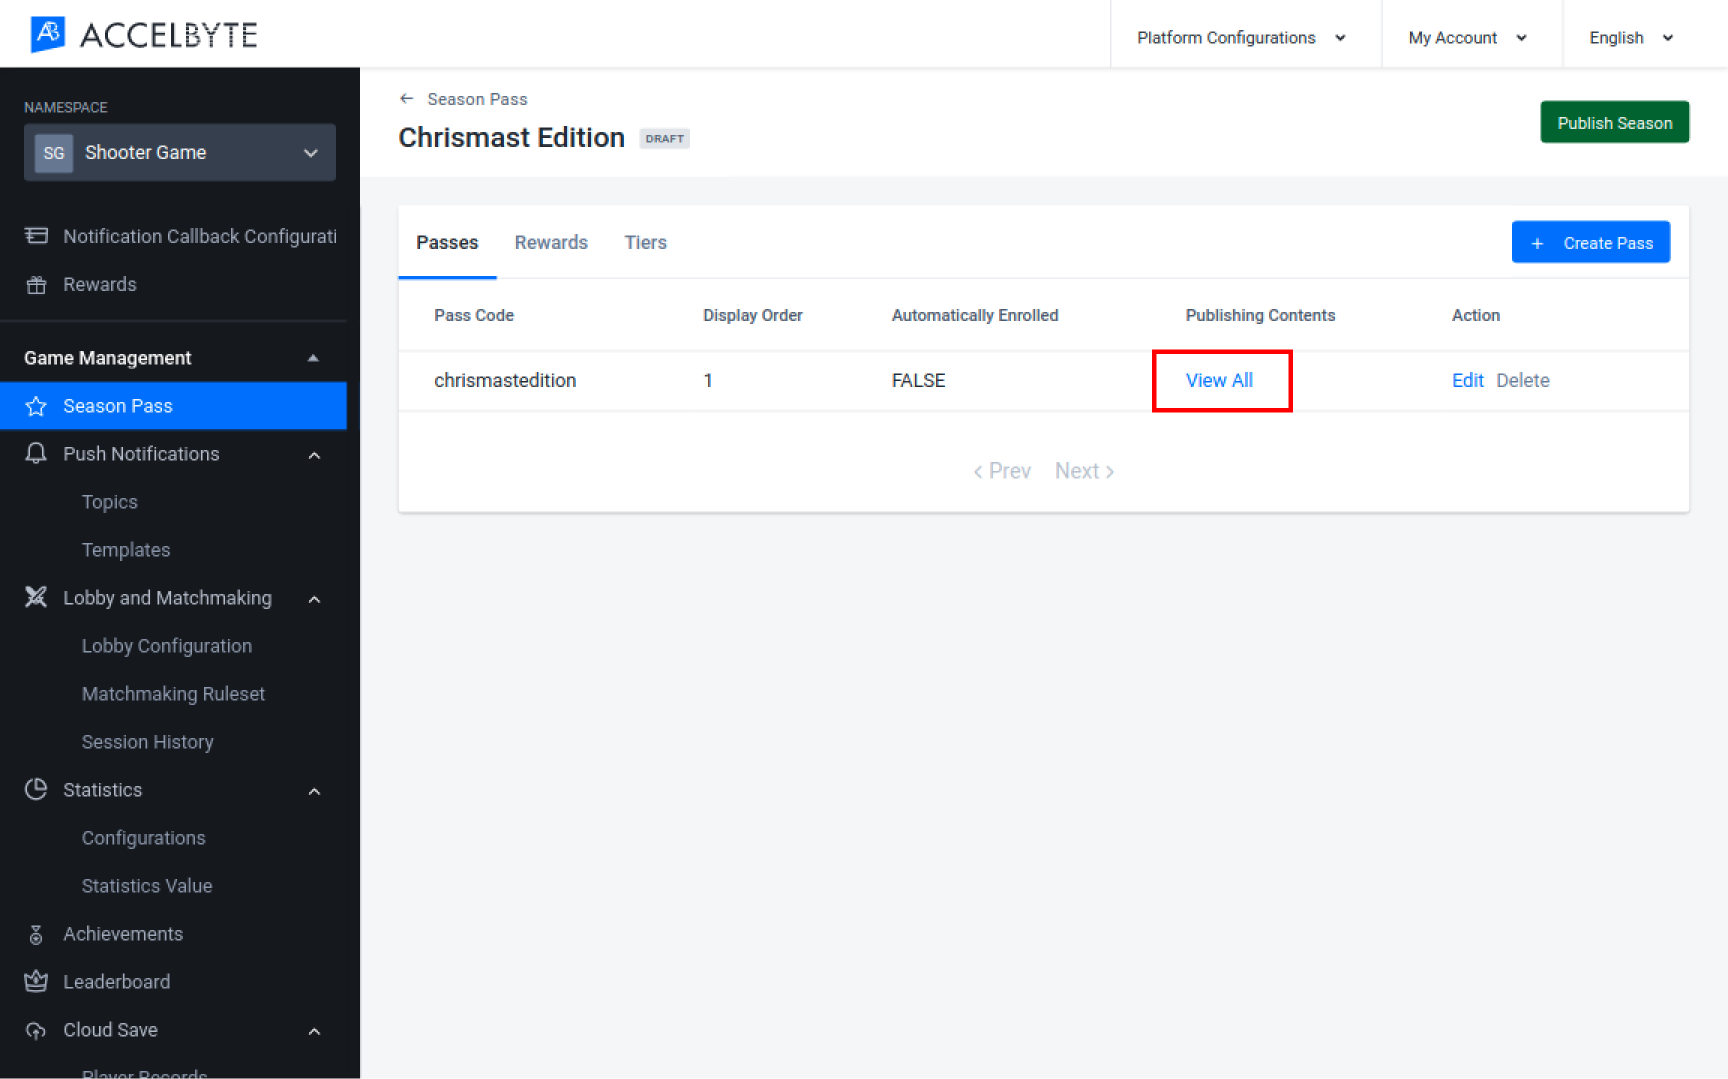
The Publishing Contents for your pass opens. To add a new localization, click the Add Language button.
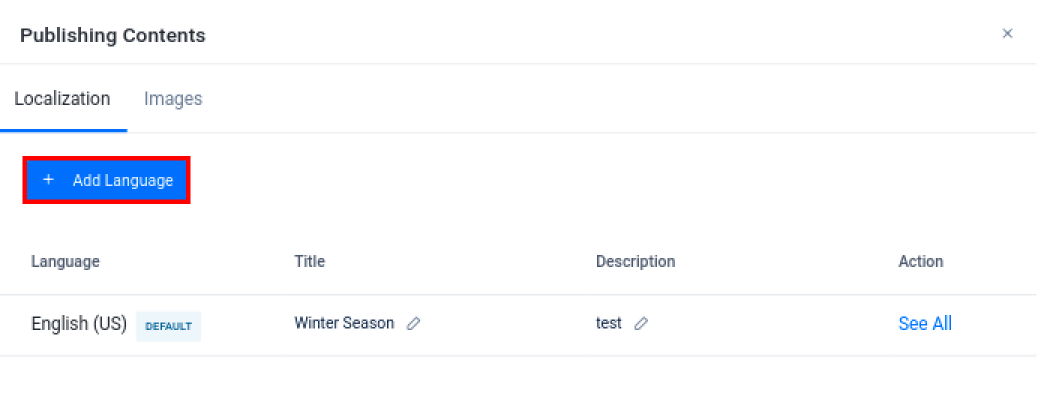
The Add Localization form appears. Fill in the required fields:
- Select the language for the new localization in the Default Language field.
- Type the localized pass name in the Title field.
- Type a localized description of the pass in the Description field.
When you're finished, click Add.
Here the localization will be added to the list.
Once you've added the localization, you can still edit by clicking on the pencil button or delete when you no longer needed it.
Upload a Background Image for a Pass
In the Draft Season section, choose the draft season that contains the pass you want to upload a background image for, then click View in that season's Action menu.

On the Season Details page, click the Passes tab and click the View All next to the pass that you want to manage.

The Publishing Contents page for your pass appears. Click the Image tab, then click the Upload button.
The Upload Images form appears. Click the Select Images button, select the desired image from your directory., and click Submit.
After the image is uploaded, make sure the image is correct. You can also change the name of the image. Once you've done, click Submit.
When you are finished, the background image will be uploaded.

Manage Rewards in the Admin Portal
Create a Reward
You can create a Reward by following the steps below:
In the Draft Season section, choose the draft season you want to add a reward to, then click View in that season's Action menu.

On the Season Details page, click the Rewards tab. Then, click the Create Reward button.
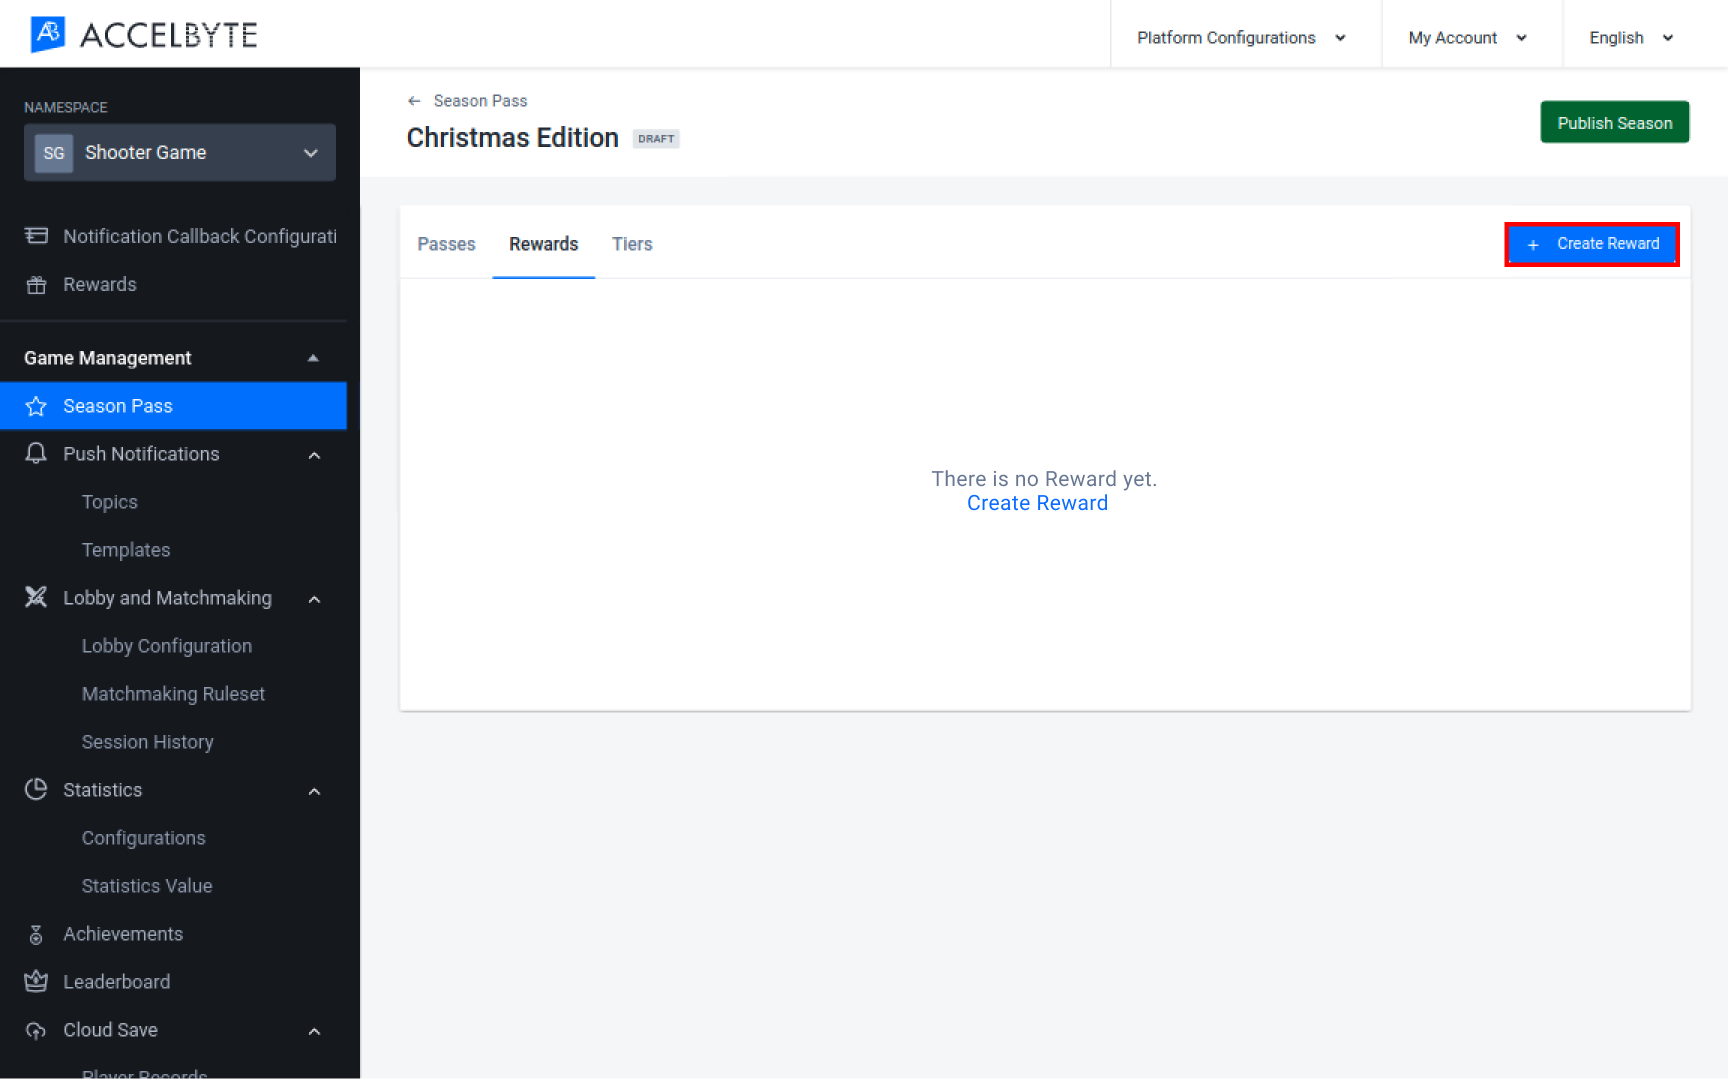
The Create New Reward form appears. Fill in the required fields:
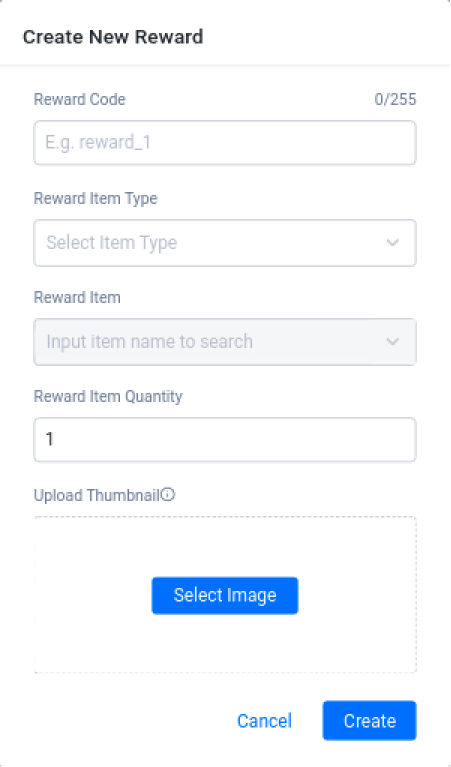
- Input a unique identifier for the code in the Reward Code field.
- Choose the Reward Item Type. The options are Items, Coins, and Bundles. For more information about item types, see the Catalog documentation.
- Choose the item that will be awarded to players in the Reward Item field.
- Type the quantity of the item to be awarded to players in the Reward Item Quantity field.
- Upload a Thumbnail image for the item.
When you're finished, click the Create button.
Here the new Reward will be added to the list.
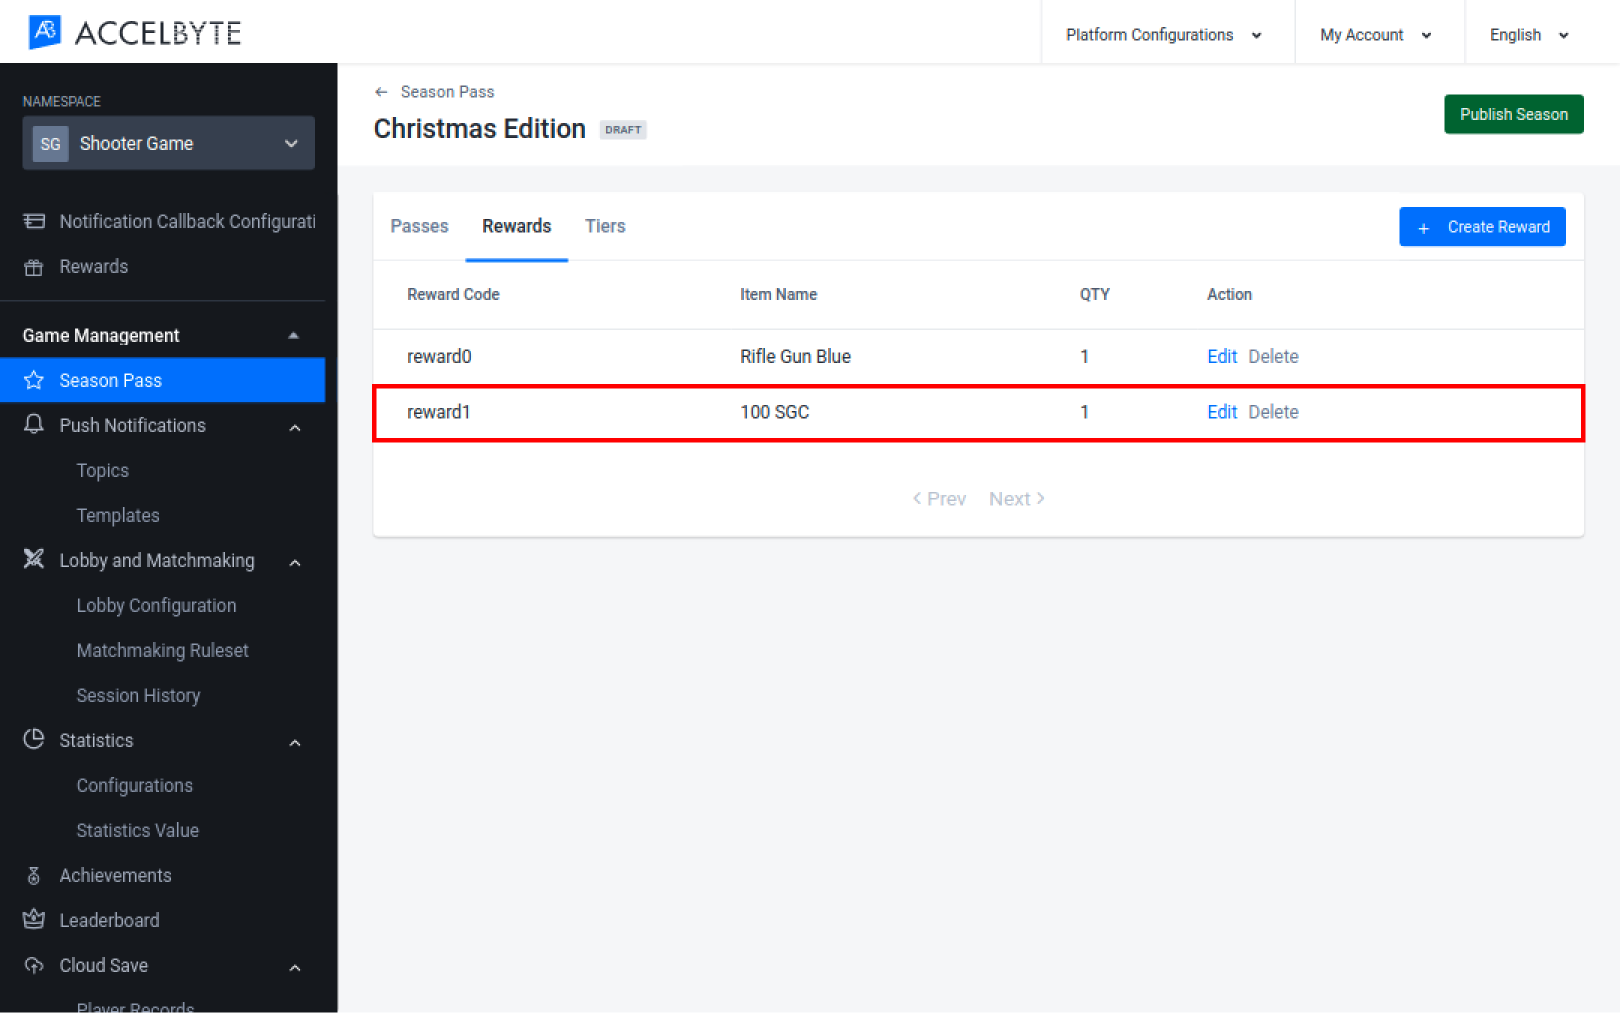
Once you created a Reward, you can still edit or delete it when you no longer needed it. Note that when you edit a reward, the reward's Reward Code cannot be changed.
Manage Tiers in the Admin Portal
Create a Tier
You can create a Tier by following the steps below:
In the Season Pass menu, go to the Draft Seasons section, choose the draft season you want to edit, and click View in that season's Action menu.

On the Season Details page, click on the Tiers tab and select the Create Tier button.

The Create New Tier form will appear. Fill in the required fields.
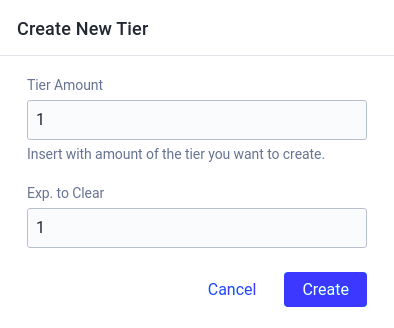
- Input the number of tiers you want this season to have in the Tier Amount field field.
- Input the amount of XP a player needs to clear each tier in the Exp. to Clear field.
Once completed, click the Create button.
Your new tier will appear in the associated Season Pass list.
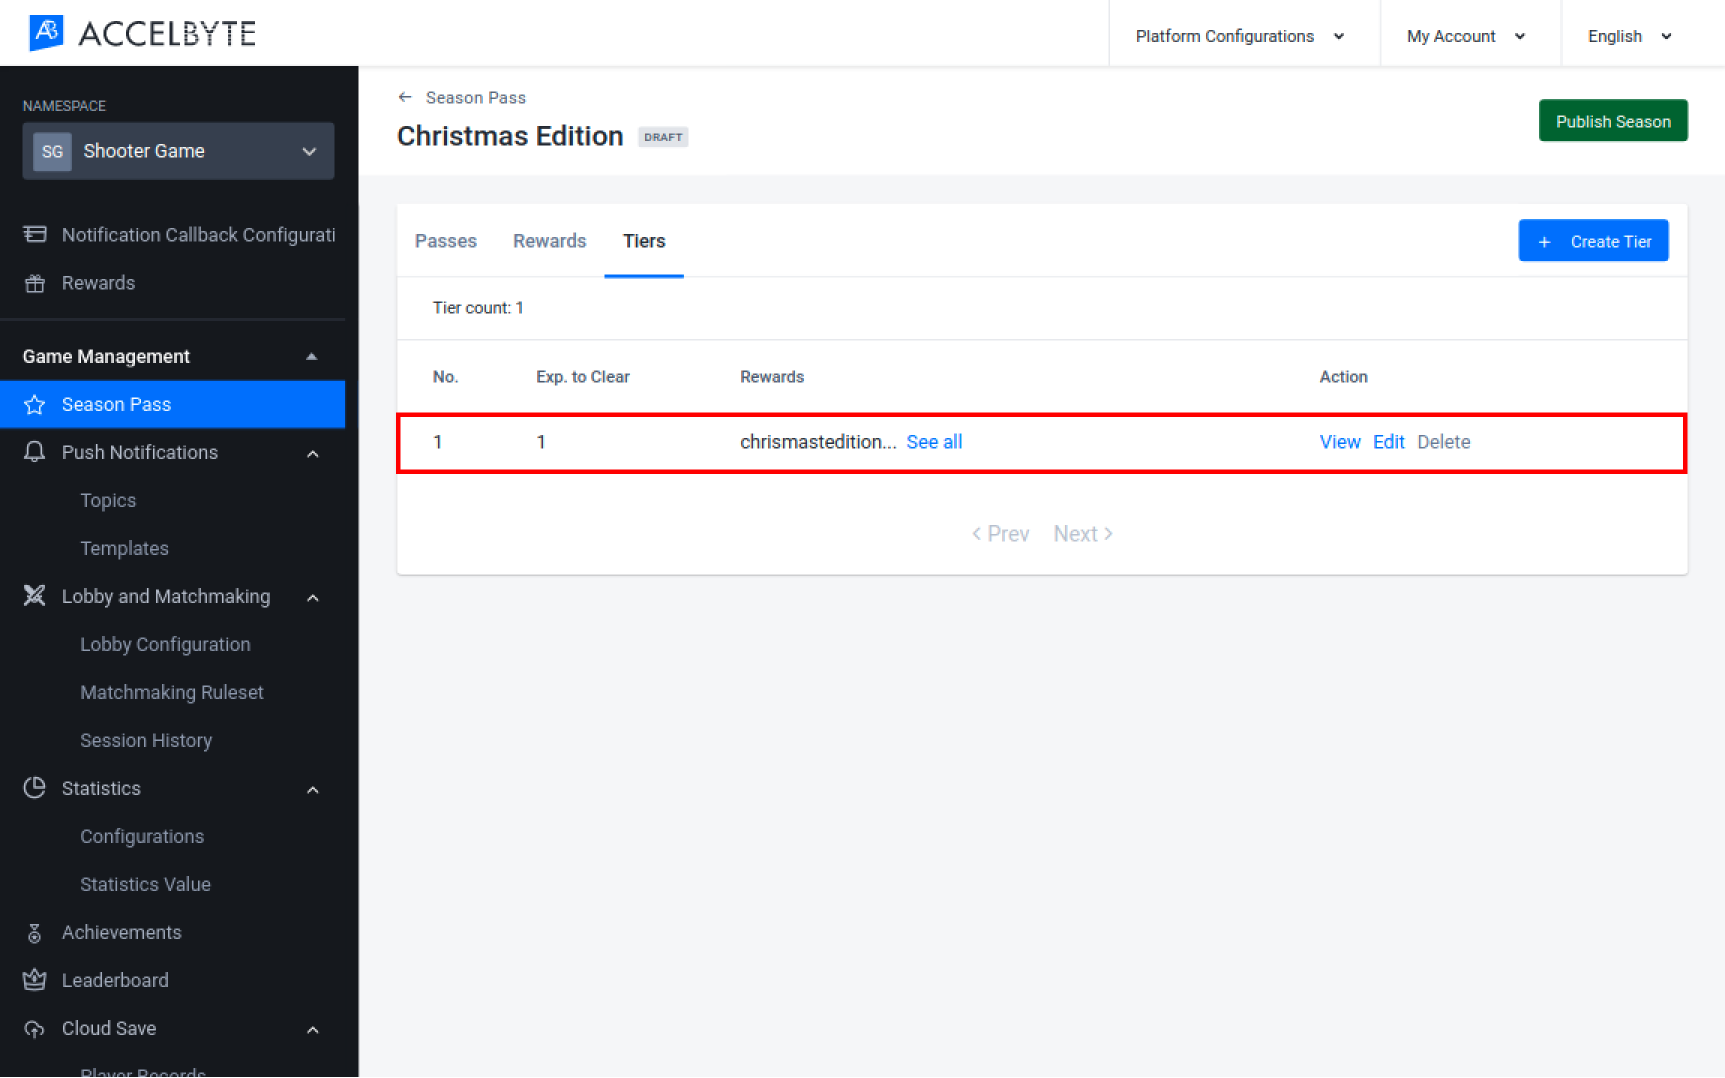
Reorder Tiers
You can reorder a season pass event's tiers by following the steps below:
NOTE
Reordering tiers will also reorder their properties, such as the tiers' Experience to Clear and their associated Rewards.
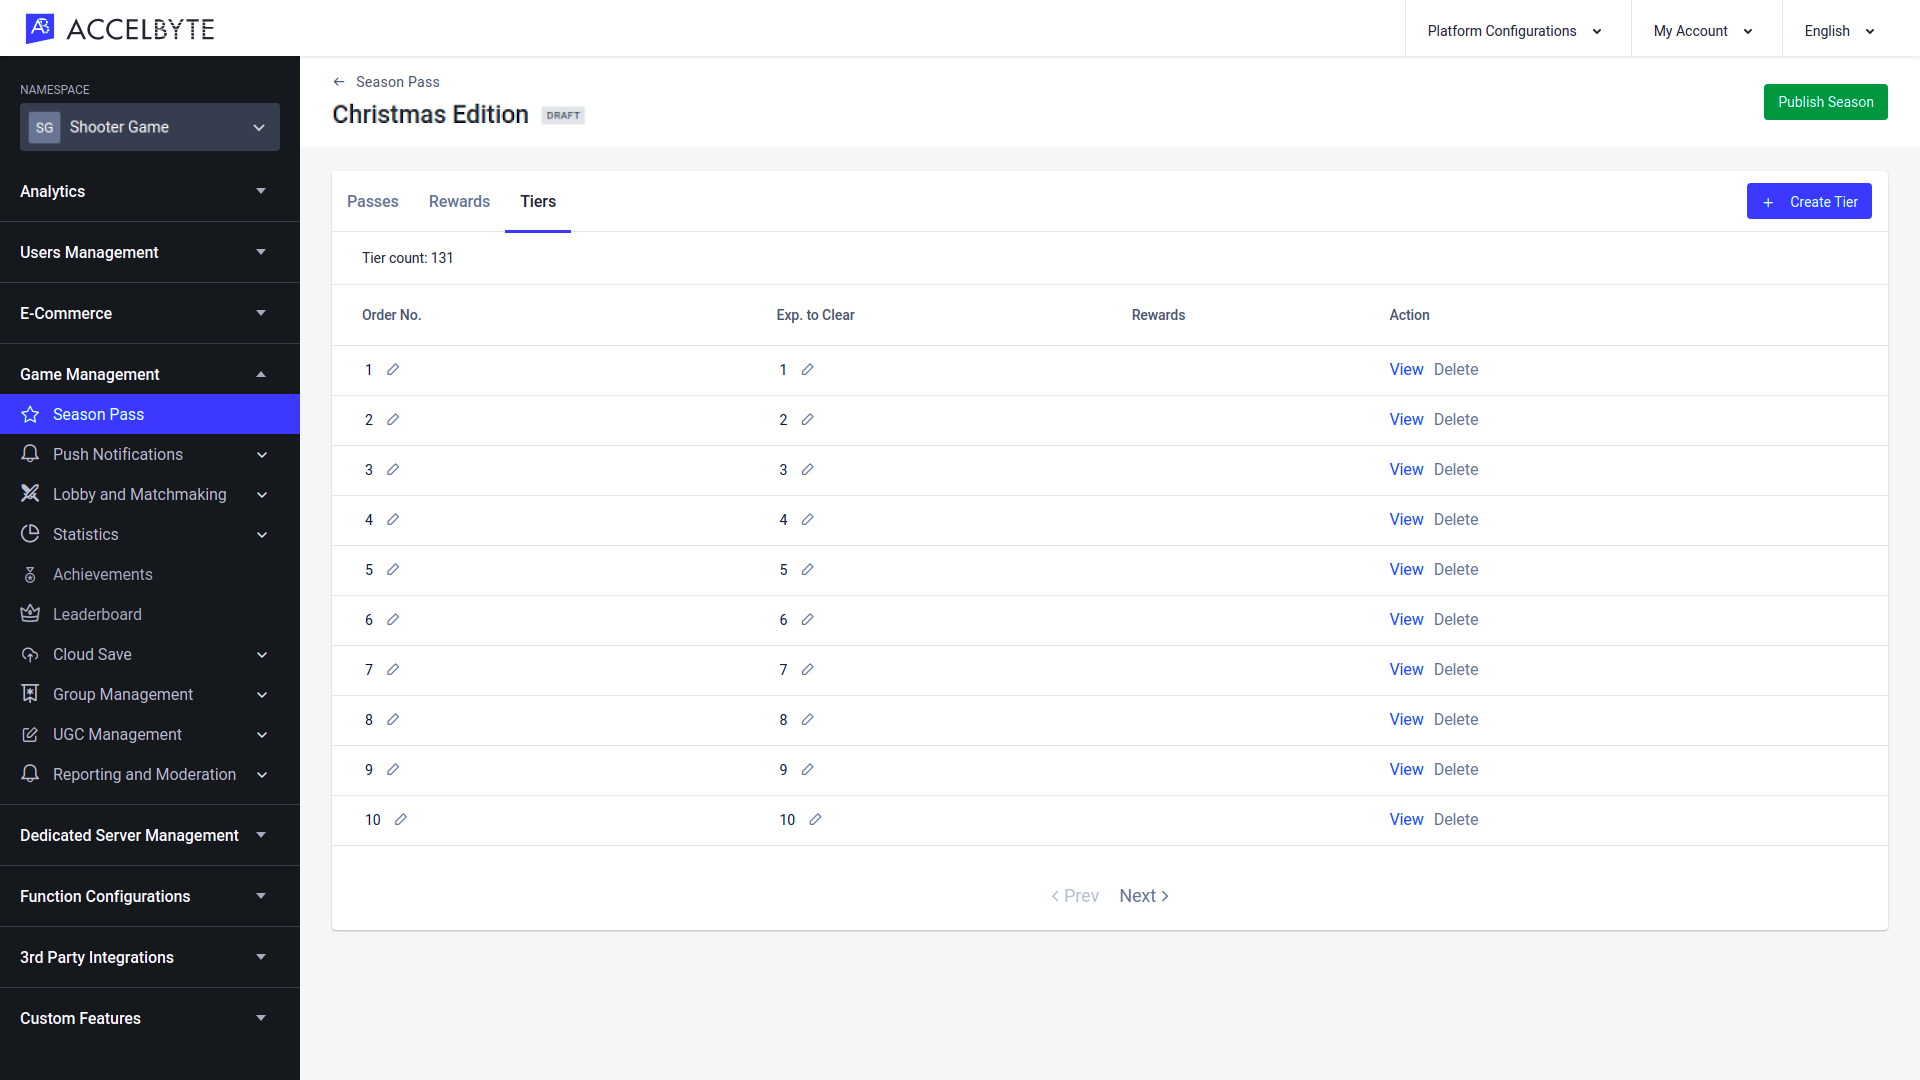
In the Draft Season section of the Season Pass page in the Admin portal, choose the desired draft season, then click View in that season's Action menu.

On the Season Details page, click the Tiers tab. You can see a list of tiers that have already been created for this event.
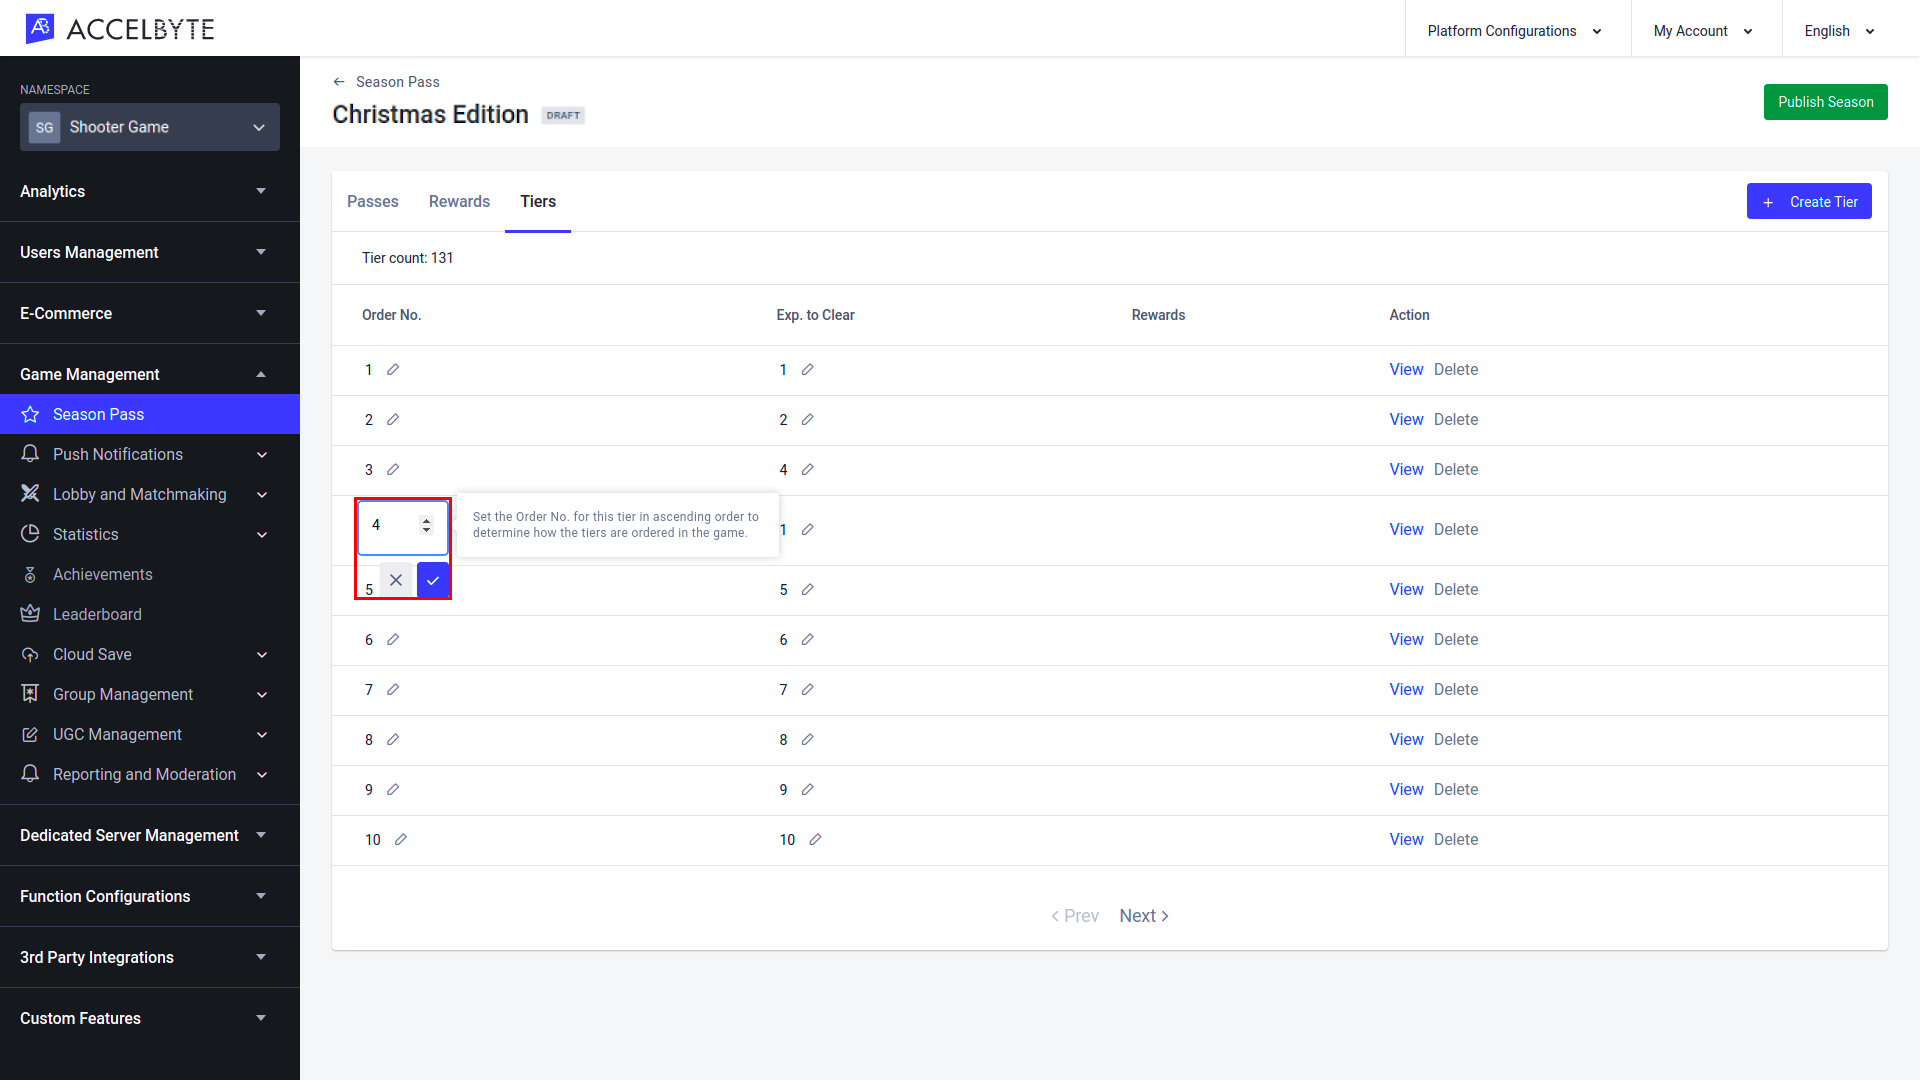
Click the pencil icon in the Order No. column of the tier that you want to move. Input the desired order value, then click the checkmark. The tiers will be reordered. For example, if you change the 4th tier to order number 1, tiers 1-3 will become tiers 2-4.
Associate Rewards with Passes and Tiers
You can associate rewards with each pass and tier combination by following the steps below:
In the Draft Season section, choose the draft season that contains the passes and tiers you want to associate to rewards, then click View in that season's Action menu.

On the Season Details page, click the Tiers tab. Then, click the View button next to a tier.
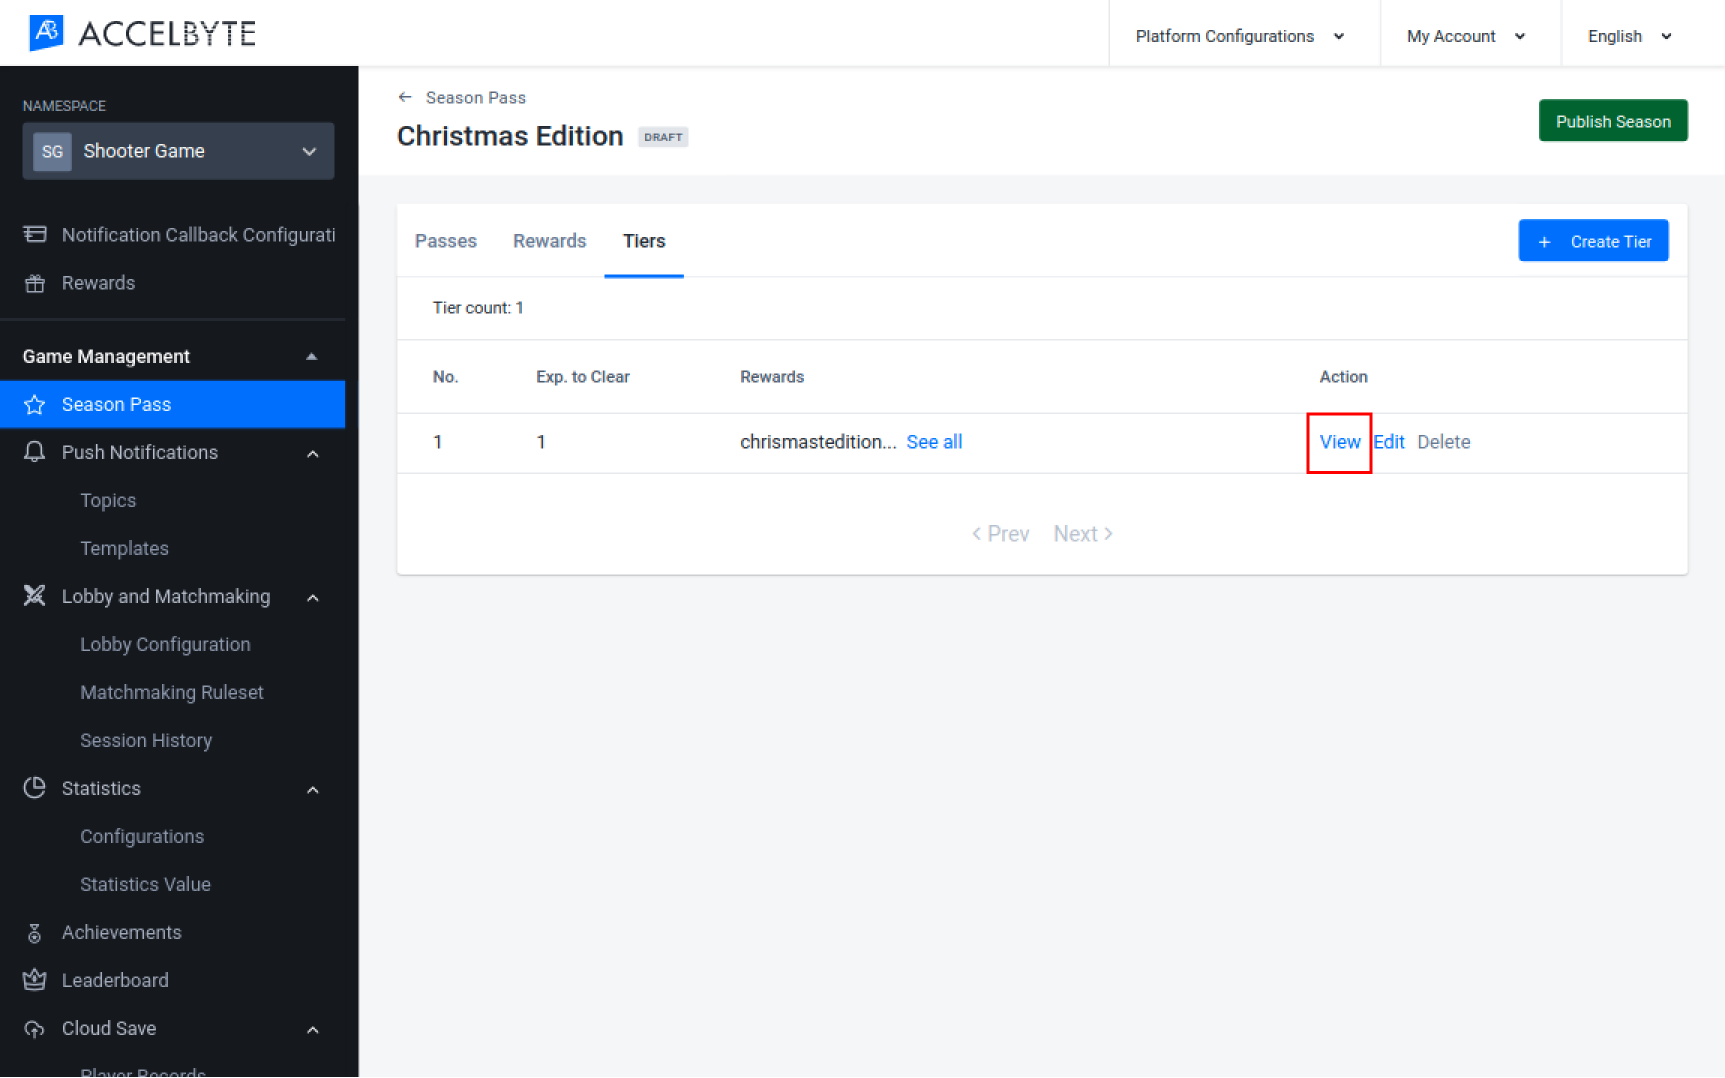
The Tier No. 1 Configuration form appears. Fields will appear for each of the passes in this season. Fill in each field by choosing the rewards that you want to bind to that specific pass. You can select multiple rewards for a single pass.
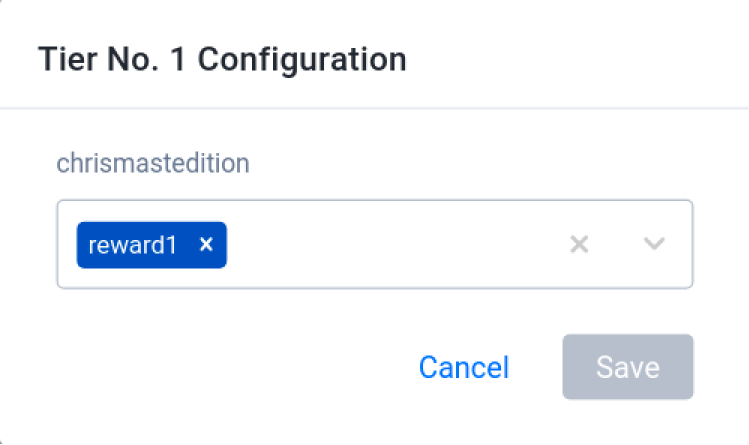
When you're finished, click the Save button. The rewards will be tied to the pass in this tier.
Publish and Retire Seasons in the Admin Portal
Publish a Season
In order for a Season to start, it must be published before its start date. You can publish a draft Season by following the steps below:
In the Draft Season section, choose the draft season you want to publish, then click Publish in that season's Action menu.

The Publish Season form appears. To publish this season, type PUBLISH into the available field and click the Publish button.

When you're finished, the draft season will be published.
Unpublish a Season
Unpublishing is a way to take a Season down temporarily to fix a problem with it, like a legal issue. Unpublishing a season will make it so that your players cannot participate further in the season event, but the data from that event will be saved. After you have fixed the problem you can publish the Season again, and because the event data was saved, players will be able to continue their progression from before the Season was unpublished. You can unpublish a Season by following the steps below:
In the Published Season section, choose the season you want to unpublish, then click Unpublish in that season's Action menu.
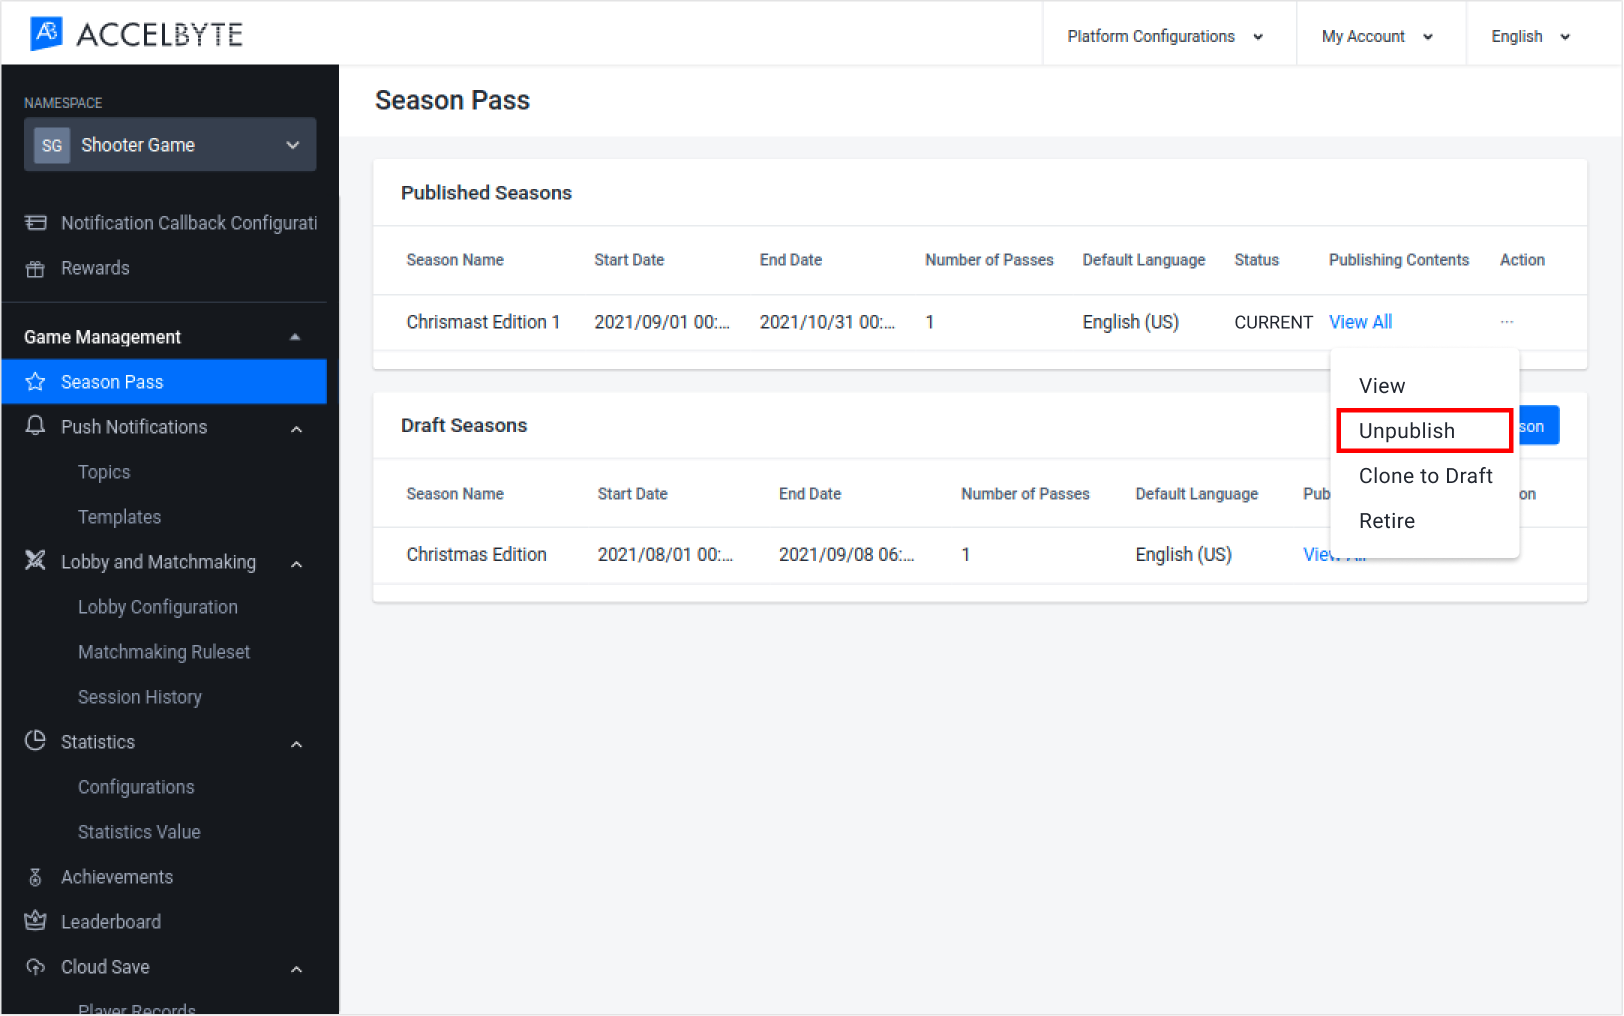
A confirmation message appears. To unpublish this season, click the Confirm button.

When you're finished, the current season will be unpublished.
Retire a Season
Seasons already have end dates, upon which players will no longer be able to participate in season events, but will still be able to claim any rewards they have already earned. Retire a Season to make it so that players can no longer claim rewards or otherwise interact with the Season. You can retire a current Season by following the steps below:
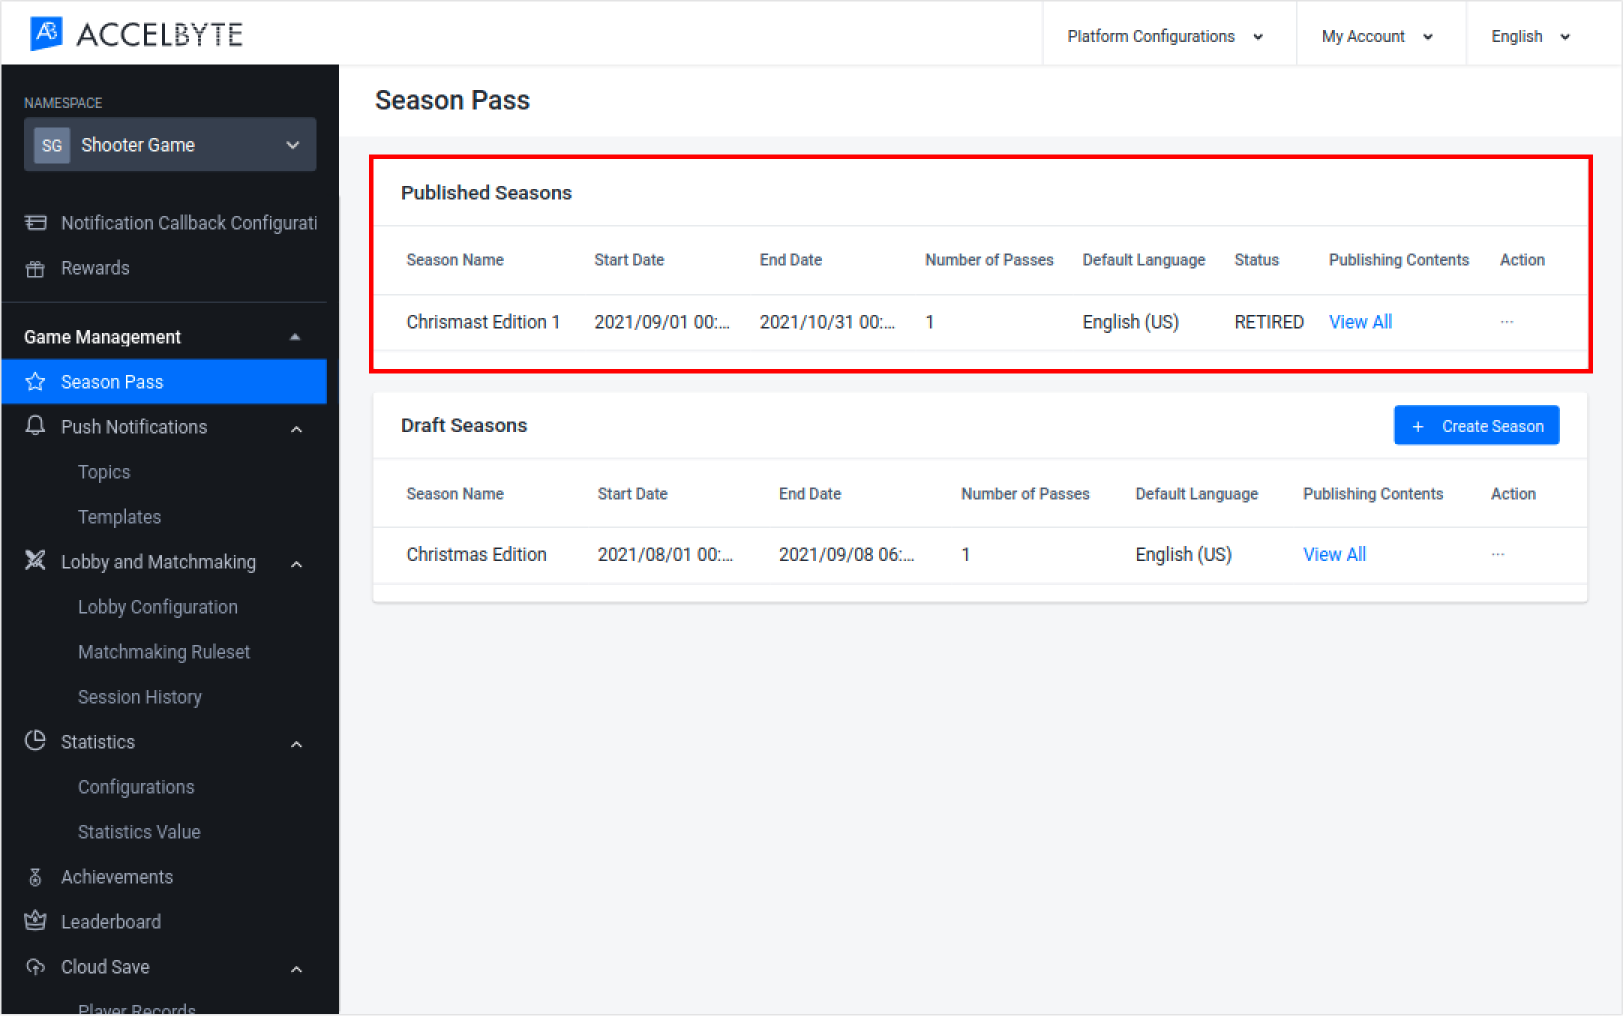
In the Published Season section, choose the season you want to retire, then click Retire in that season's Action menu.

A confirmation message appears. To retire this season, click the Confirm button.

When you're finished, the current season will be retired.
Manage User Advancement through Season Events in the Admin Portal
You can manually advance a user to the next tier by following the steps below:
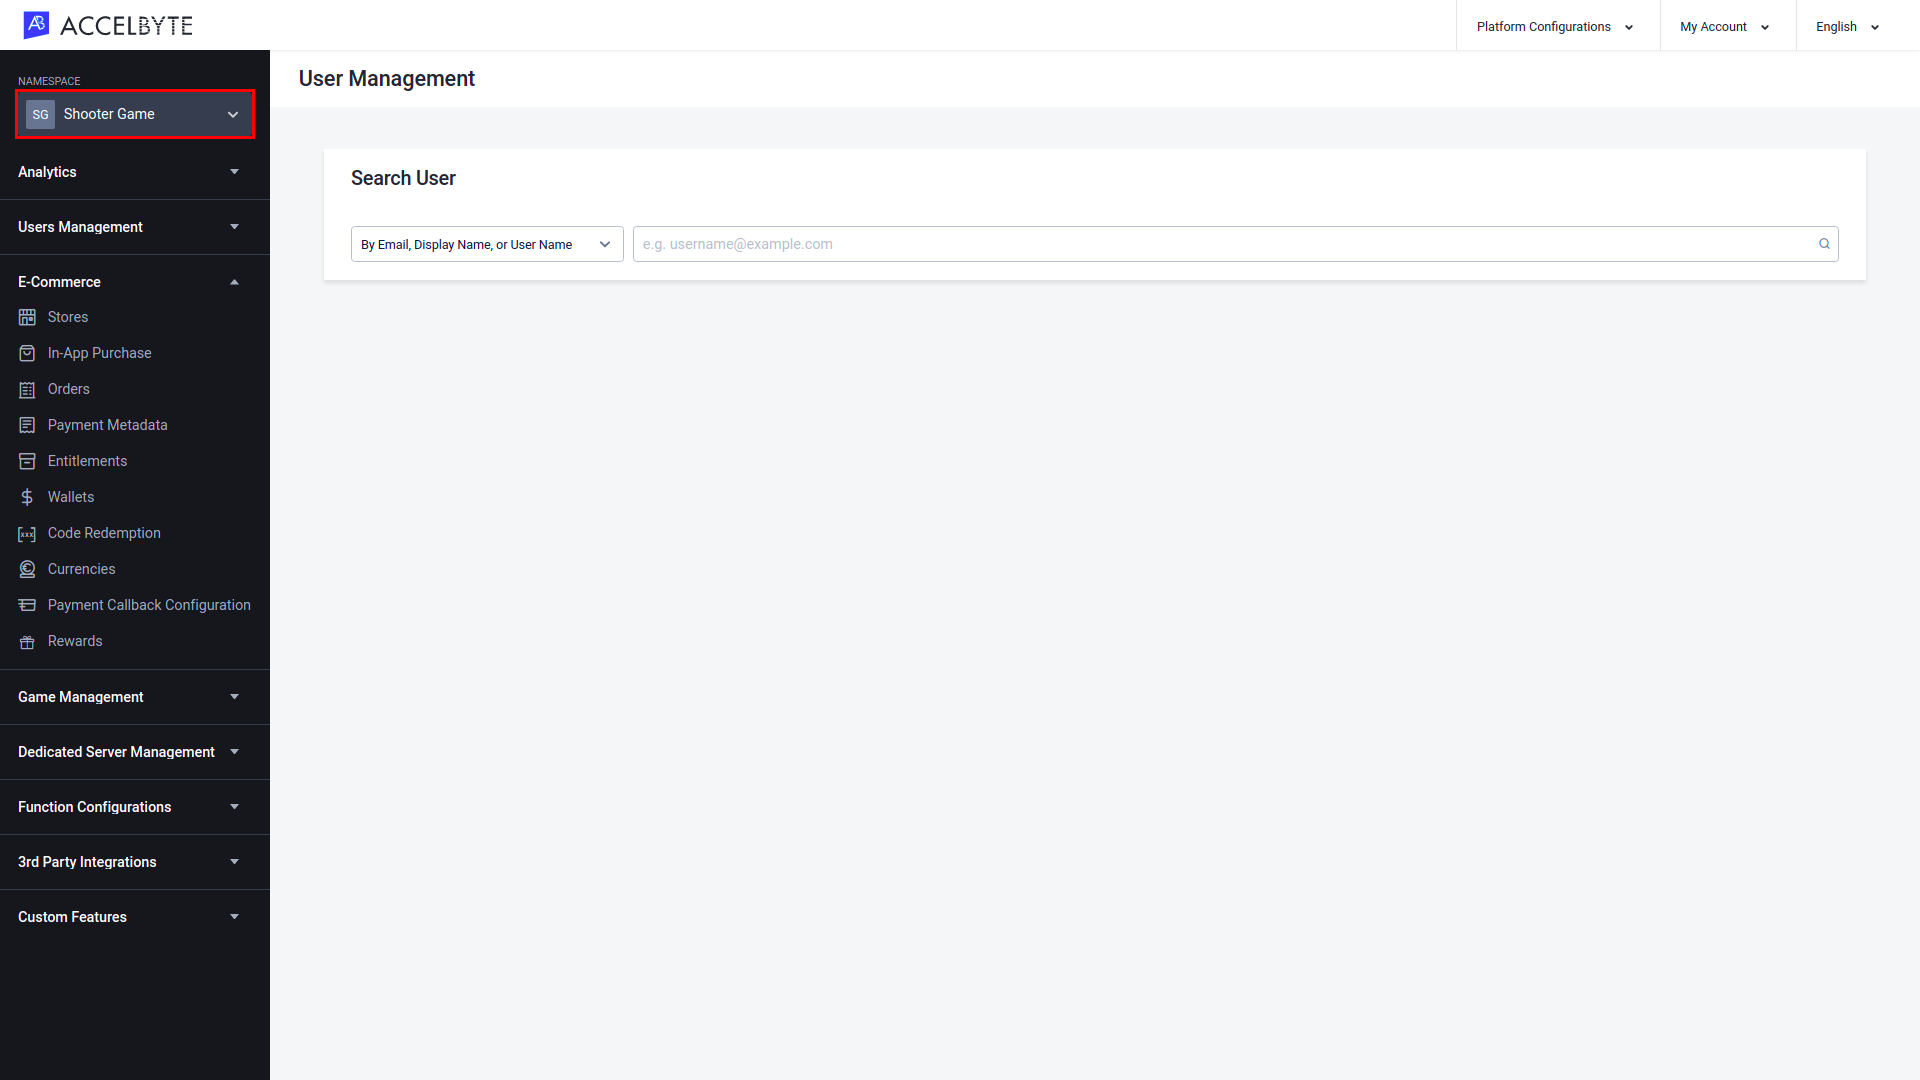
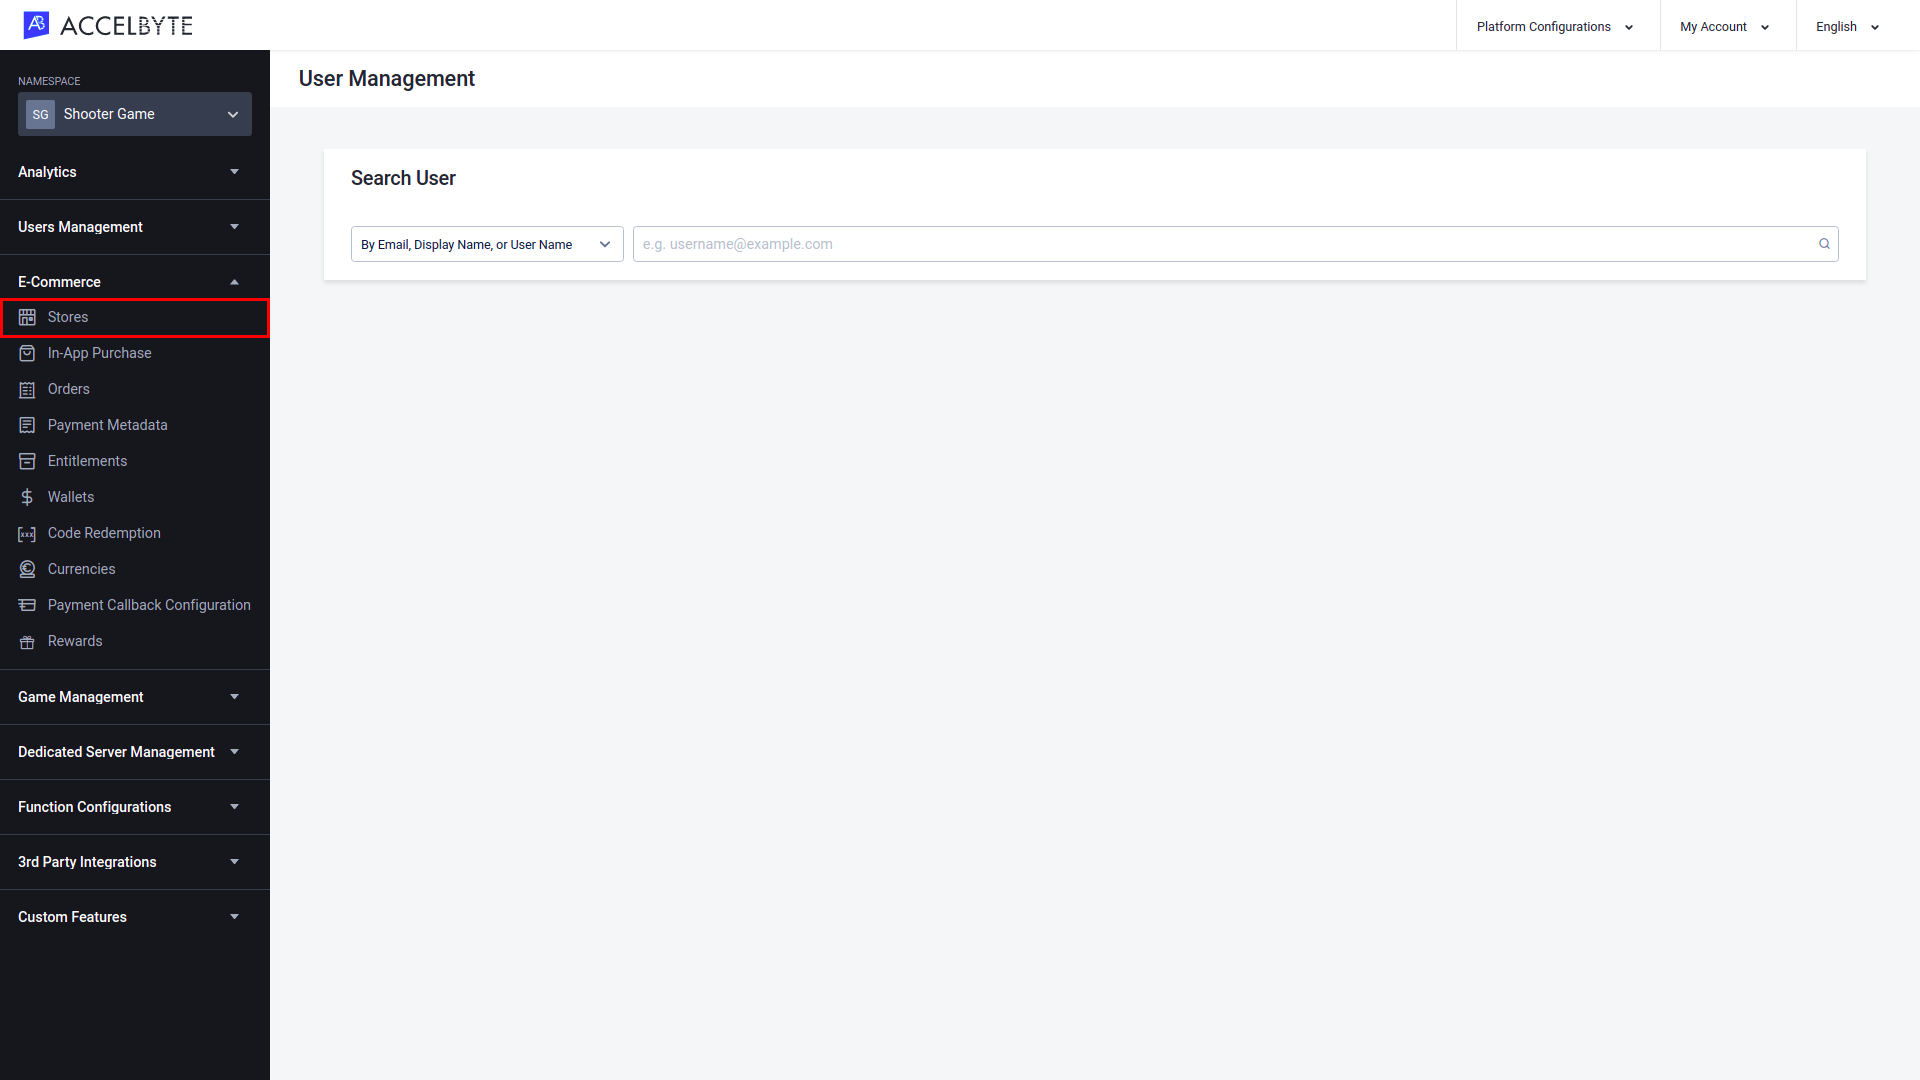
In the Admin Portal, choose the target game namespace. Then go to the User Management section of the left navigation menu and click Users.
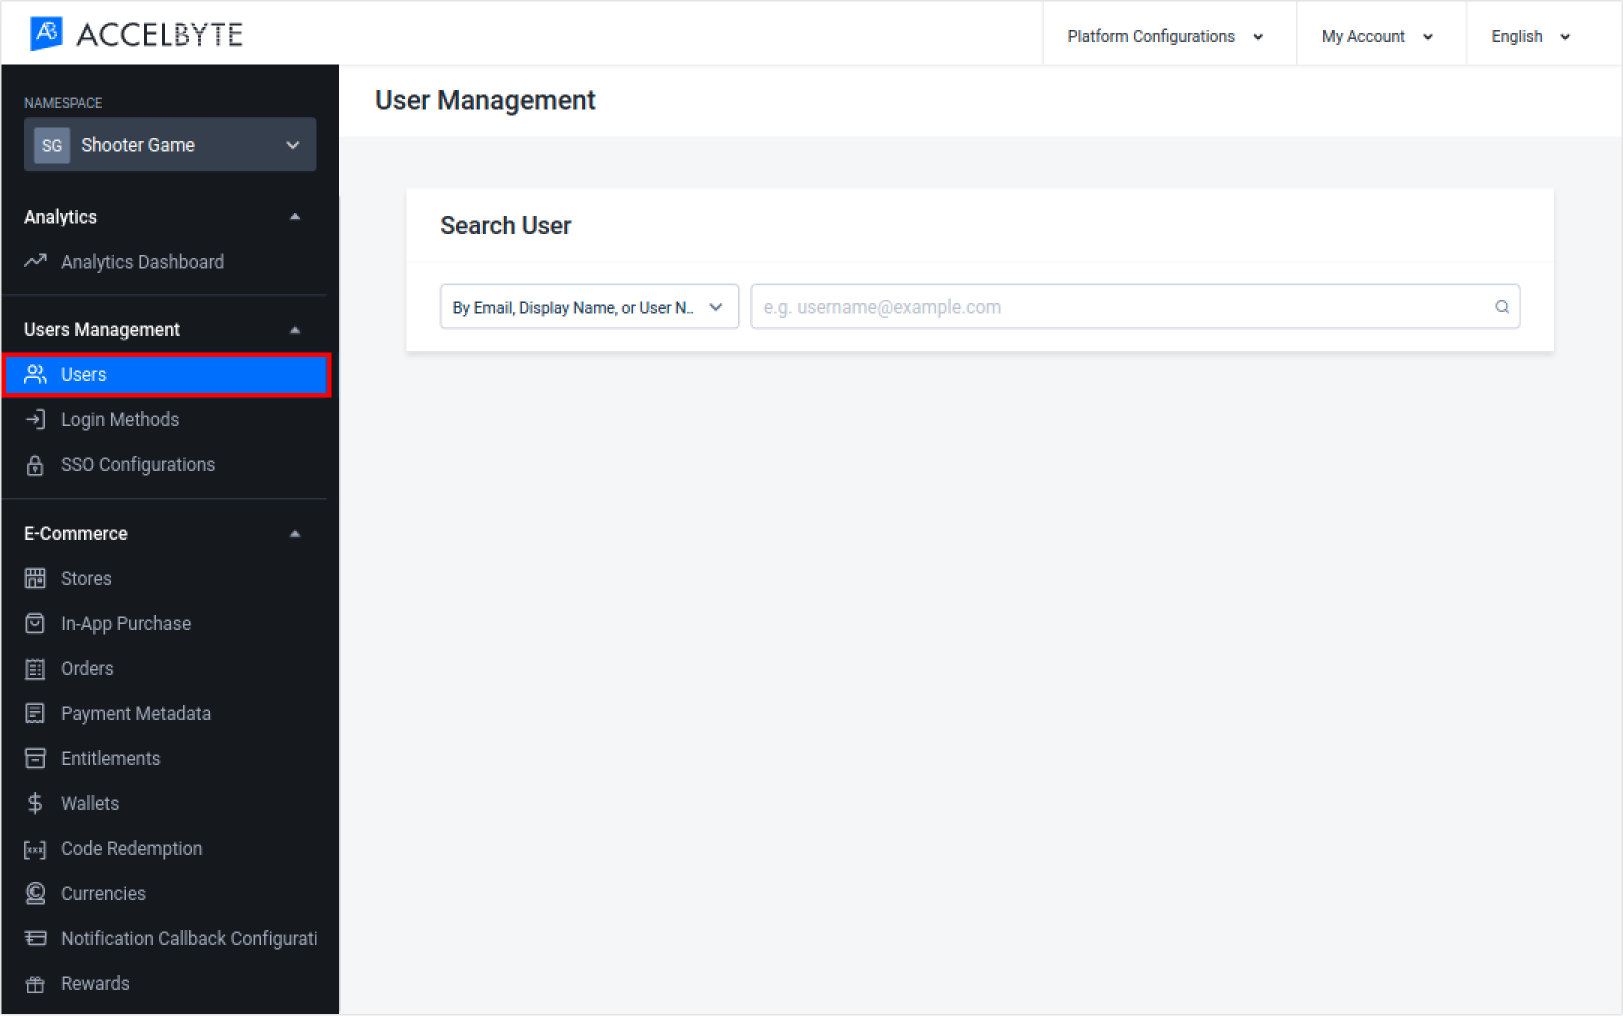
Select the search filter from the dropdown menu in the Search User panel that corresponds to the player's account information that you have on hand. Type that information in the text box and press Enter to search. The results of your search will appear. Browse the list to find the account you're looking for and click View in the Action column of the account listing to open it.
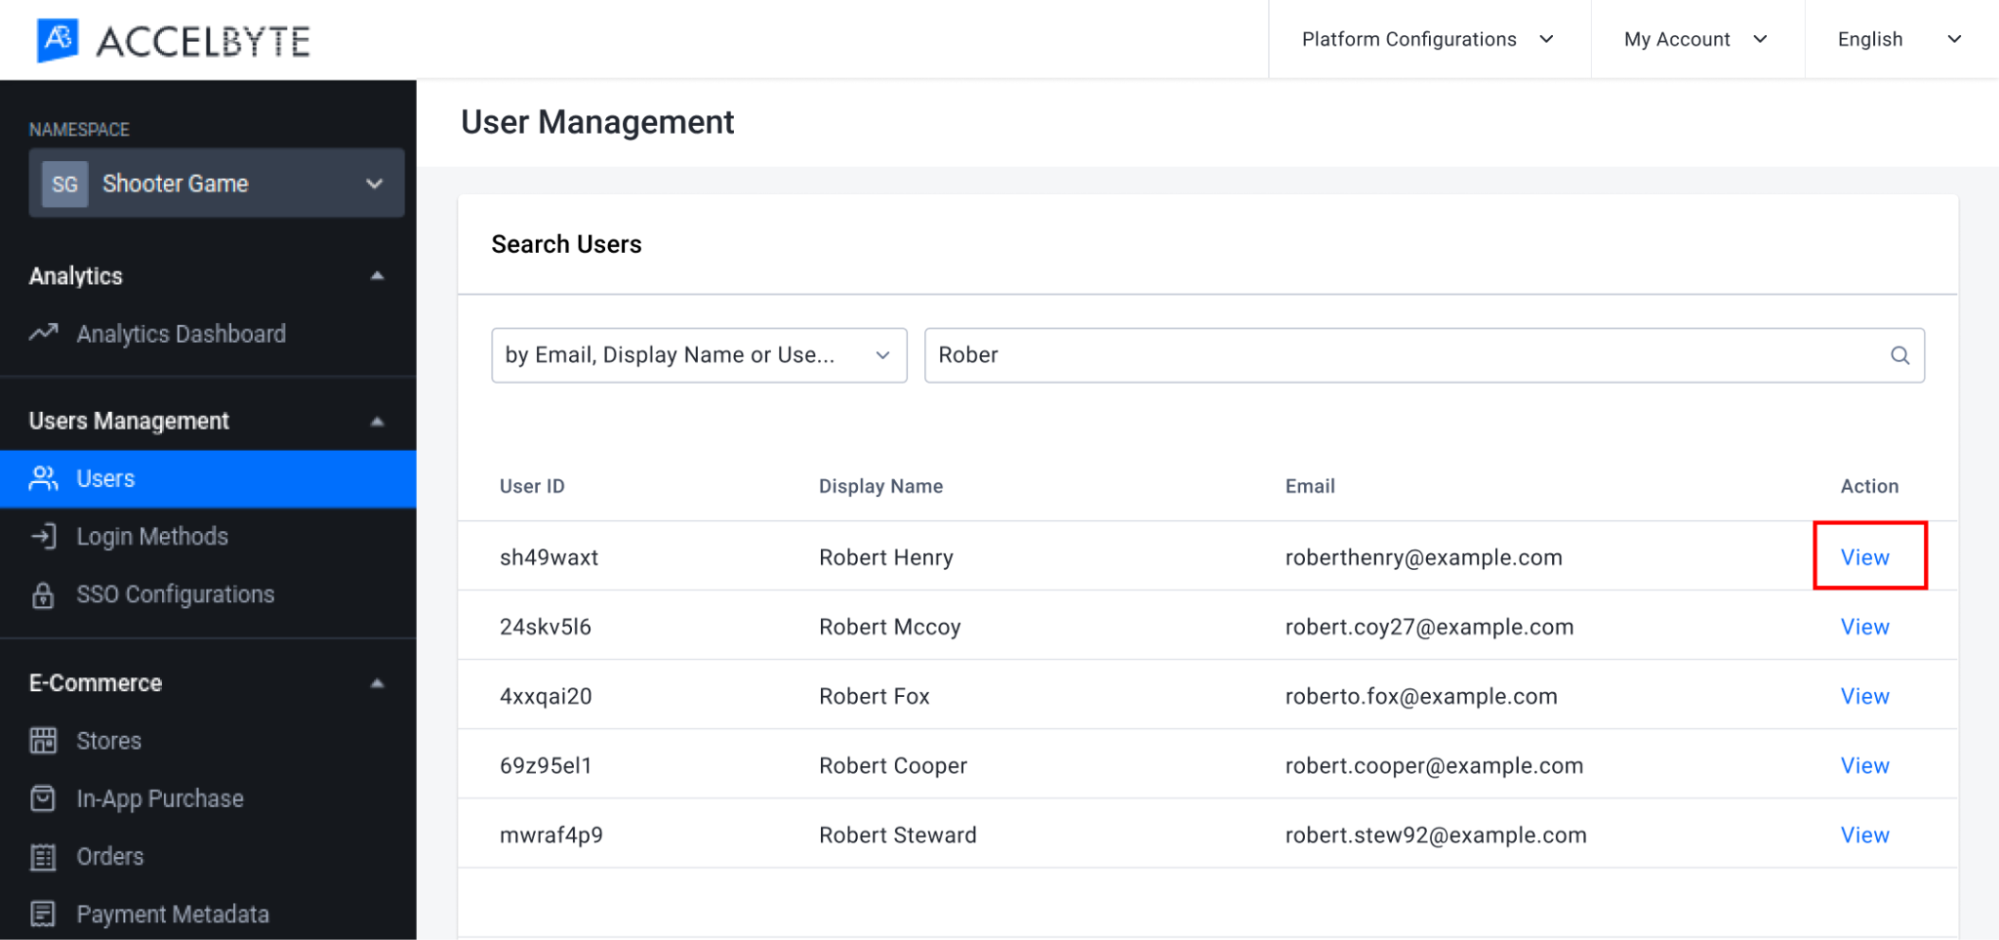
TIP
Fuzzy search is allowed here, so you can find the player you're looking for by typing just the first few characters of the player's credentials that you have.
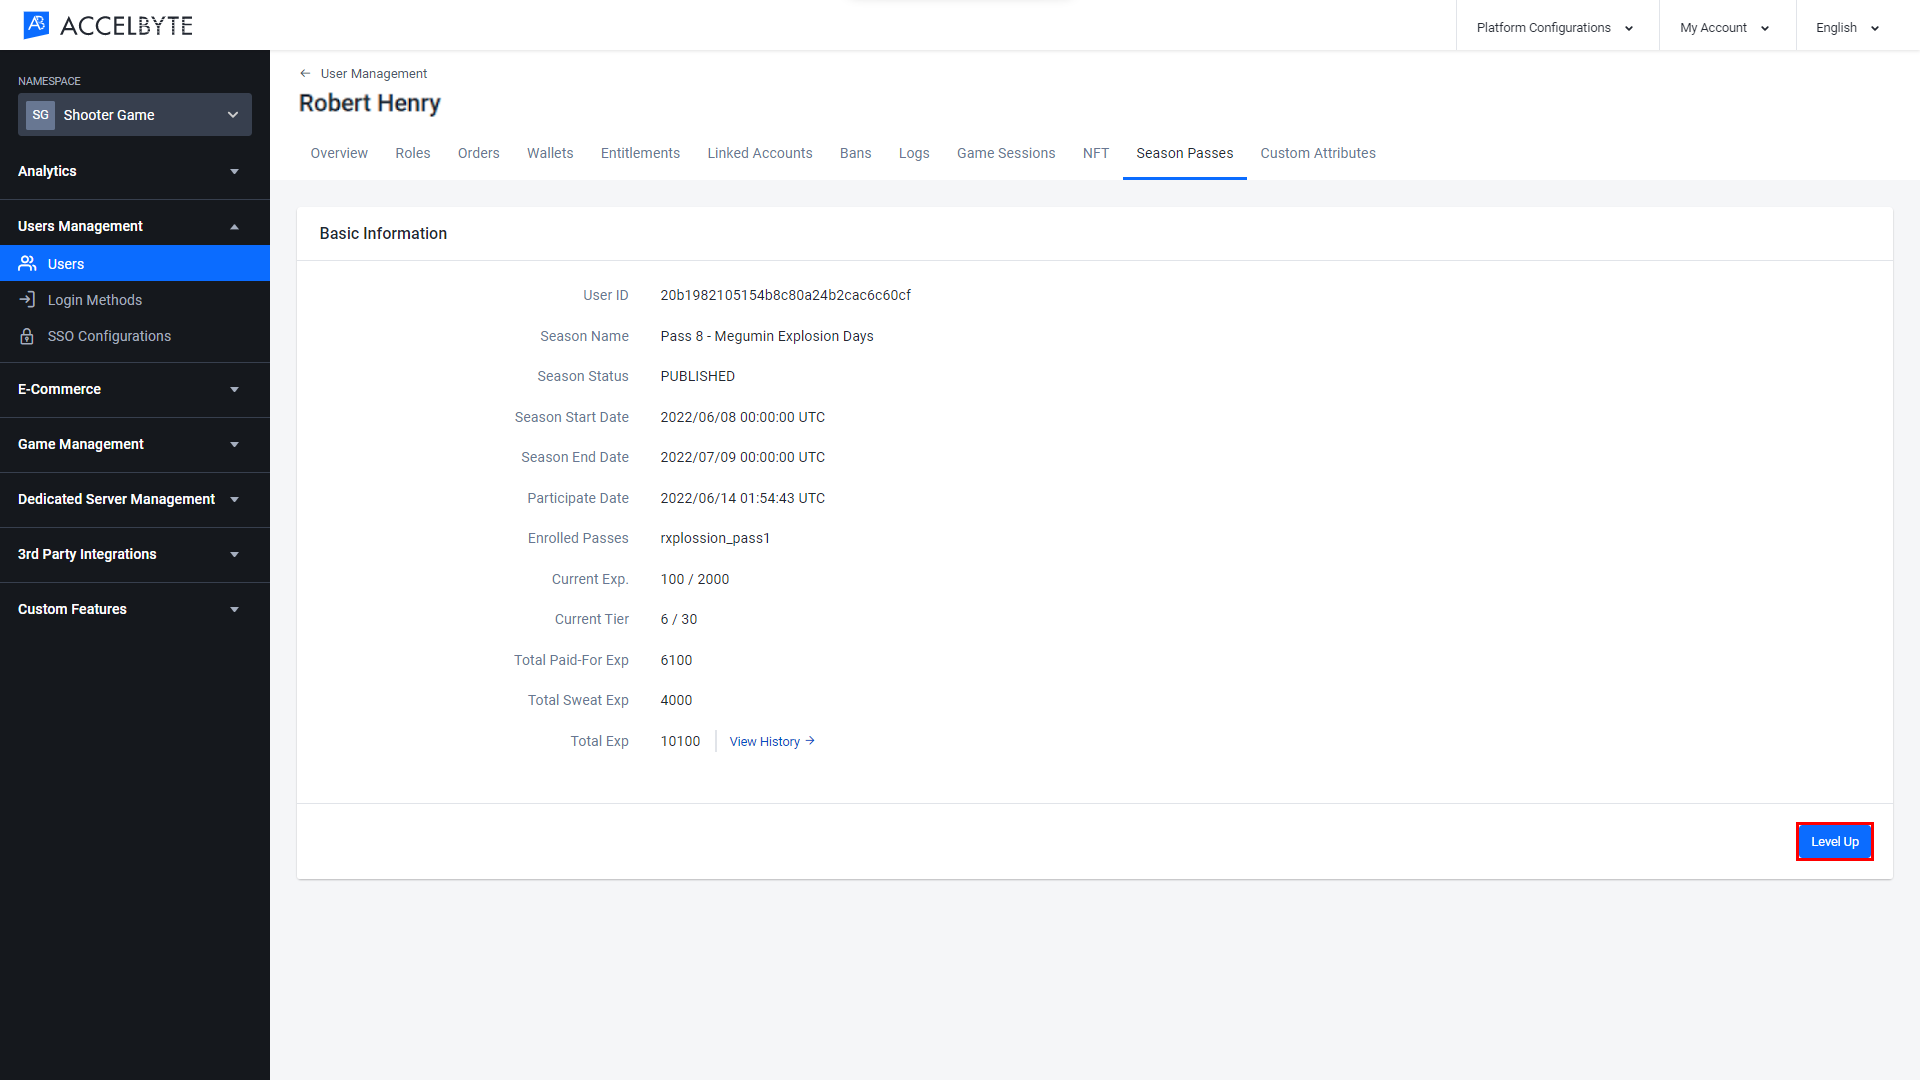
The User Overview will appear, giving you a quick look at player data such as wallet balance, ban status, and linked accounts, as well as more detailed records of the player's activity. Open the Season Pass tab from the ribbon at the top of the page.

On the Season Pass Information page, click the View button of the selected season pass.

On the Season Pass Details of the User page, click the Level Up button to advance the user to the next tier.
A confirmation message will appear. Fill in the following fields:
- Fill the Source field with the options from the dropdown to define the source of the advancement. Choose Paid-For if the player got their advancement through purchasing a level upgrade. Choose Sweat if the player got their advancement through gameplay and engagement with your game.
- Fill the Reason Tag with the reason why the player got their advancement.
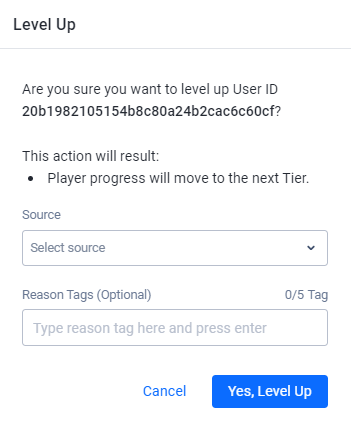
To advance the user to the next tier, click Yes, Level Up. The user will be advanced to the next tier.
NOTE
You can view a user's advancement history in the User Accounts documentation.
Add a Pass Item to a Bundle
After creating a season, you can add a pass item to an item bundle. Before adding a pass item to a bundle, make sure you've already done the following actions:
- Create a Draft Store
- Create a Bundle Category in the Draft Store
- Create a Bundle Item in the Draft Store
- Create a Season Pass item in the Draft Store
To add a pass item to a bundle, follow these steps:
In the AccelByte Admin Portal, choose the target game namespace.
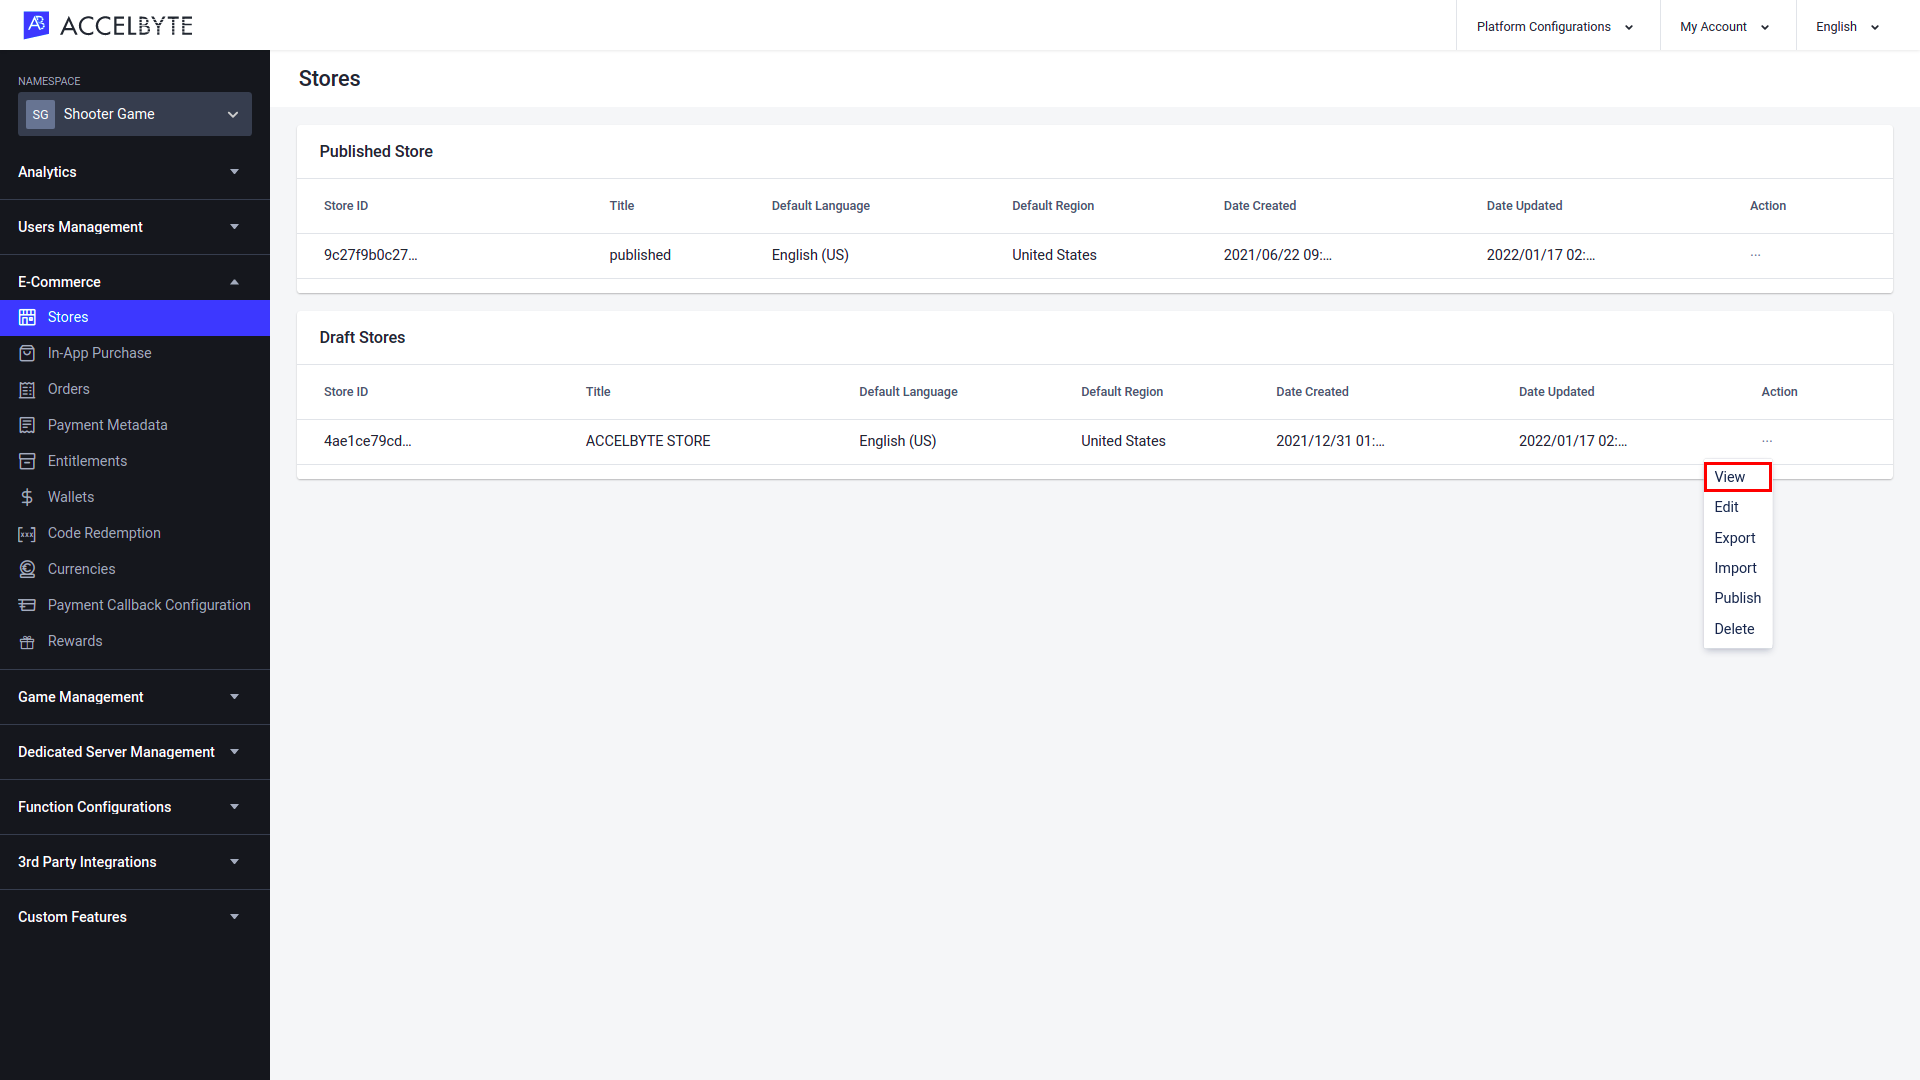
Then go to the E-Commerce section of the left navigation menu and click Stores.
On the Stores page, choose the draft store where the target bundle exists, open the store's Action menu, then click View.
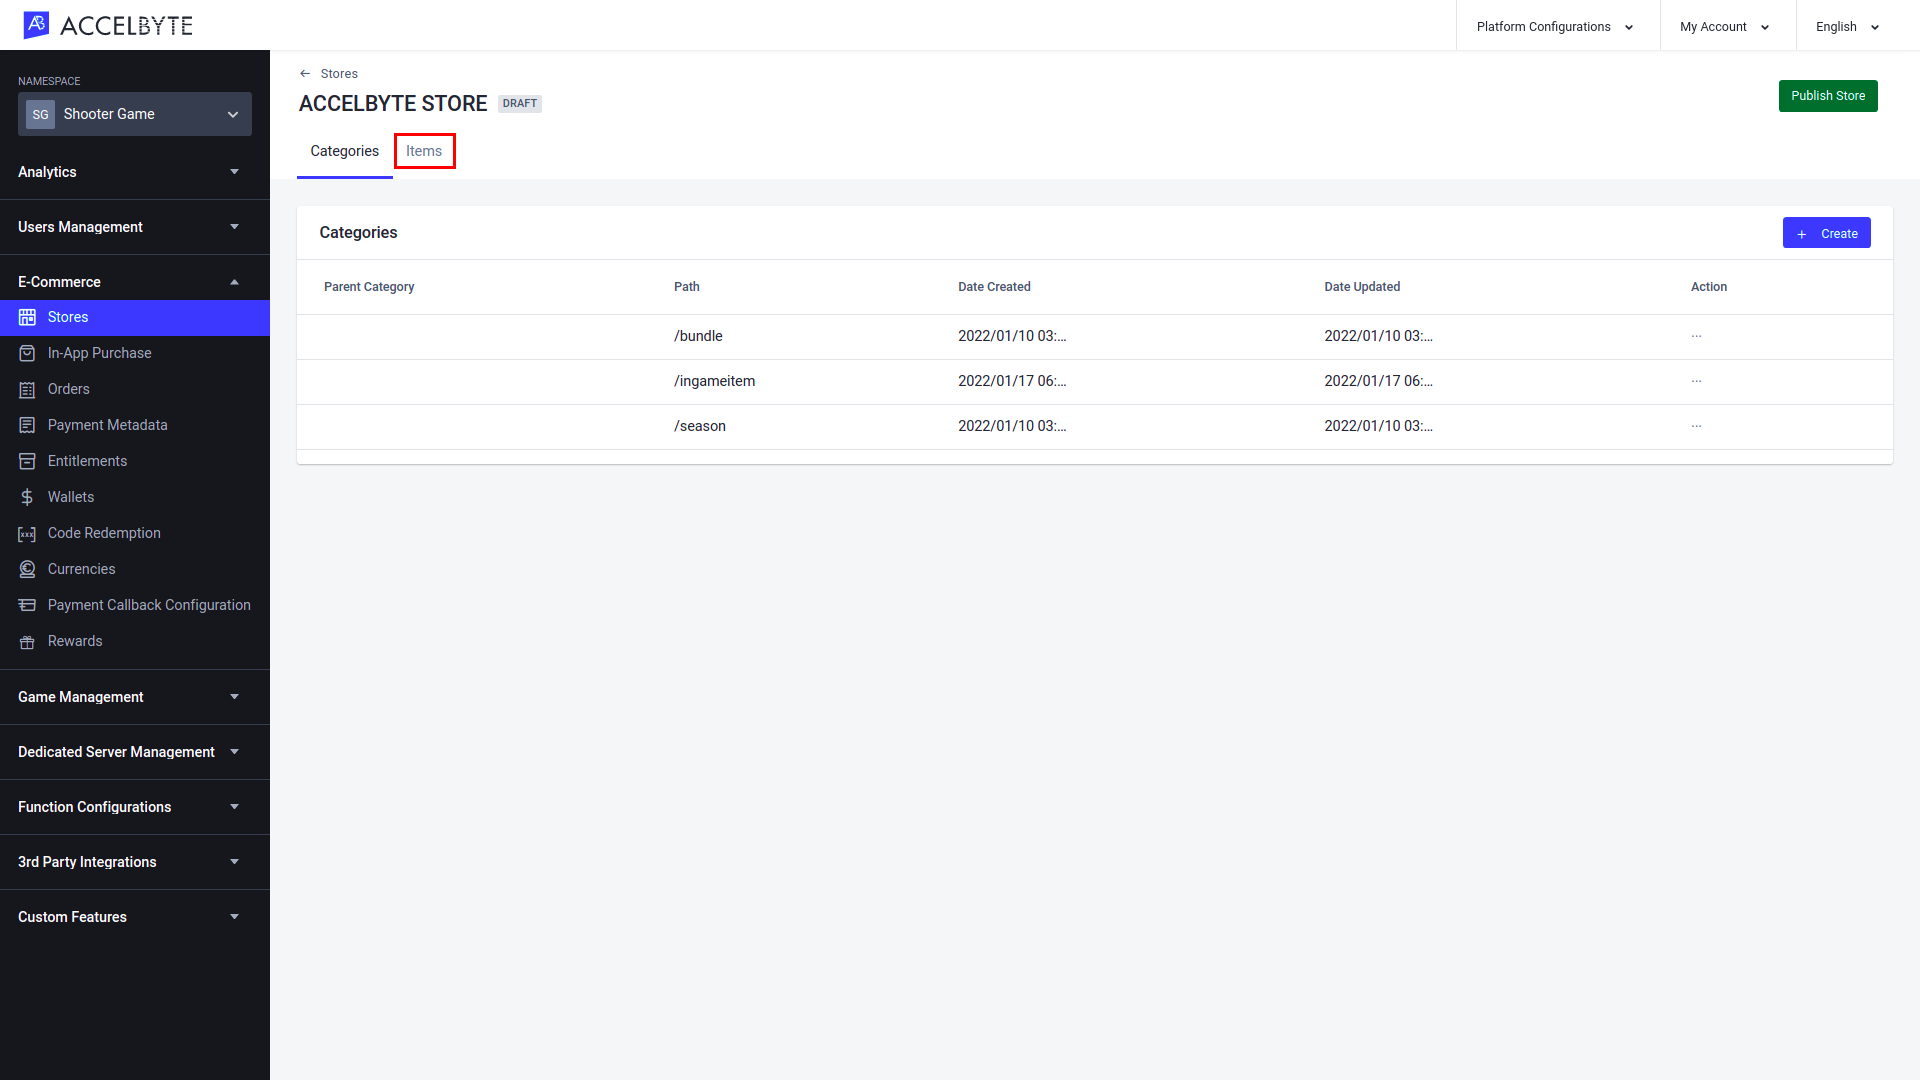
On the Draft Store page, click the Items tab.
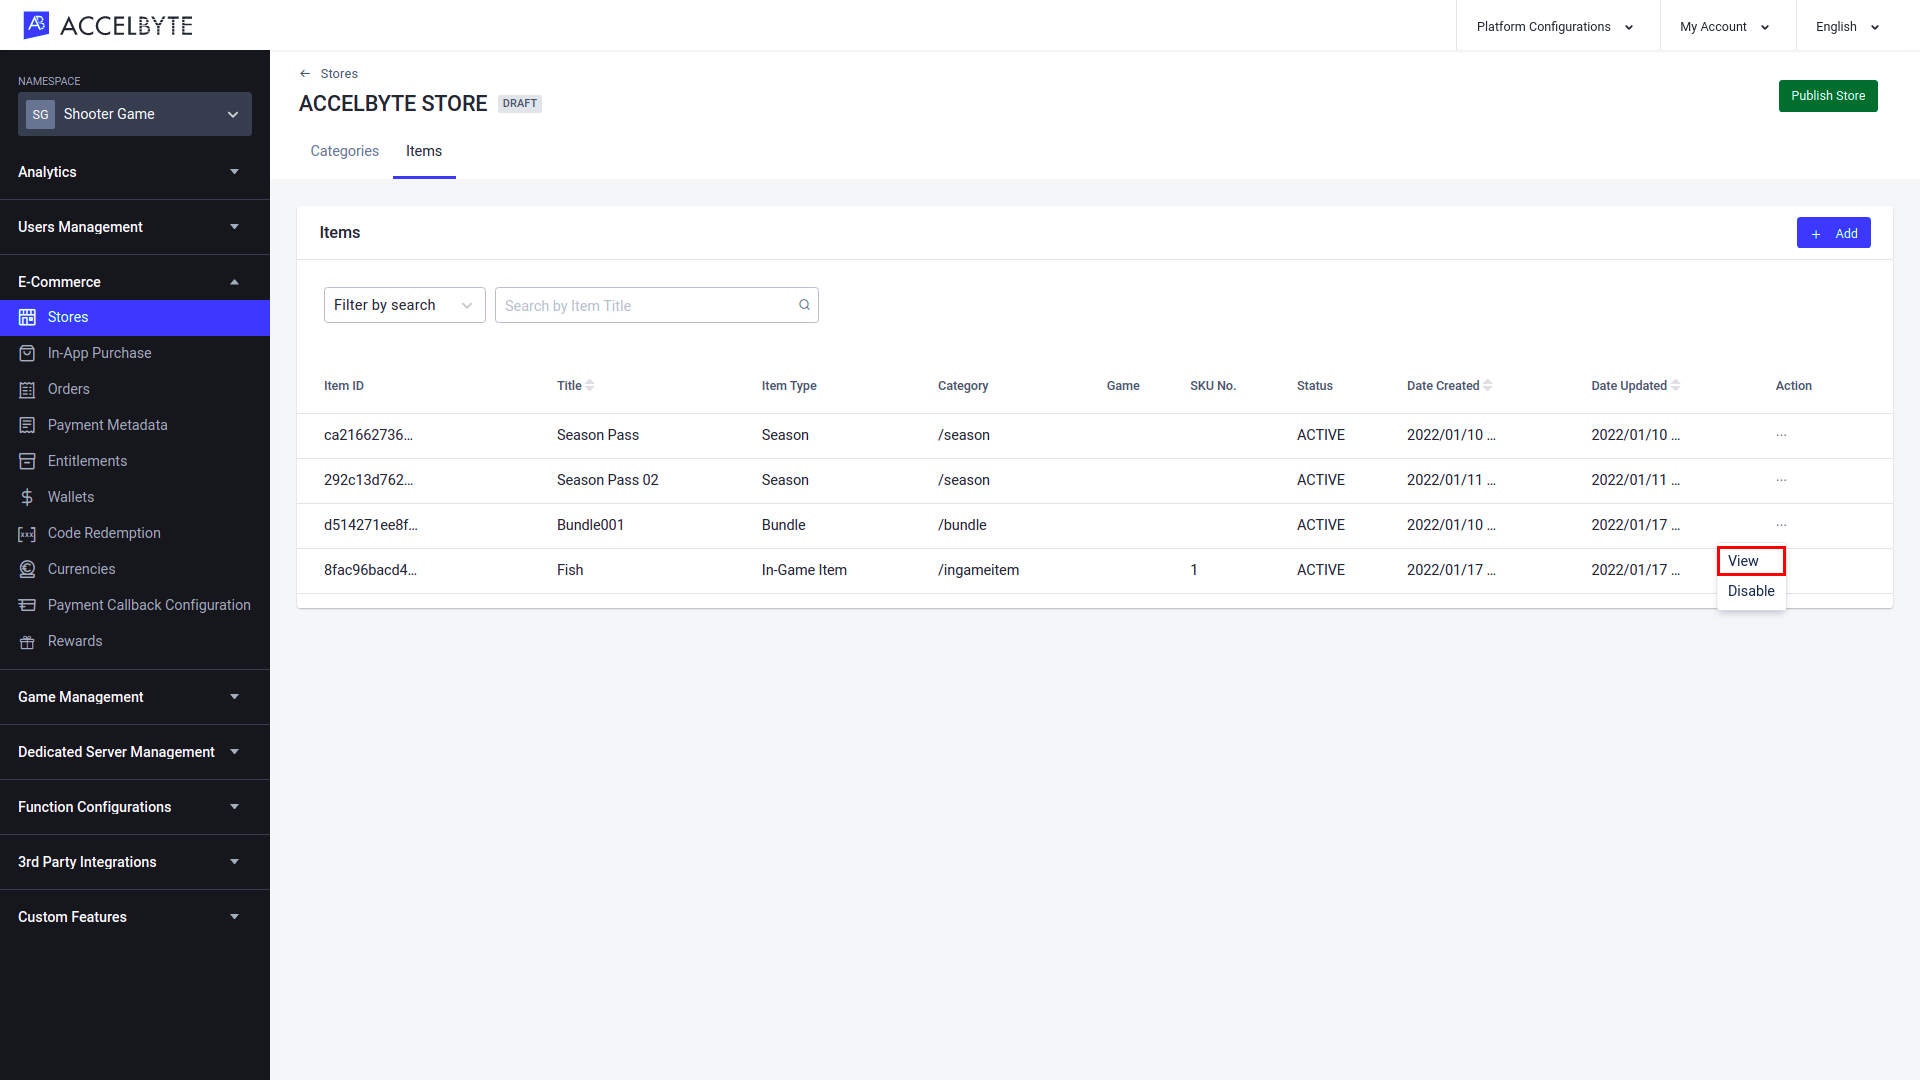
On the Items tab of the Draft Store page, choose the bundle you want to add the pass item to, open the bundle's Action menu, then click View.
In the Bundle Items section of the Bundle page, click the Add New button.
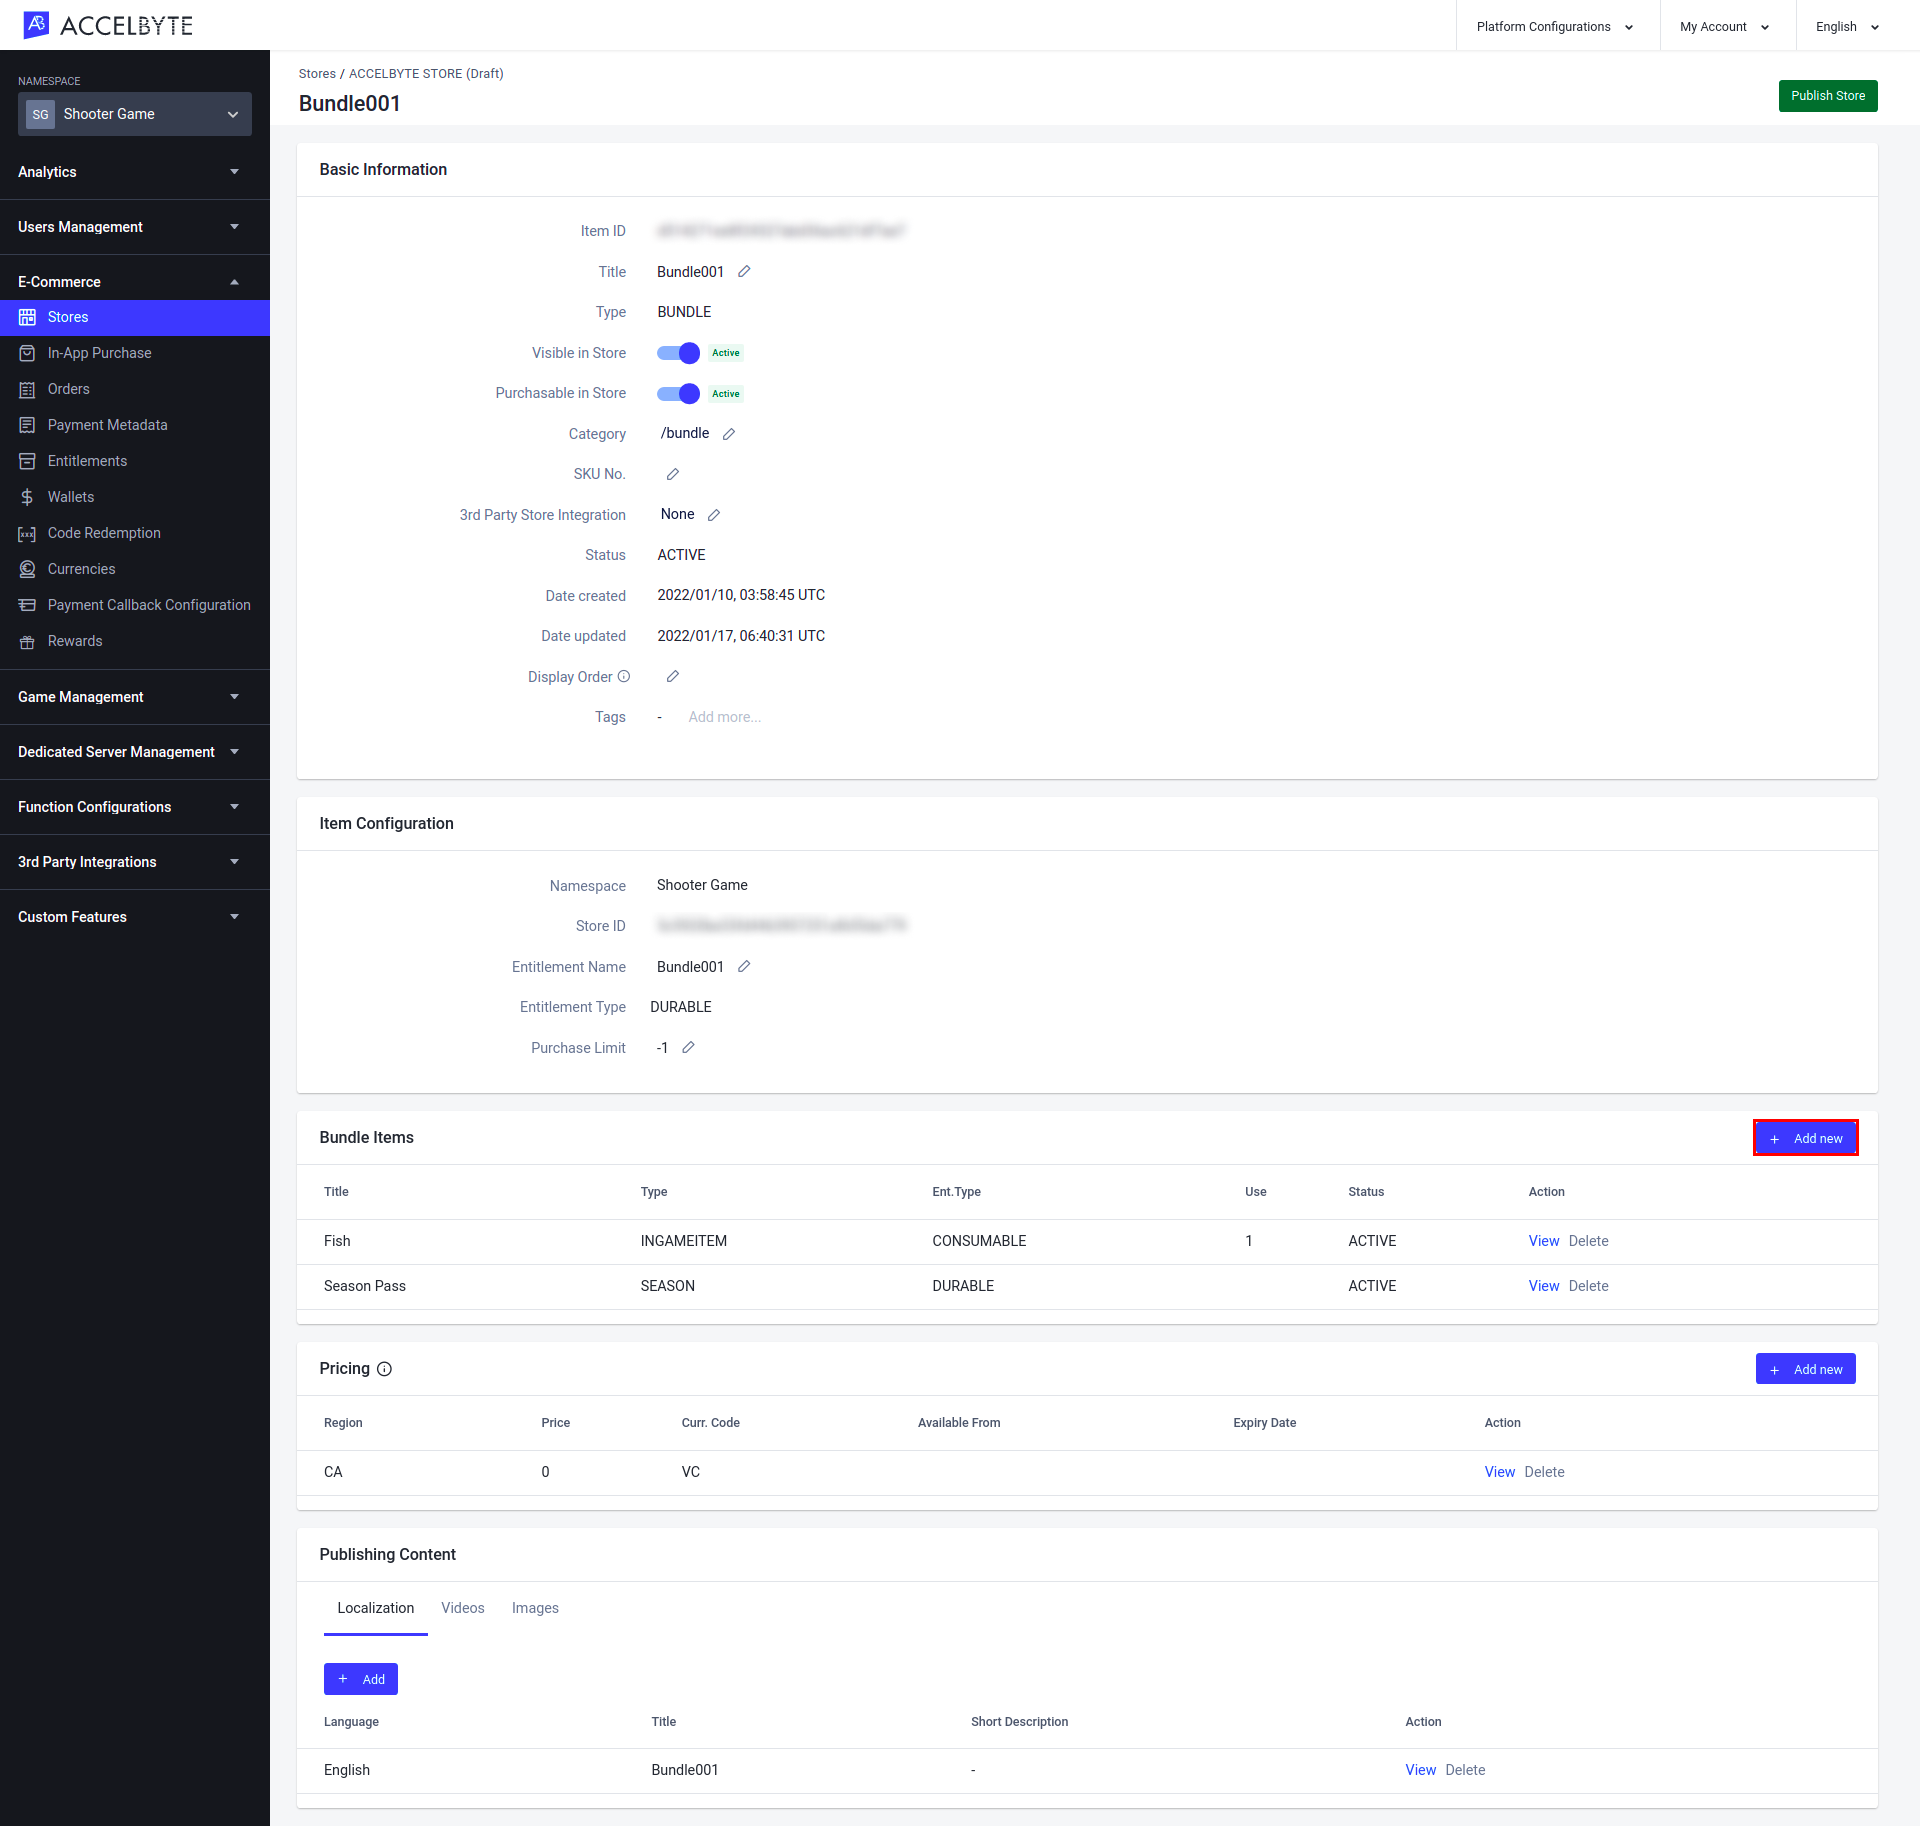
The Add Items form appears. Type the name of the pass item you want to add to the bundle in the Add Items field. When you're done, click the Add button.

Manage Season Passes using the Client SDKs
Retrieve the Current Season Pass
The game client can query the current active Season Pass to return information, such as the Item IDs of the items used as rewards, and tier progression information such as the required XP and reward passes for each tier.
- Unreal Engine
FString Language = TEXT(“en”);

AccelByte::FRegistry::SeasonPass.GetCurrentSeason(
     Language,
     THandler<FAccelByteModelsSeasonInfo>::CreateLambda([&](const FAccelByteModelsSeasonInfo& Result)
    {
        /* do something when succeed*/
    }),
    FError::CreateLambda([](int32 ErrorCode, FString ErrorMessage)
    {
        /* do something when failed */
    })
);
Retrieve the Current Player's Season Pass Progression
The game client can query a player's season data to show the player their season progression and rewards that can be claimed.
- Unreal Engine
FString Language = TEXT(“en”);

AccelByte::FRegistry::SeasonPass.GetCurrentUserSeason(
   THandler<FAccelByteModelsUserSeasonInfo>::CreateLambda([](const FAccelByteModelsUserSeasonInfo& Result)
    {
        /* do something when succeed*/
    }),
    FError::CreateLambda([](int32 ErrorCode, FString ErrorMessage)
    {
        /* do something when failed */
    })
);
Grant XP to the Player using the Server API
The player can be granted XP by the Server API. The game server tracks player progression during season events. If the player completes the challenges successfully, the game server will grant XP to the player.
- Unreal Engine
int32 EXP = 300;
FString UserId = “TargetUserId”;

AccelByte:ServerSeasonPass.GrantExpToUser(
    UserId, EXP,
    THandler<FAccelByteModelsUserSeasonInfoWithoutReward>::CreateLambda(
    [](const FAccelByteModelsUserSeasonInfoWithoutReward& Result)
    {
        /* do something when succeeded */
    }),
    FError::CreateLambda([](int32 ErrorCode, FString ErrorMessage)
    {
        /* do something when failed */
    })
);
Level Up in Tier
Players can move up in tier in two ways: either by gaining XP in season challenges or by buying access to tiers. If a player moves up a tier from gaining XP, their tier will be leveled up automatically, their XP will be reset to 0, and any remainder from the last tier's XP will be added back to the player's XP. Players can also purchase access to advanced tiers..
When a player purchases access to a new tier, the tier information will have to be retrieved if it isn't cached. This function retrieves the tier data.
TIP
This function isn't necessary if the tier item is cached.
- Unreal Engine
FAccelByteModelsItemCriteria ItemCriteria;
ItemCriteria.ItemType = EAccelByteItemType::INGAMEITEM;
ItemCriteria.CategoryPath = TEXT(“/seasonpass”);
int32 Offset = 0;
int32 Limit = 32;

AccelByte:FRegistry::Item.GetItemsByCriteria(
    ItemCriteria, Offset, Limit,
    THandler<FAccelByteModelsItemPagingSlicedResult>::CreateLambda(
    [](const FAccelByteModelsItemPagingSlicedResult& Result)
    {
        /* do something when succeeded */
    }),
    FError::CreateLambda([](int32 ErrorCode, FString ErrorMessage)
    {
        /* do something when failed */
    })
);
Then this function enables a player to purchase access to a tier.
- Unreal Engine
FAccelByteModelsOrderCreate OrderTier;
OrderTier.CurrencyCode = TEXT(“CurrencyCode”);
OrderTier.DiscountedPrice = 100;
OrderTier.Price = 100;
OrderTier.Quantity = 1;
OrderTier.ReturnUrl = TEXT("https://example.com");
OrderTier.ItemId = TEXT(“ItemId”);
OrderTier.Region = "US";
OrderTier.Language = "en";

FRegistry::Order.CreateNewOrder(
    OrderTier,
    THandler<FAccelByteModelsOrderInfo>::CreateLambda([&](const FAccelByteModelsOrderInfo& Result)
    {
        /* do something when succeed */
    }),
    FError::CreateLambda([](int32 ErrorCode, FString ErrorMessage)
    {
        /* do something when failed */
    })
);
Unlock a Premium Pass
Players can purchase a premium pass to gain access to additional rewards from season events..
When a player purchases a premium pass, the pass information will have to be retrieved if it isn't cached. This function retrieves the pass data.
tip
This function isn't necessary if the pass item is cached.
- Unreal Engine
FAccelByteModelsItemCriteria ItemCriteria;
ItemCriteria.ItemType = EAccelByteItemType::INGAMEITEM;
ItemCriteria.CategoryPath = TEXT(“/seasonpass”);
int32 Offset = 0;
int32 Limit = 32;

AccelByte:FRegistry::Item.GetItemsByCriteria(
    ItemCriteria, Offset, Limit,
    THandler<FAccelByteModelsItemPagingSlicedResult>::CreateLambda(
    [](const FAccelByteModelsItemPagingSlicedResult& Result)
    {
        /* do something when succeeded */
    }),
    FError::CreateLambda([](int32 ErrorCode, FString ErrorMessage)
    {
        /* do something when failed */
    })
);
Then this function enables a player to purchase a premium pass.
- Unreal Engine
FAccelByteModelsOrderCreate OrderPass;
OrderTier.CurrencyCode = TEXT(“CurrencyCode”);
OrderTier.DiscountedPrice = 100;
OrderTier.Price = 100;
OrderTier.Quantity = 1;
OrderTier.ReturnUrl = TEXT("https://example.com");
OrderTier.ItemId = TEXT(“ItemId”);
OrderTier.Region = "US";
OrderTier.Language = "en";

FRegistry::Order.CreateNewOrder(
    OrderPass,
    THandler<FAccelByteModelsOrderInfo>::CreateLambda([&](const FAccelByteModelsOrderInfo& Result)
    {
        /* do something when succeed */
    }),
    FError::CreateLambda([](int32 ErrorCode, FString ErrorMessage)
    {
        /* do something when failed */
    })
);
Claim a Reward
If a season wasn't configured to grant players earned rewards automatically, the game client needs to claim the player's reward manually. All rewards will be processed by the Fulfillment service.
- Unreal Engine
FString PassCode = TEXT(“PremiumPassCode”);
int32 TierIndex = 0;
FString RewardCode = TEXT(“RewardCode”);

FAccelByteModelsSeasonClaimRewardRequest ClaimRequest{
   PassCode, TierIndex, RewardCode
};
AccelByte::FRegistry::SeasonPass.ClaimRewards(
     ClaimRequest,
     THandler<FAccelByteModelsSeasonClaimRewardResponse>::CreateLambda(
     [&](const FAccelByteModelsSeasonClaimRewardResponse& Result)
    {
        /* do something when succeed*/
    }),
    FError::CreateLambda([](int32 ErrorCode, FString ErrorMessage)
    {
        /* do something when failed */
    })
);
Claim All Rewards
If a player has multiple rewards available to claim, they can be claimed all at once by the game client.
- Unreal Engine
AccelByte::FRegistry::SeasonPass.BulkClaimRewards(
     THandler<FAccelByteModelsSeasonClaimRewardResponse>::CreateLambda(
     [&](const FAccelByteModelsSeasonClaimRewardResponse& Result)
    {
        /* do something when succeed*/
    }),
    FError::CreateLambda([](int32 ErrorCode, FString ErrorMessage)
    {
        /* do something when failed */
    })
);
Related Concepts
- Using Season Pass requires you to create items, or use existing items you've already created. For more information about items and how to create them, see our Cloud E-commerce documentation.
- Season Pass is just one way to reward players for their engagement. For more information about rewards, see our Cloud Rewards documentation.