Roles
Overview
Roles are used to allow central management of user permissions as well as define whether a user can access the Admin Portal. A role is an association between a list of permissions and a list of users. As permissions cannot be directly defined on a user account, roles provide the mechanism for assigning permissions to a user. When a user signs into the platform, the user inherits the permissions granted by all roles assigned to that user.
Roles can be configured to allow access to all namespaces, which means that any user assigned to that role will have the permissions granted by that role in any namespace the user signs into. If a role is not configured to allow access to all namespaces, you must choose which namespaces the role will be applied in for each user that is assigned to the role.
AccelByte Cloud's platform includes several Default Roles that have already been granted permissions and are ready to use. You can also create a new role with a set of permissions to match users' needs in your organization. That way, you can avoid users having access they don't need.
INFO
Role ID is a universally unique identifier (UUID) that is automatically generated when the role is created and can never be changed.
Prerequisites
Permissions
Permissions are used to grant access to specific resources within our services. Make sure your account has the following permissions before you attempt to manage roles in the Admin Portal. For a full list of permissions that impact roles management, see the IAM tab of the permissions reference.
| Usage | Resource | Action |
|---|---|---|
| Create Role | ADMIN:ROLE | Create |
| Add Role Permissions | ADMIN:ROLE | Update |
| Invite User Admin | ADMIN:NAMESPACE:{namespace}:USER:INVITE | Create |
| Admin Add User's Role | ADMIN:NAMESPACE:{namespace}:ROLE:USER:* | Update |
Permissions work slightly differently depending on whether they are assigned to IAM Clients or Roles assigned to users. For more information, read the Authentication and Authorization documentation.
Default Roles
When a new publisher environment is created, it will contain the following roles by default. Each role contains its own permissions. Here's the list of default roles and their permissions:
| Role | Admin | Description | Permissions |
|---|---|---|---|
| User | No | A user that normally signs into the backend through the game, i.e. a player. The user role is automatically applied to user accounts when they are created, for the purpose of giving players the permissions they need to access resources within your game. | Permissions |
| View Only | Yes | Read-only admin access to the Admin Portal. Has access to all namespaces. | Permissions |
| Game Admin | Yes | Full control, admin access to the Admin Portal. Has access to specific game namespaces only. | Permissions |
| Super Admin | Yes | Full control, admin access to the Admin Portal. Has access to all namespaces. | Permissions |
Manage Roles in the Admin Portal
Create a New Role
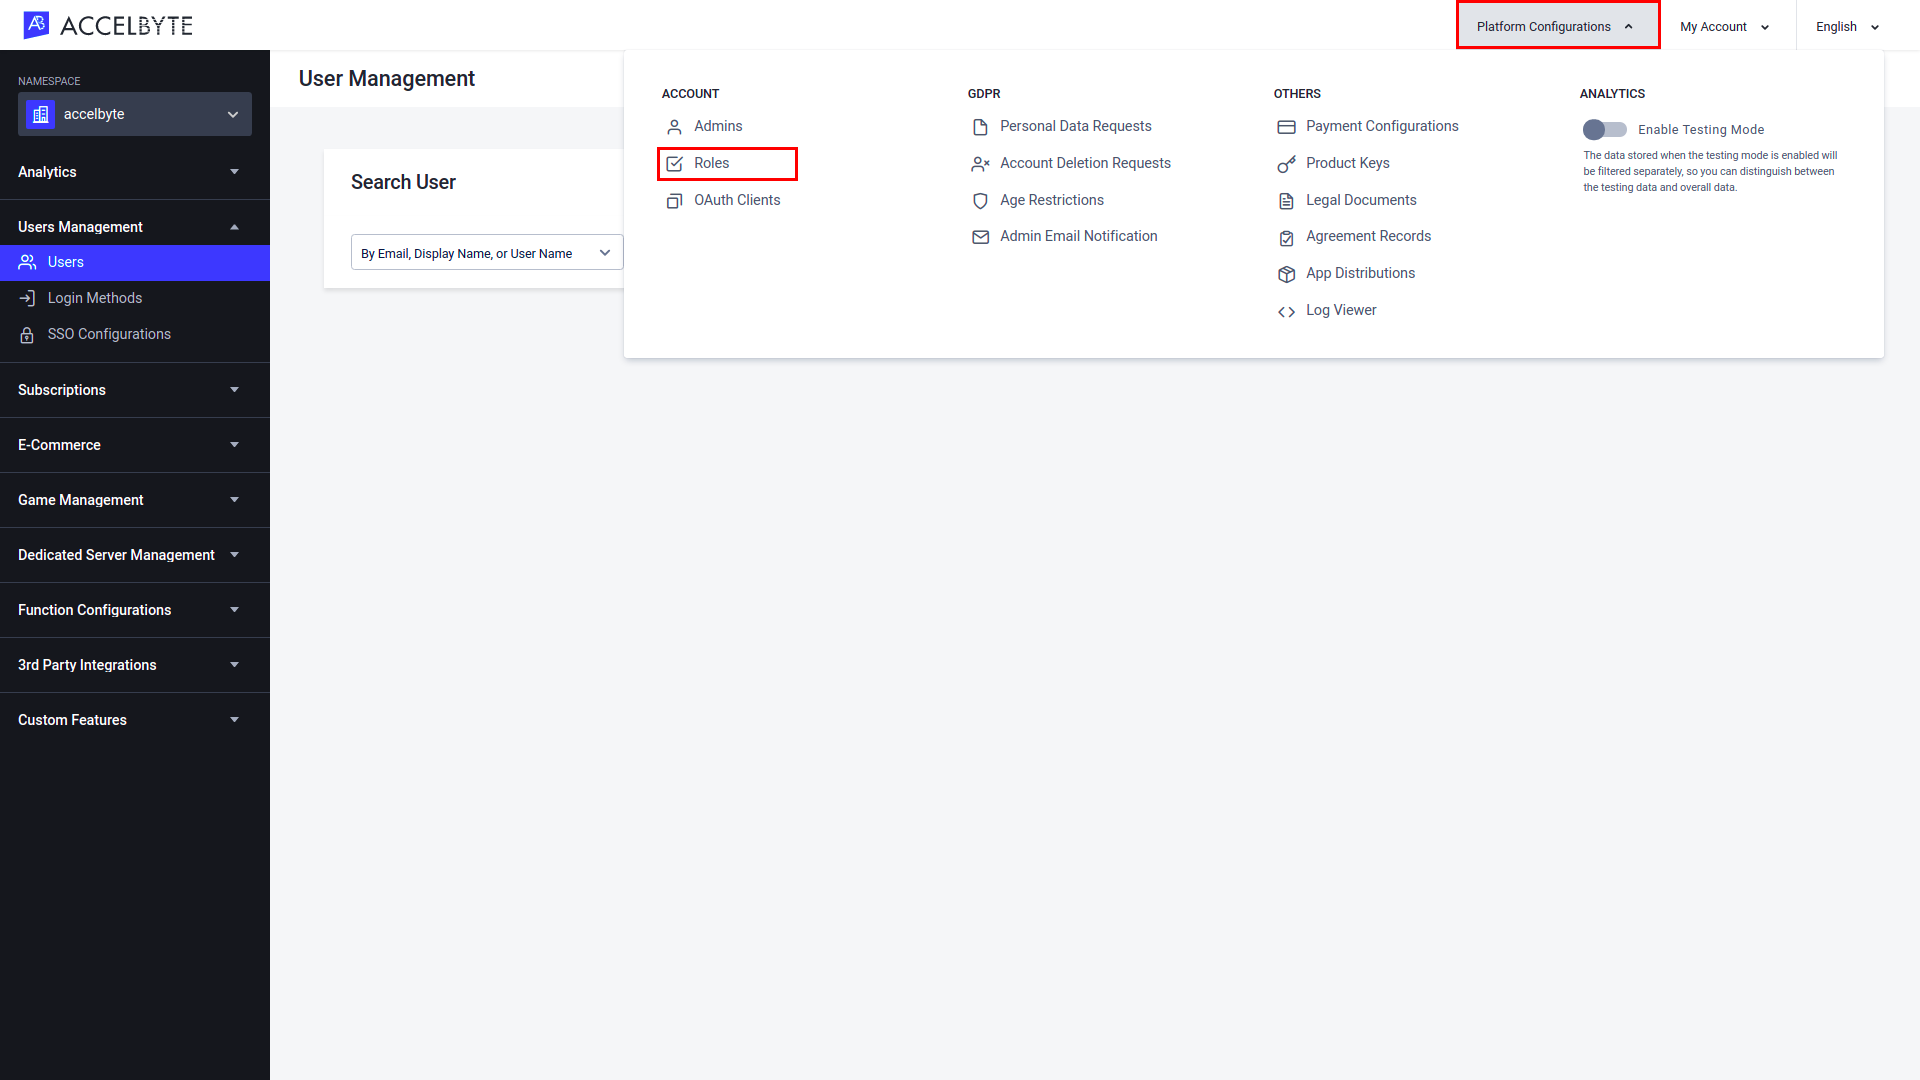
In the Admin Portal, open the Platform Configurations dropdown in the top-right corner of the page and select the Roles menu.
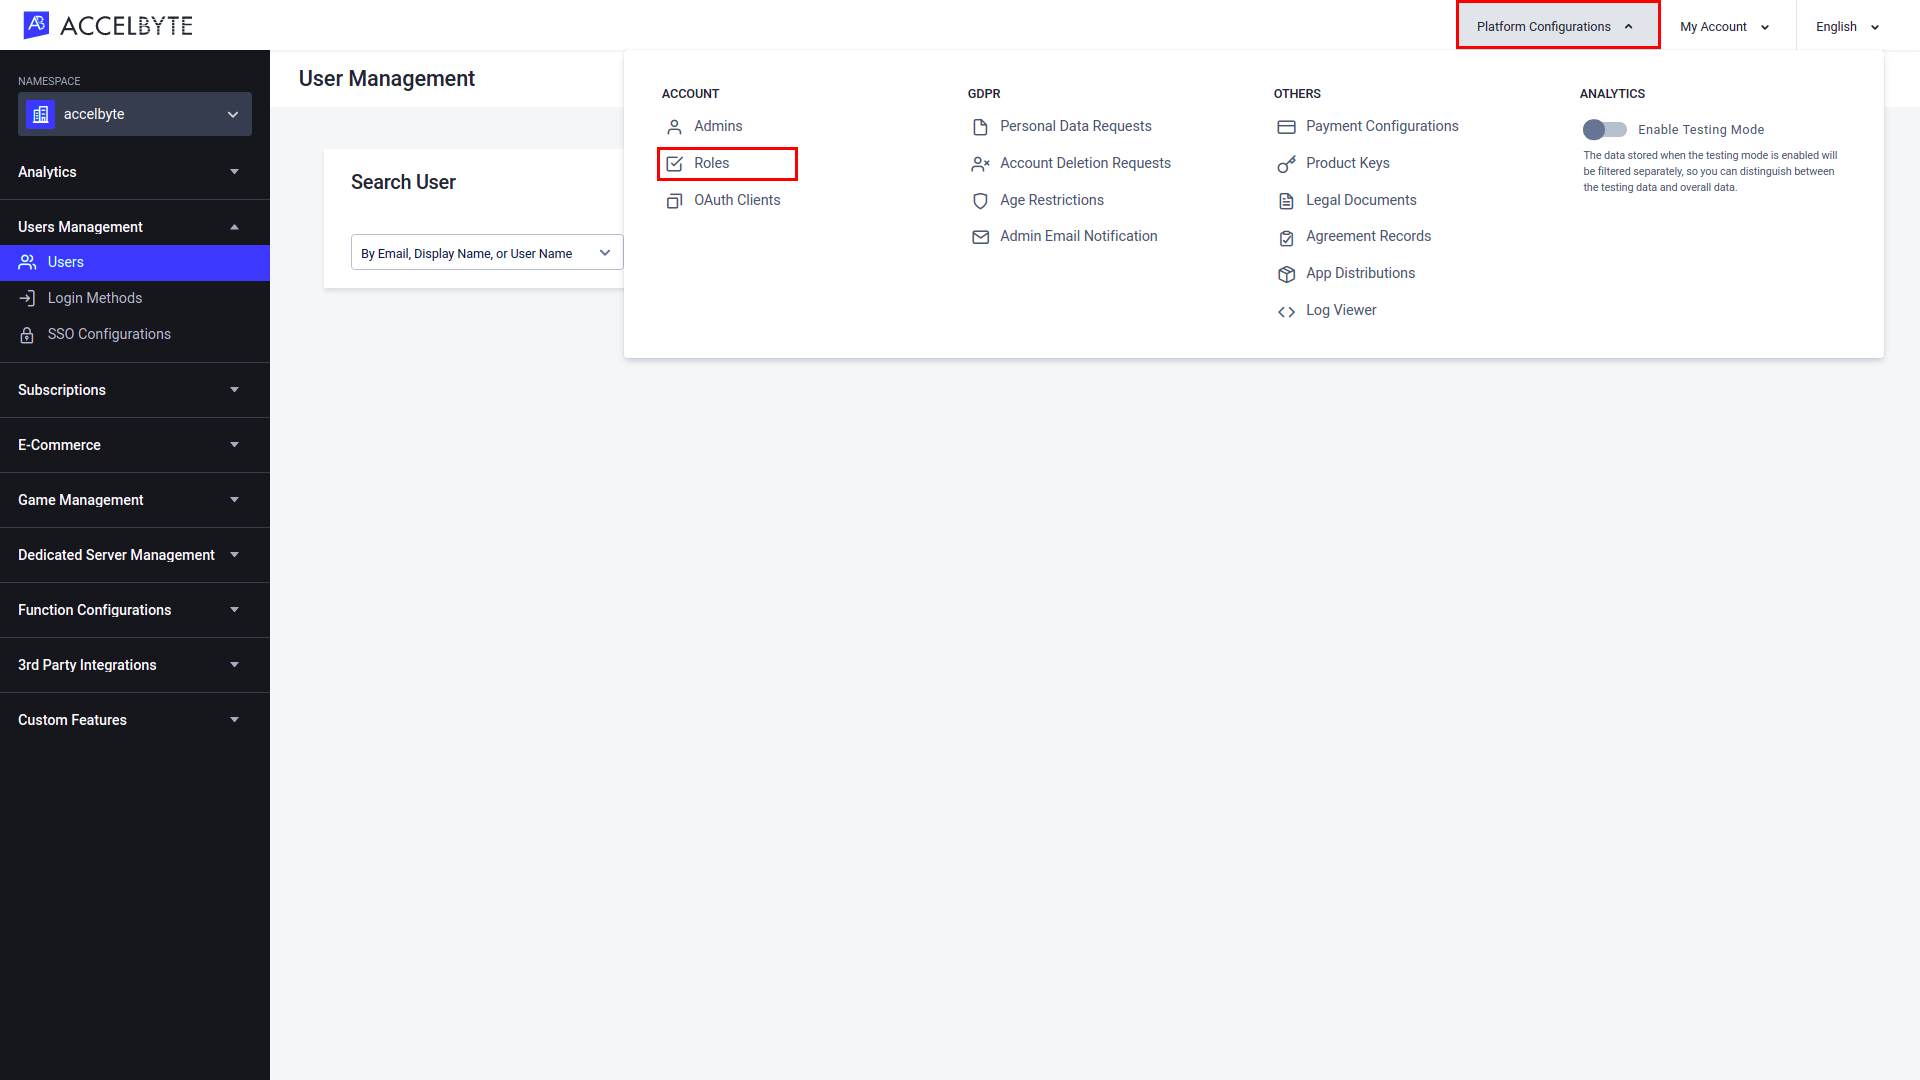
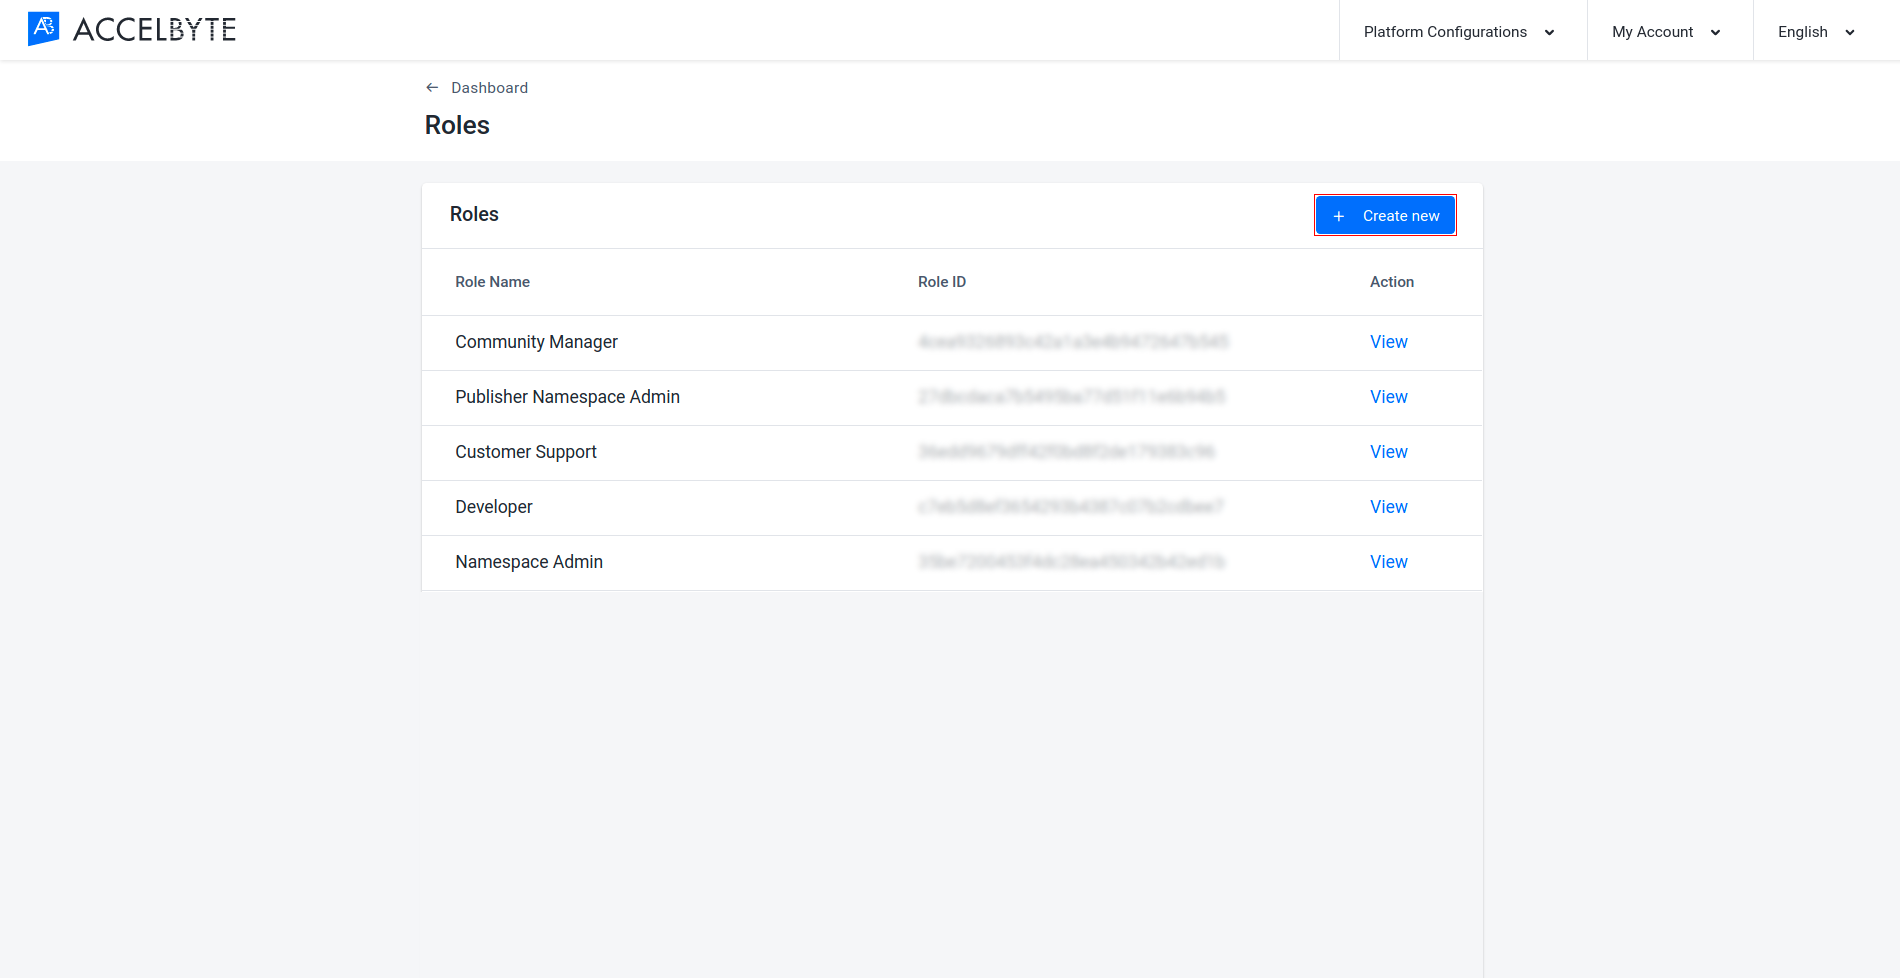
On the Roles page, click the Create New button.
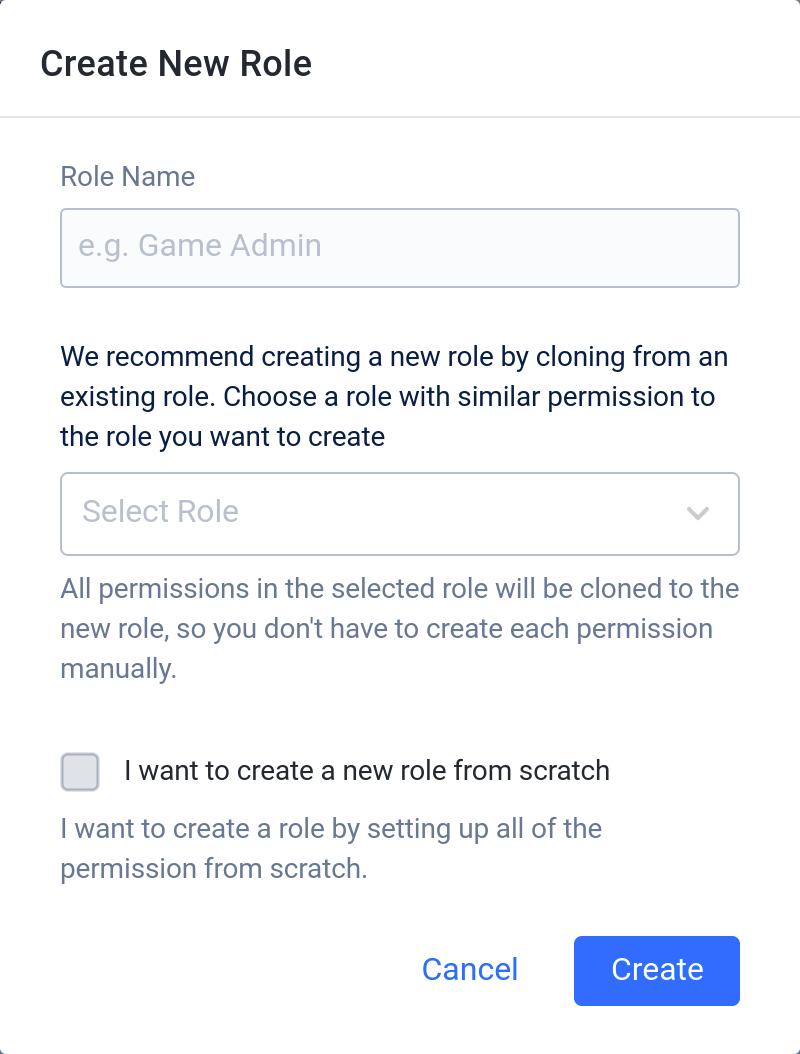
By default, when you create a new role, you will be prompted to select an existing role to clone. This enables you to quickly create new roles with all the permissions from the cloned role carried over. If you don't want to clone a role and would prefer to select permissions separately, select the I want to create a new role from scratch checkbox.
To clone an existing role, fill in the Create New Role fields with the following information:
Enter a name for the role in the Role Name field.
Select the existing role that you want to clone from the Select Role dropdown.
To create a new role without cloning, select the I want to create a new role from scratch checkbox and fill in the fields with the following information:
Enter a name for the role in the Role Name field.
Select the Set as Admin Role checkbox if you want your role to have access to the Admin Portal.
Select the Set as Global Role checkbox if you want your role to be able to access all namespaces.
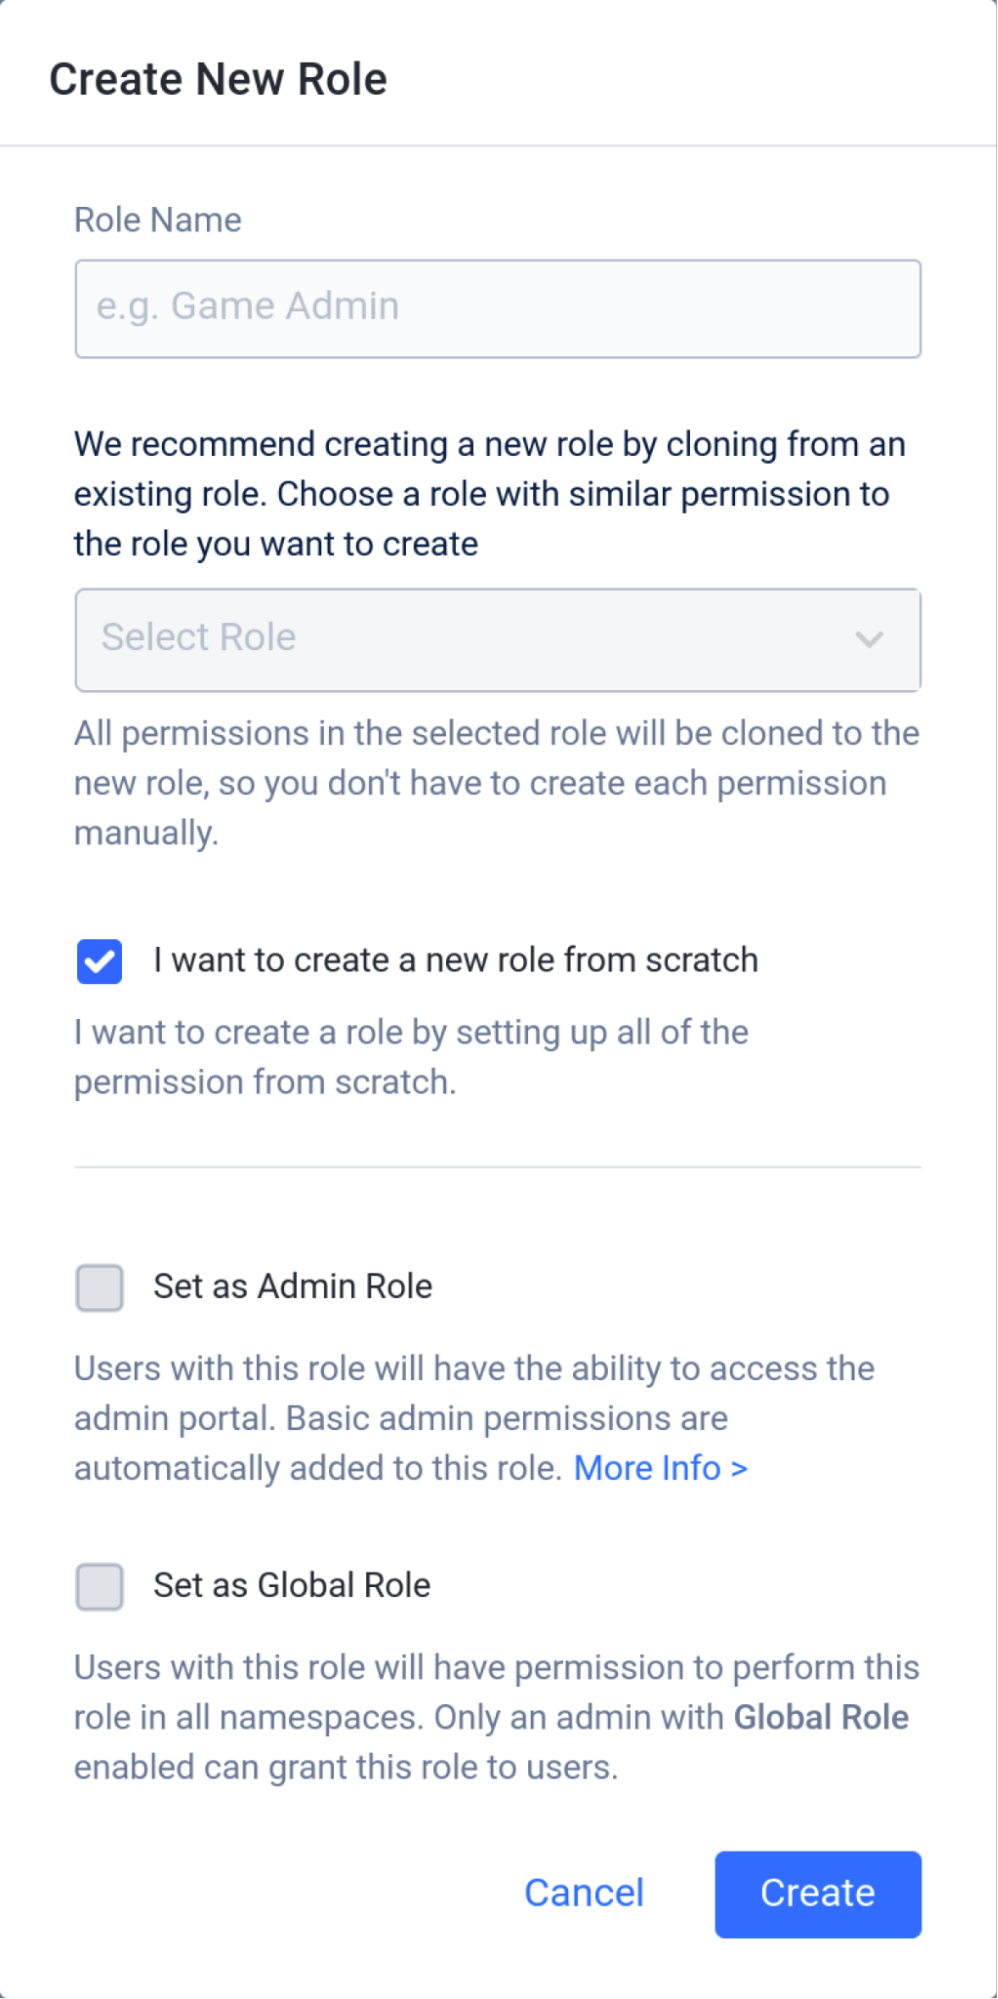
Once completed, click the Create button to create your new role.
Add Permissions to a Role
After you create a role, you can add permissions to the role by following the steps below.
In the Admin Portal, open the Platform Configurations dropdown in the top-right corner of the page and select the Roles menu.
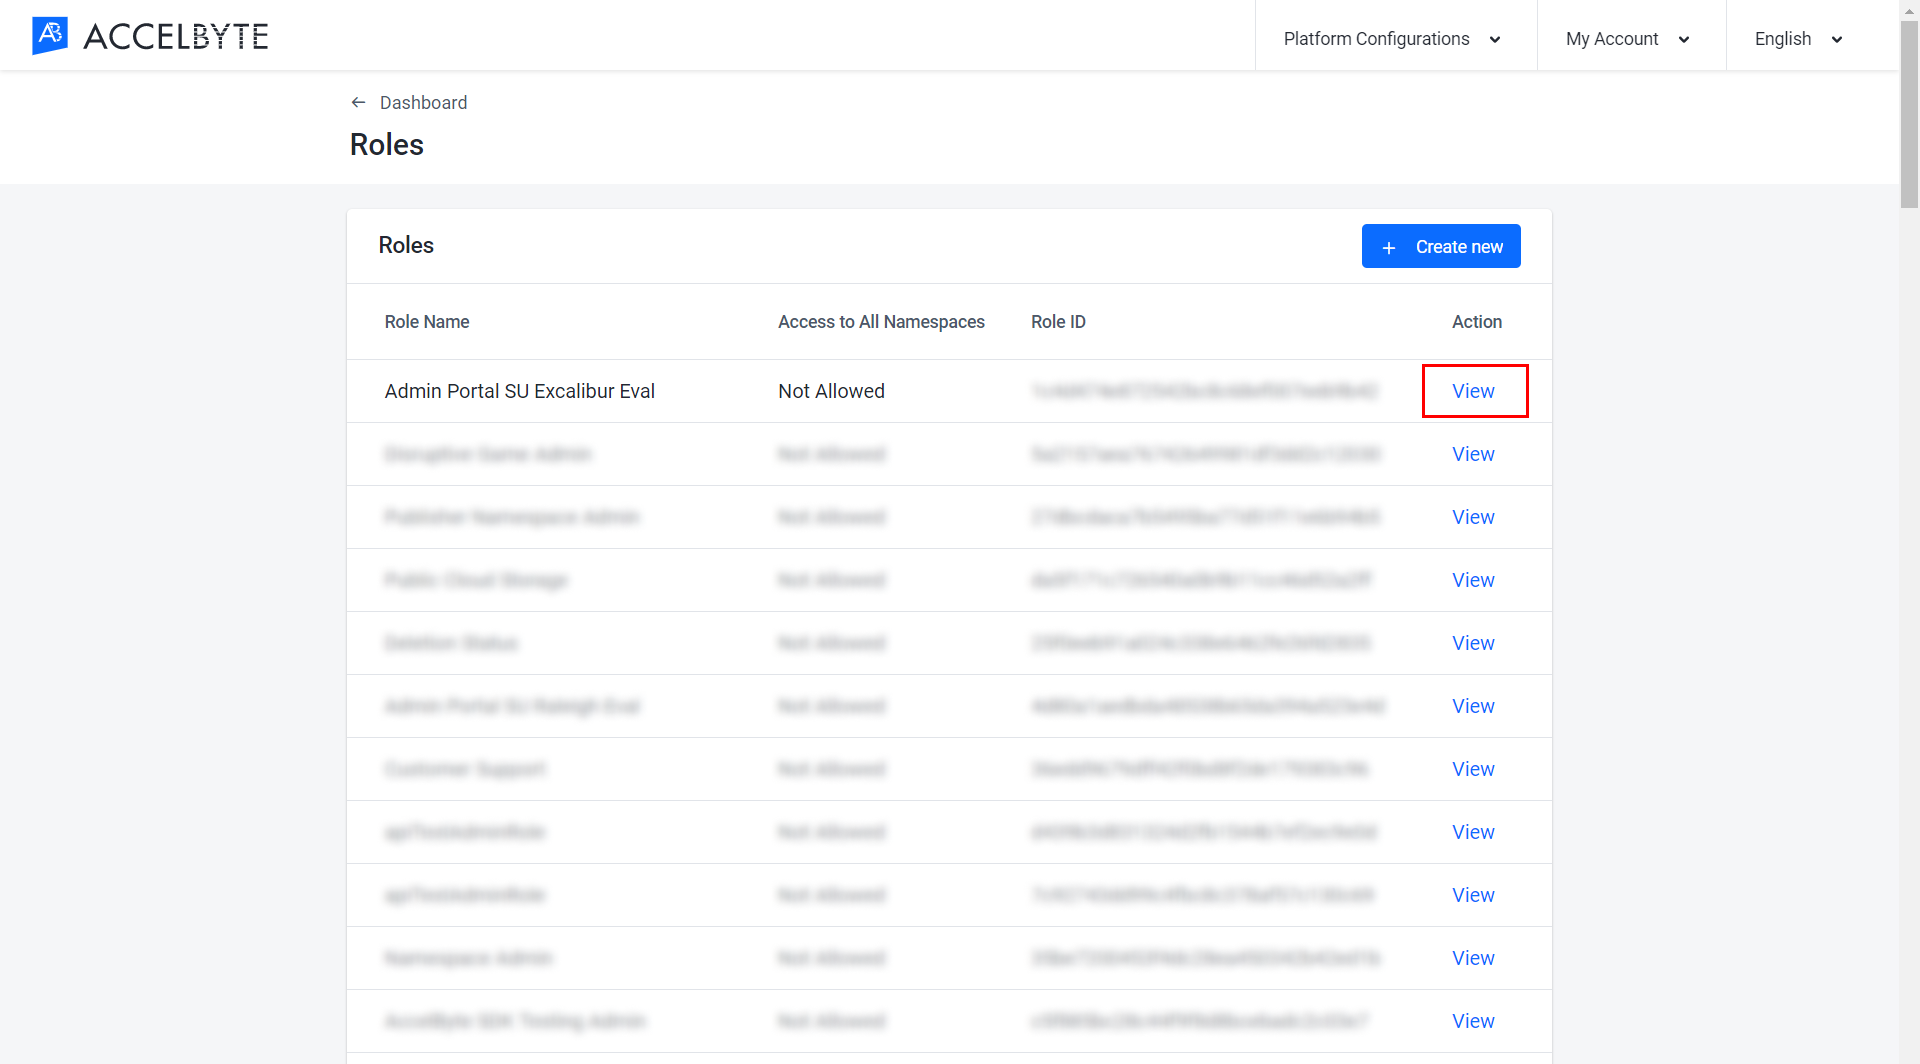
Find the role that you want to add permissions to and click View.
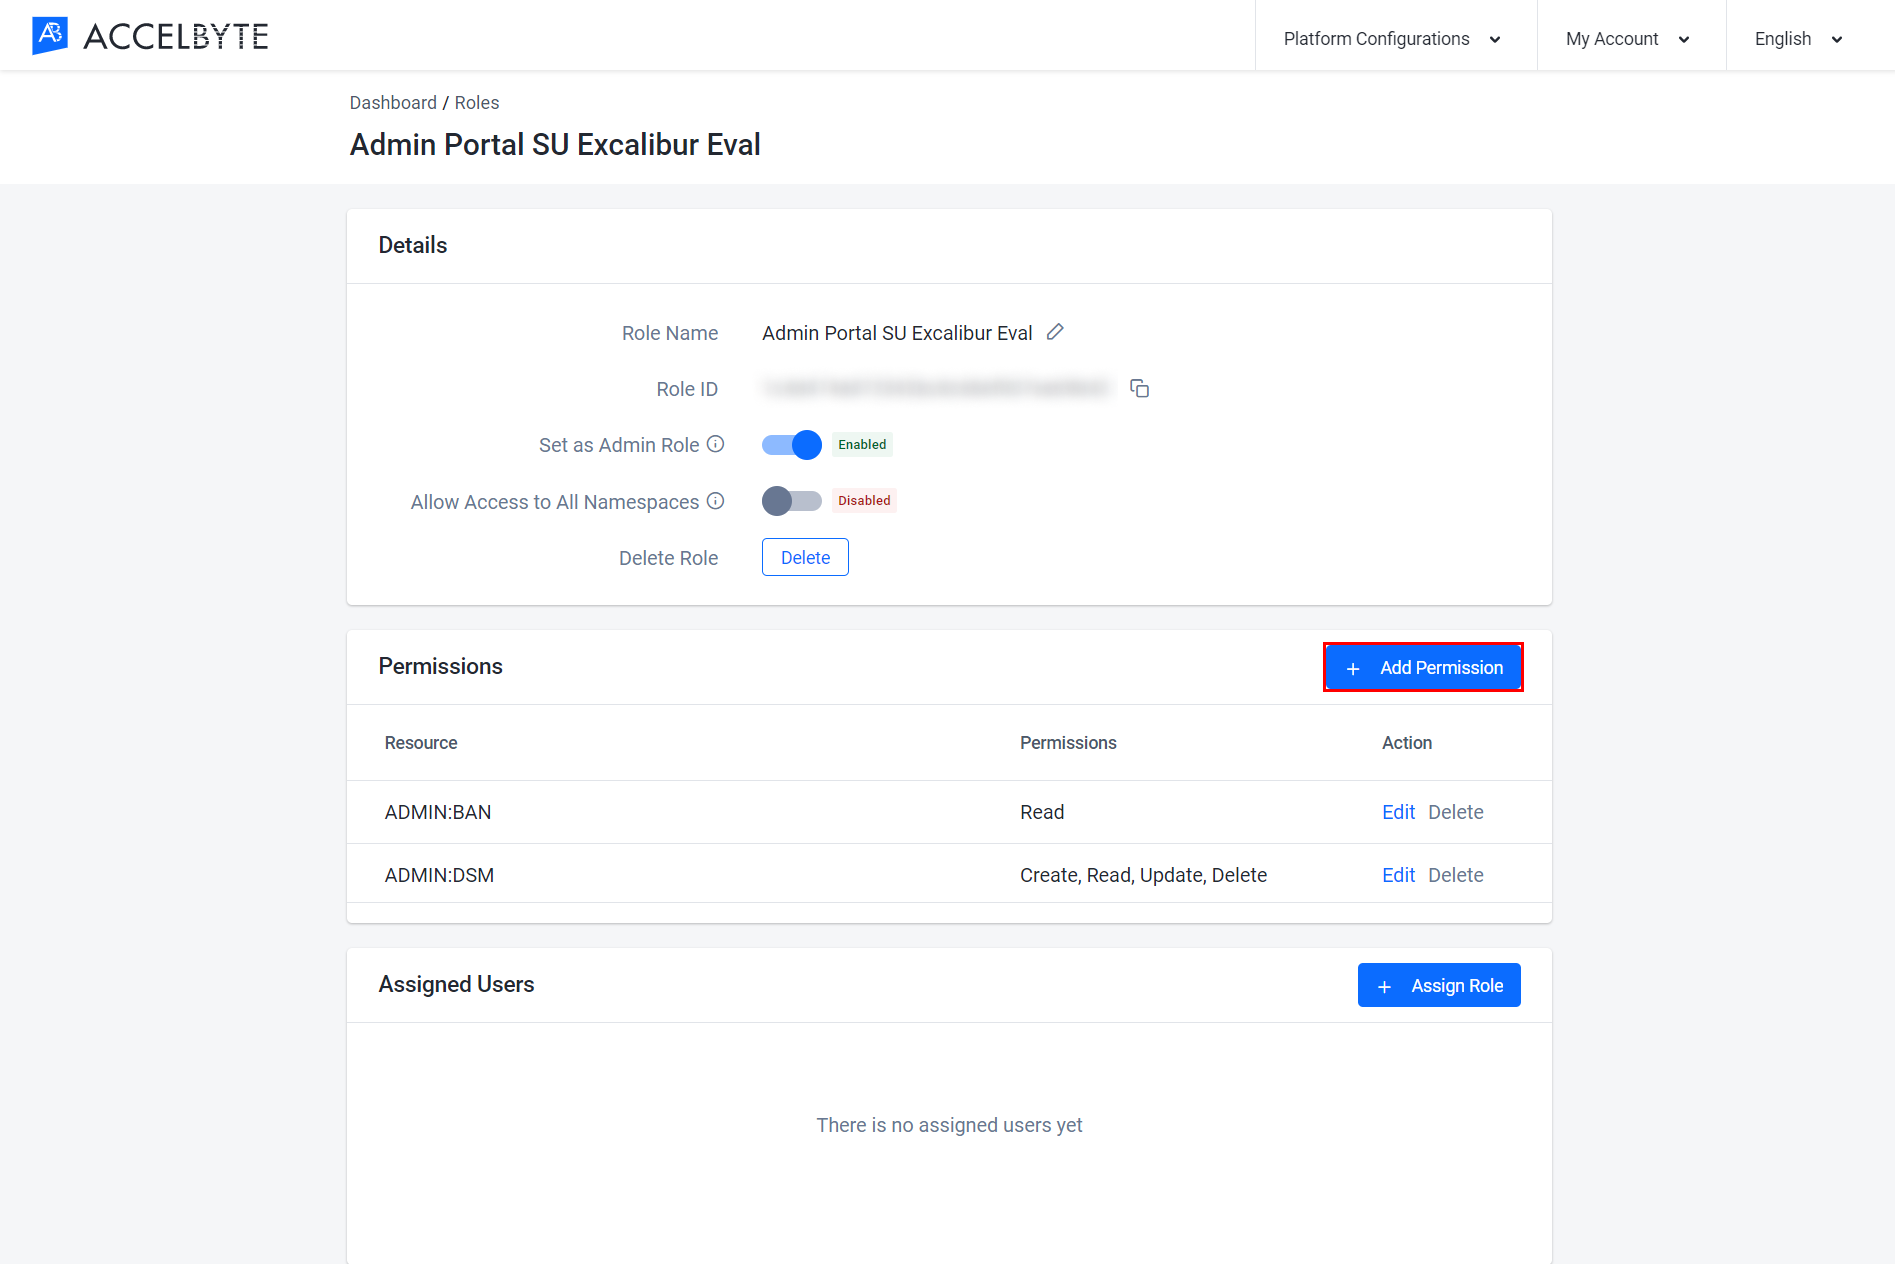
In the Permissions section of the Role page, click the Add Permission button.
The Add Role Permission will appear. Fill in the fields with the following information:
Enter a permission tag into the Resource field. A permission tag is a string containing multiple tokens that is used to grant access to specific resources. For more information, see Permissions in the AccelByte documentation or the Permisions Reference list.
Select the actions the permission requires in the Action field. These can be found in the Permisions Reference list.
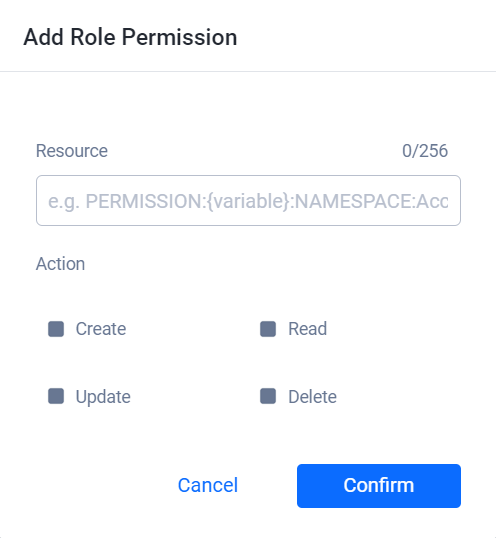
Once completed, click Confirm. The permission will be added to the role.
Assign a Role to a User
You can assign a role to the user from either the Users Management page or the Roles page in the Admin Portal.
Assign a Role from the Role Page
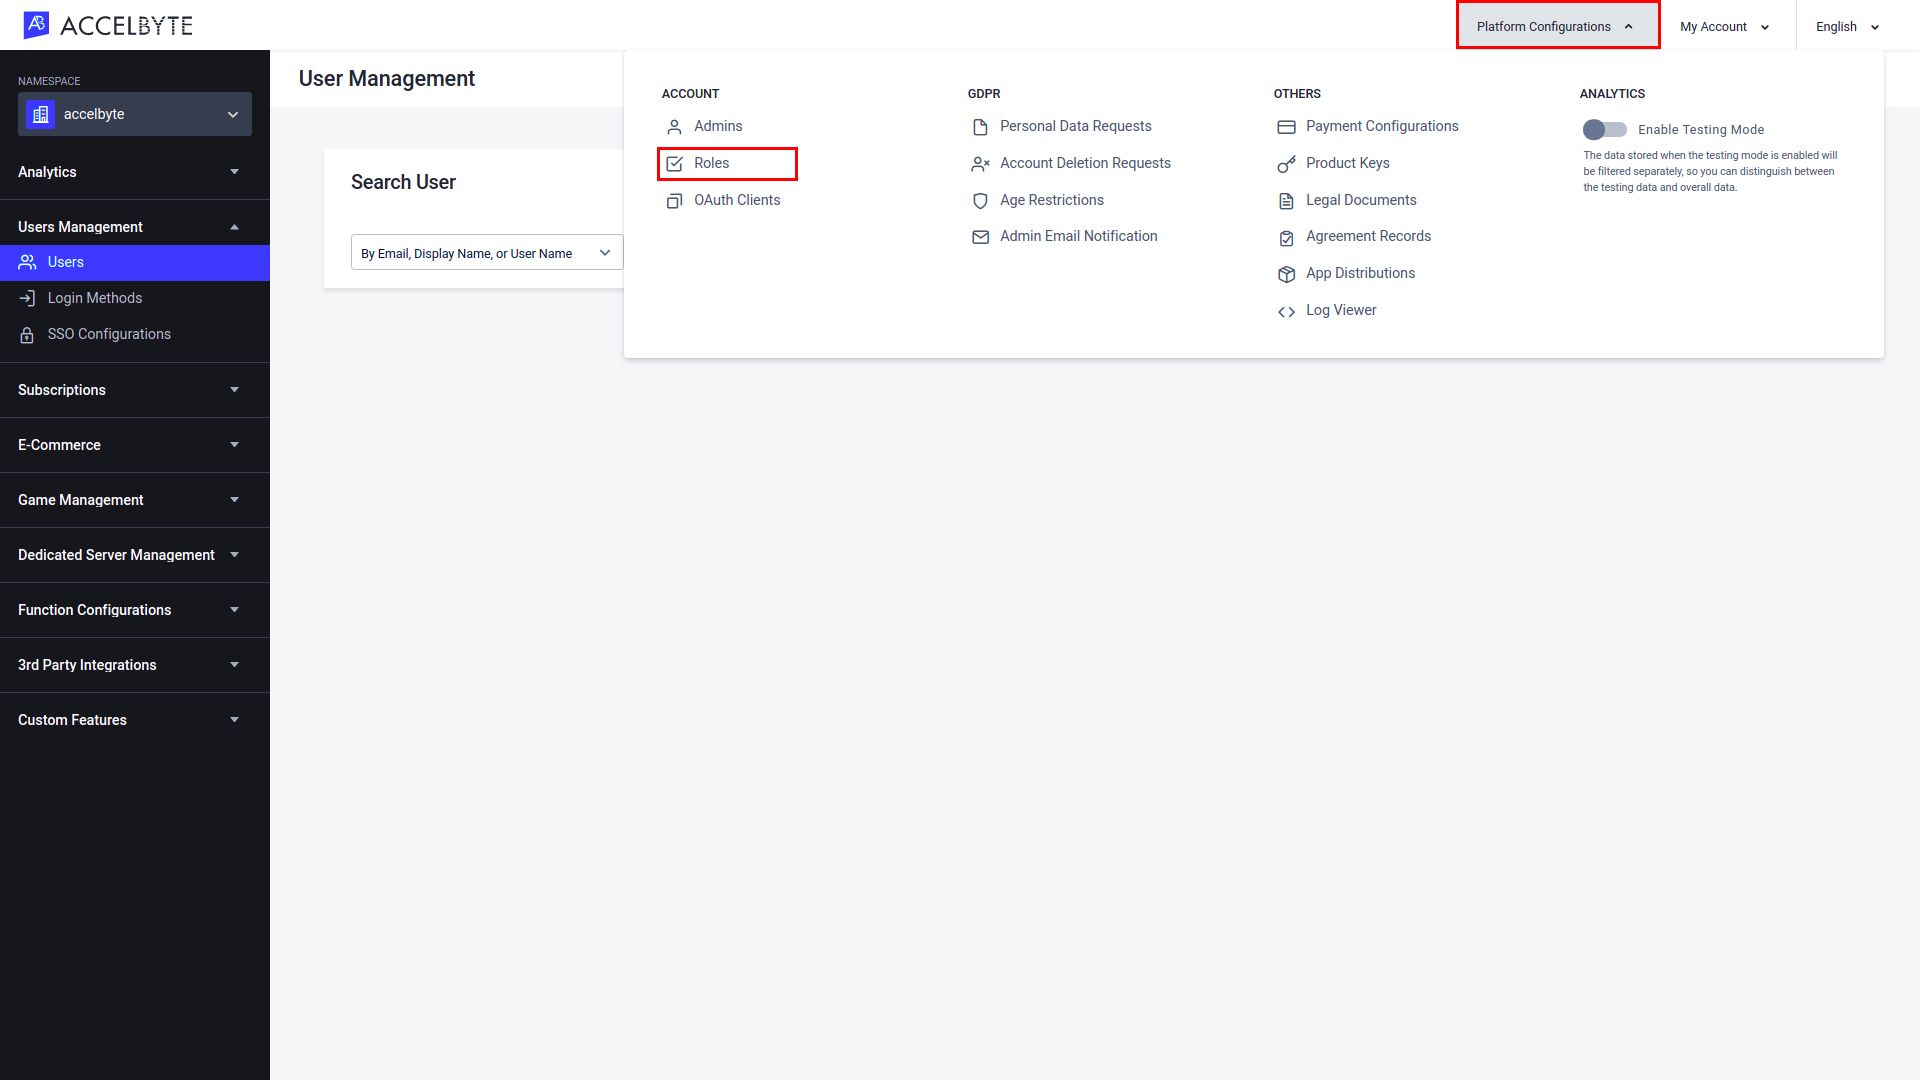
In the Admin Portal, open the Platform Configurations dropdown in the top-right corner of the page and select the Roles menu.
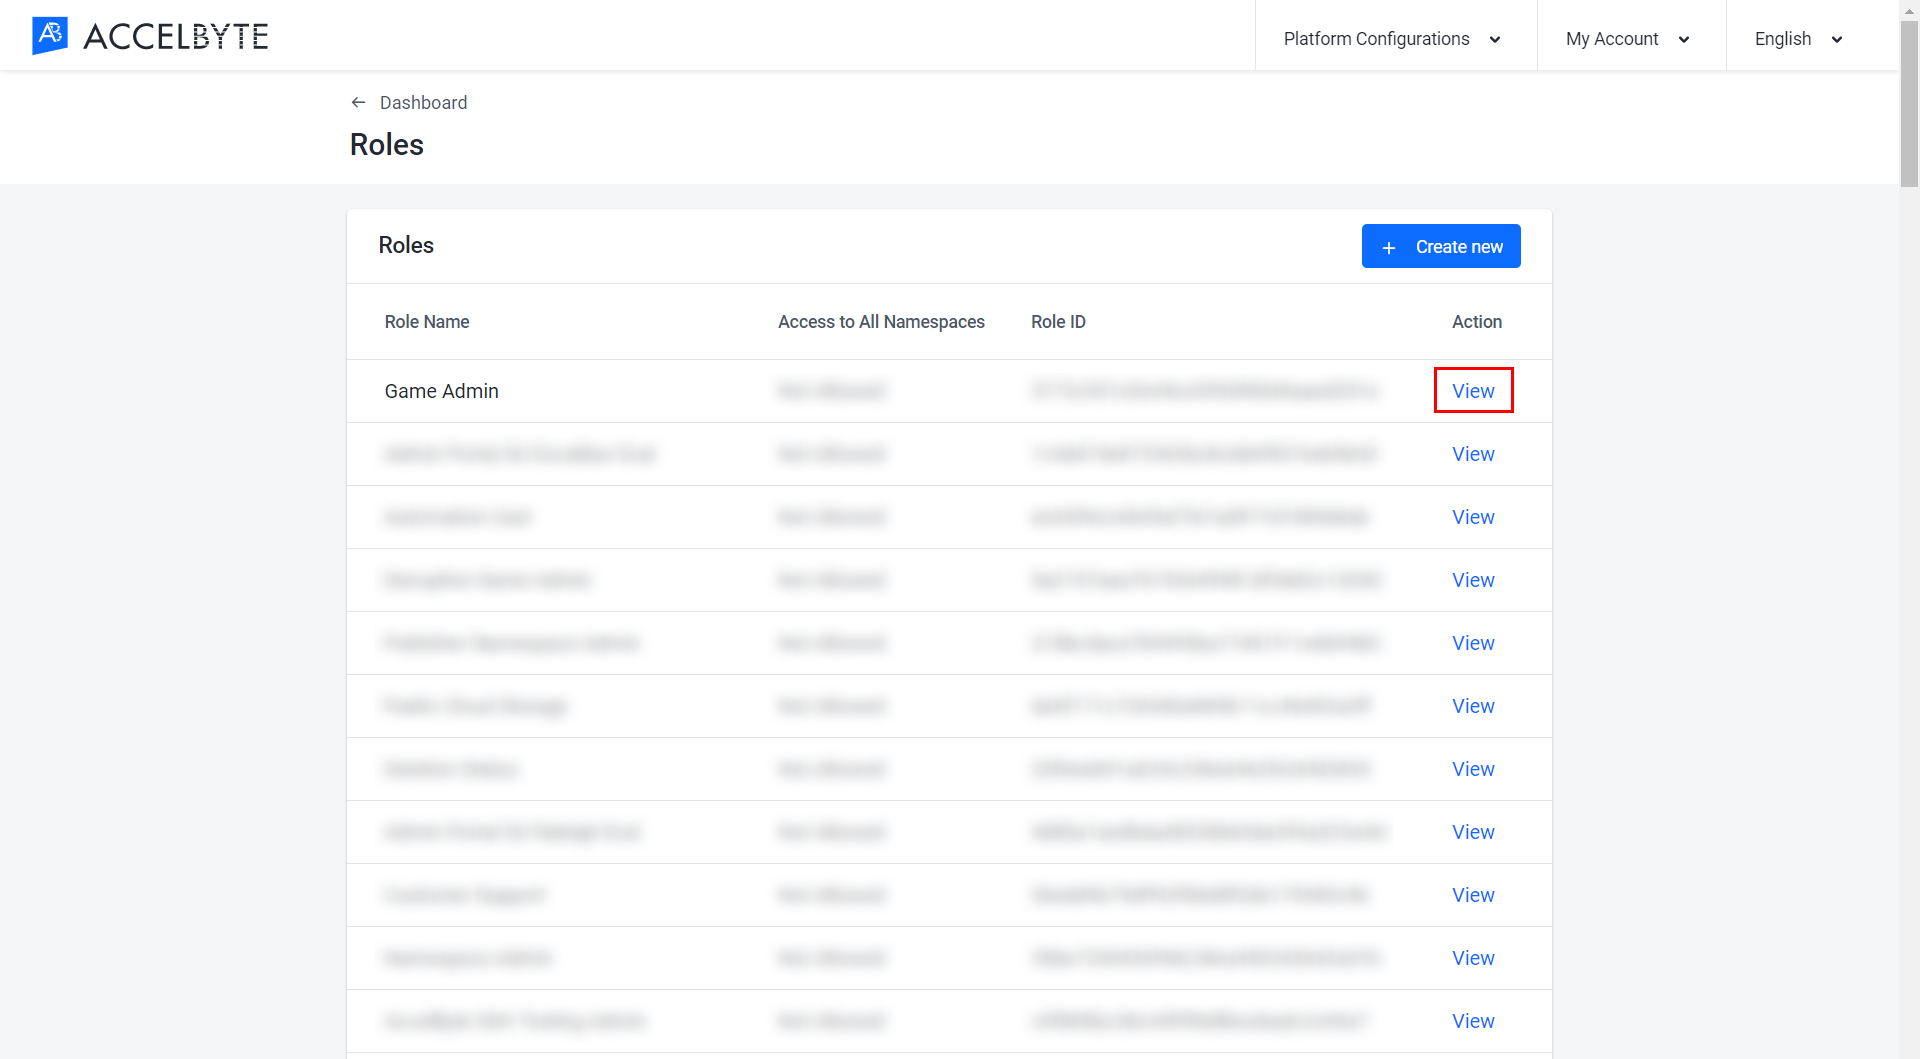
Click View next to the role that you want to assign users to.
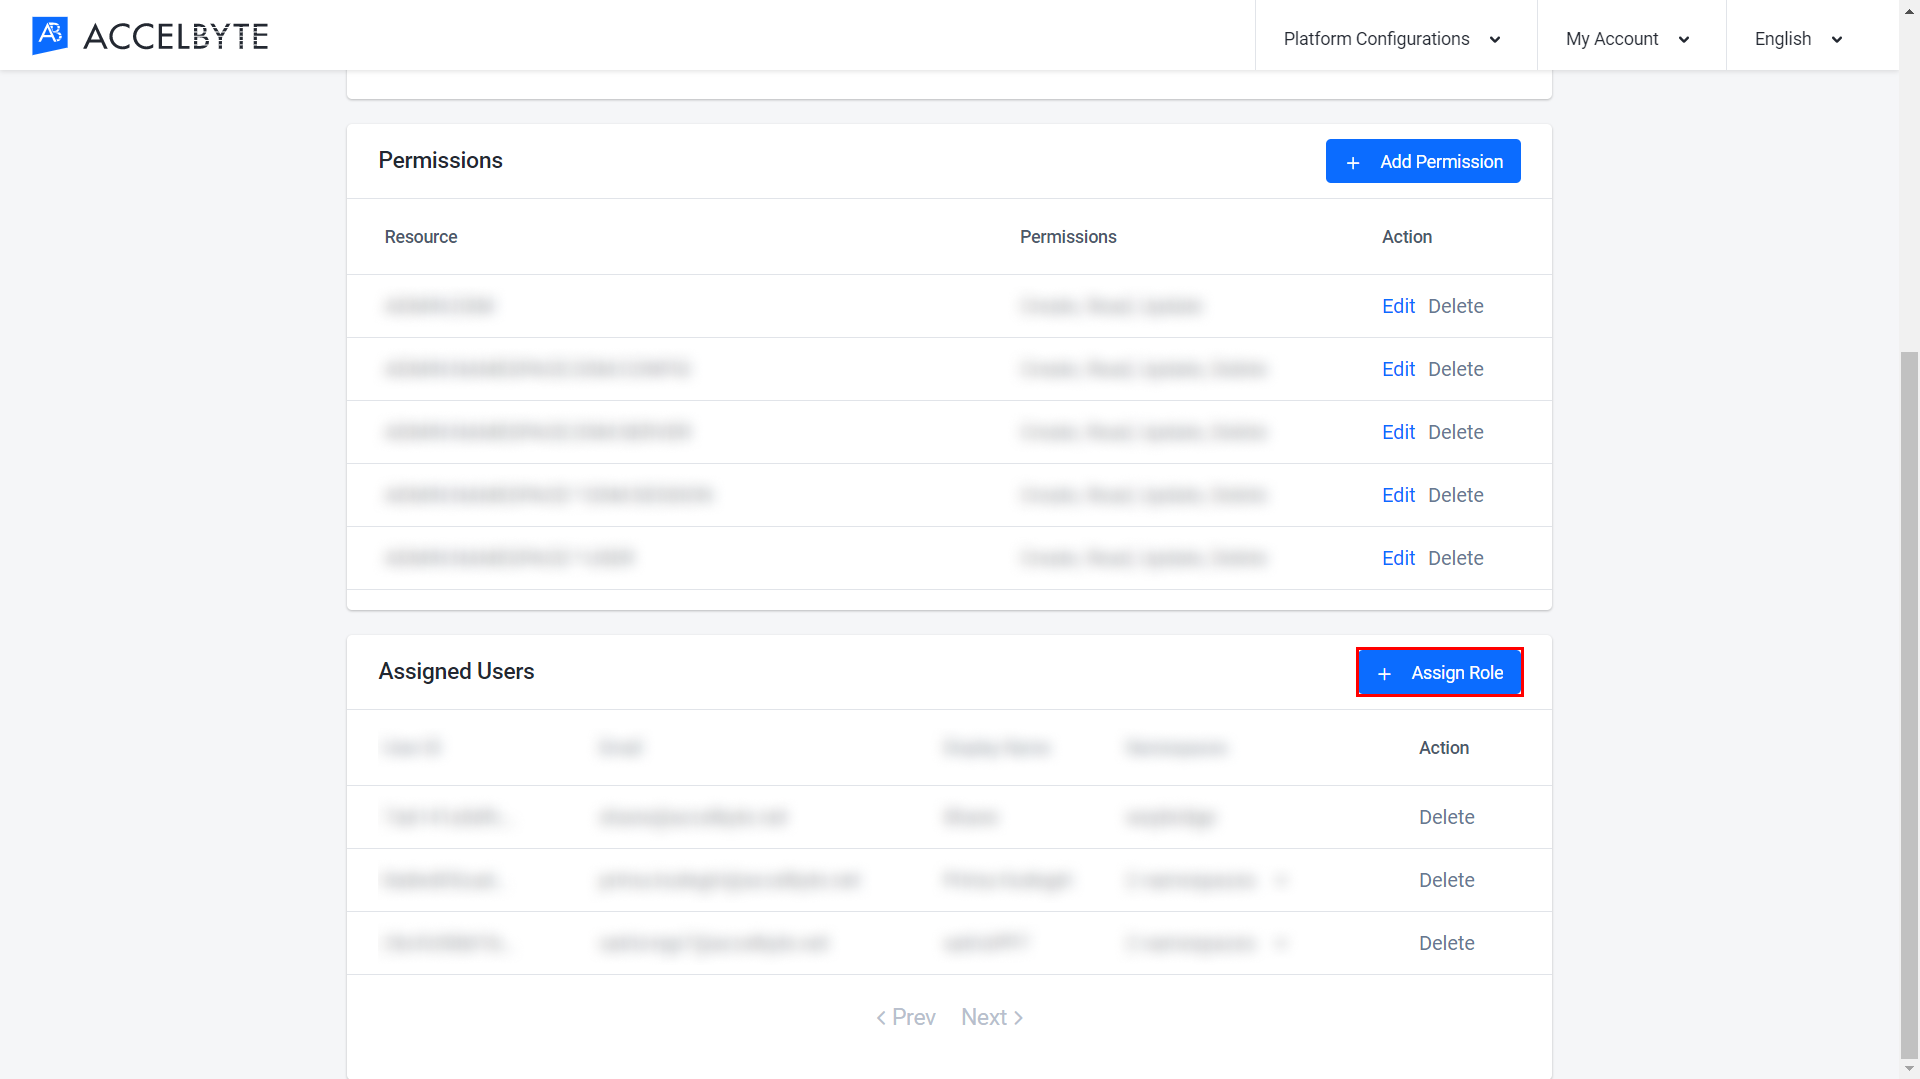
Click the Assign Role button in the Assigned Users section of the page.
The Assign User Role form appears. Fill in the fields with the following information to add the role to the selected user:
In the User ID or Email Address field, enter the user ID or email address of the user you want to assign to the role to.
If the role has not been configured to allow access to all namespaces, the Select Namespace field will appear, where you can choose one or more namespaces. These namespaces will be the only namespaces in which the user will be given this role. This allows you to create one role that can be used for multiple games.
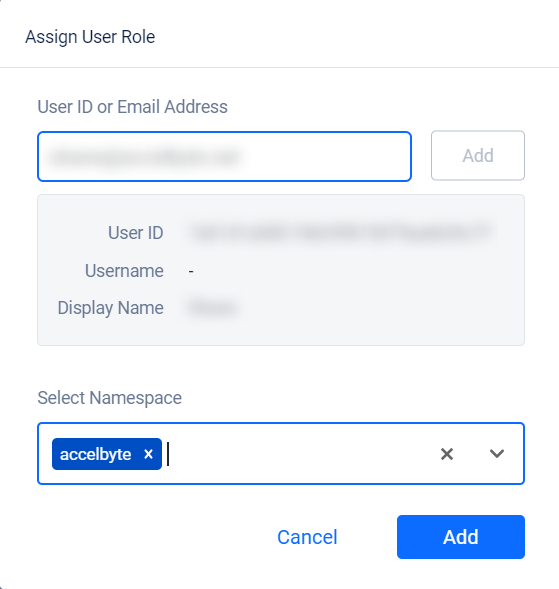
Once completed, click Add. The user will be assigned to the selected role.
Assign a Role from the User Management Page
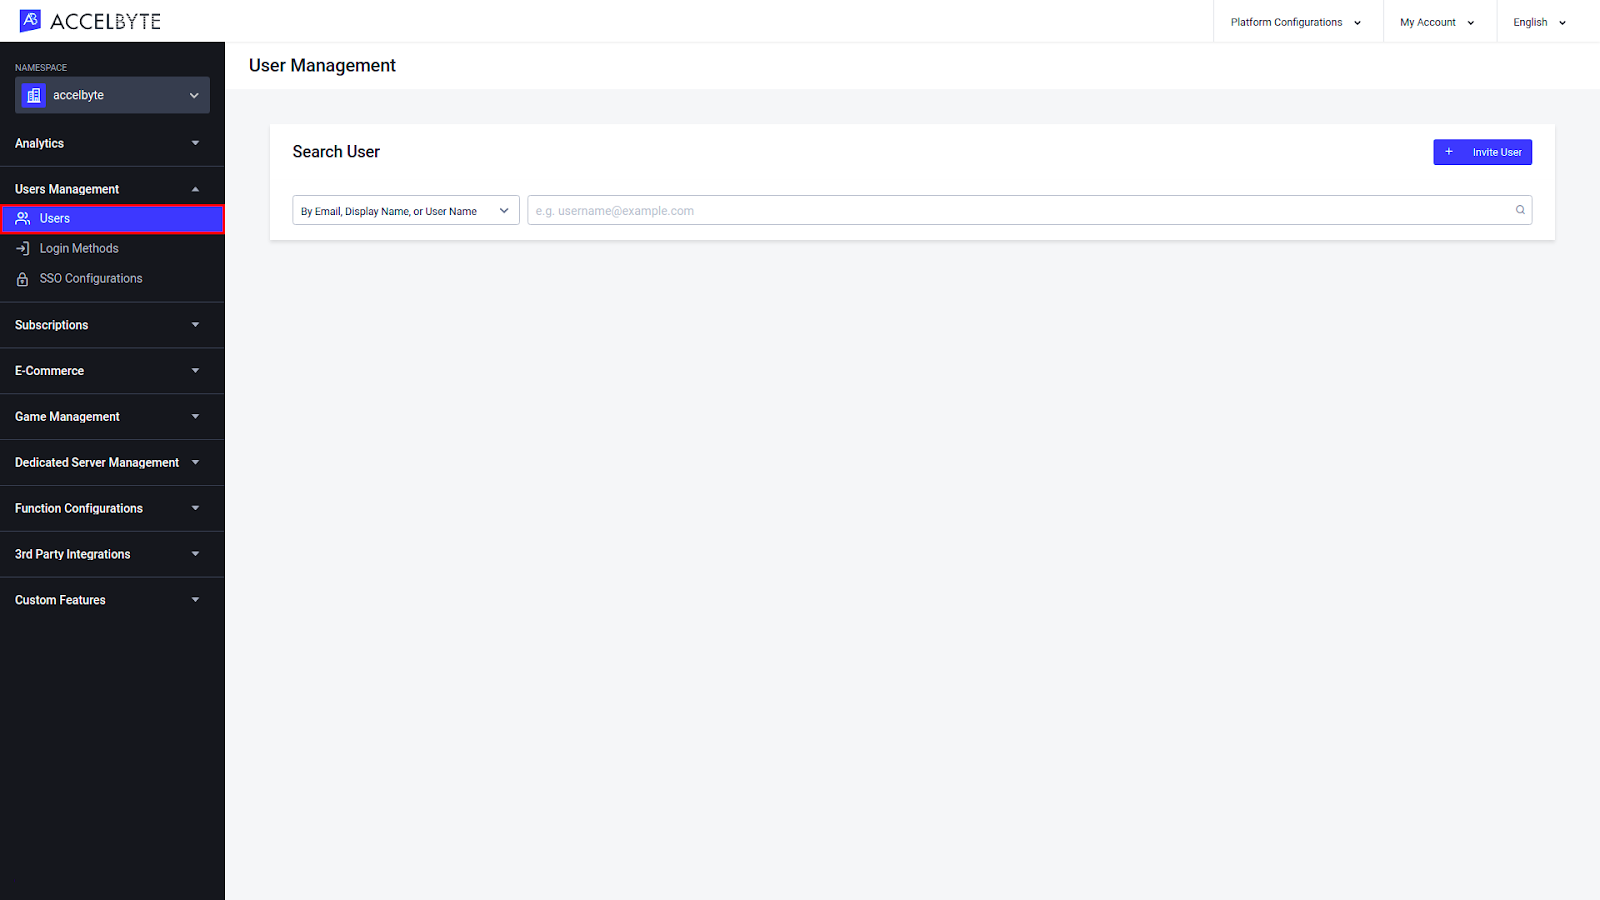
In the desired namespace of the Admin Portal, expand the Users Management section and click Users.
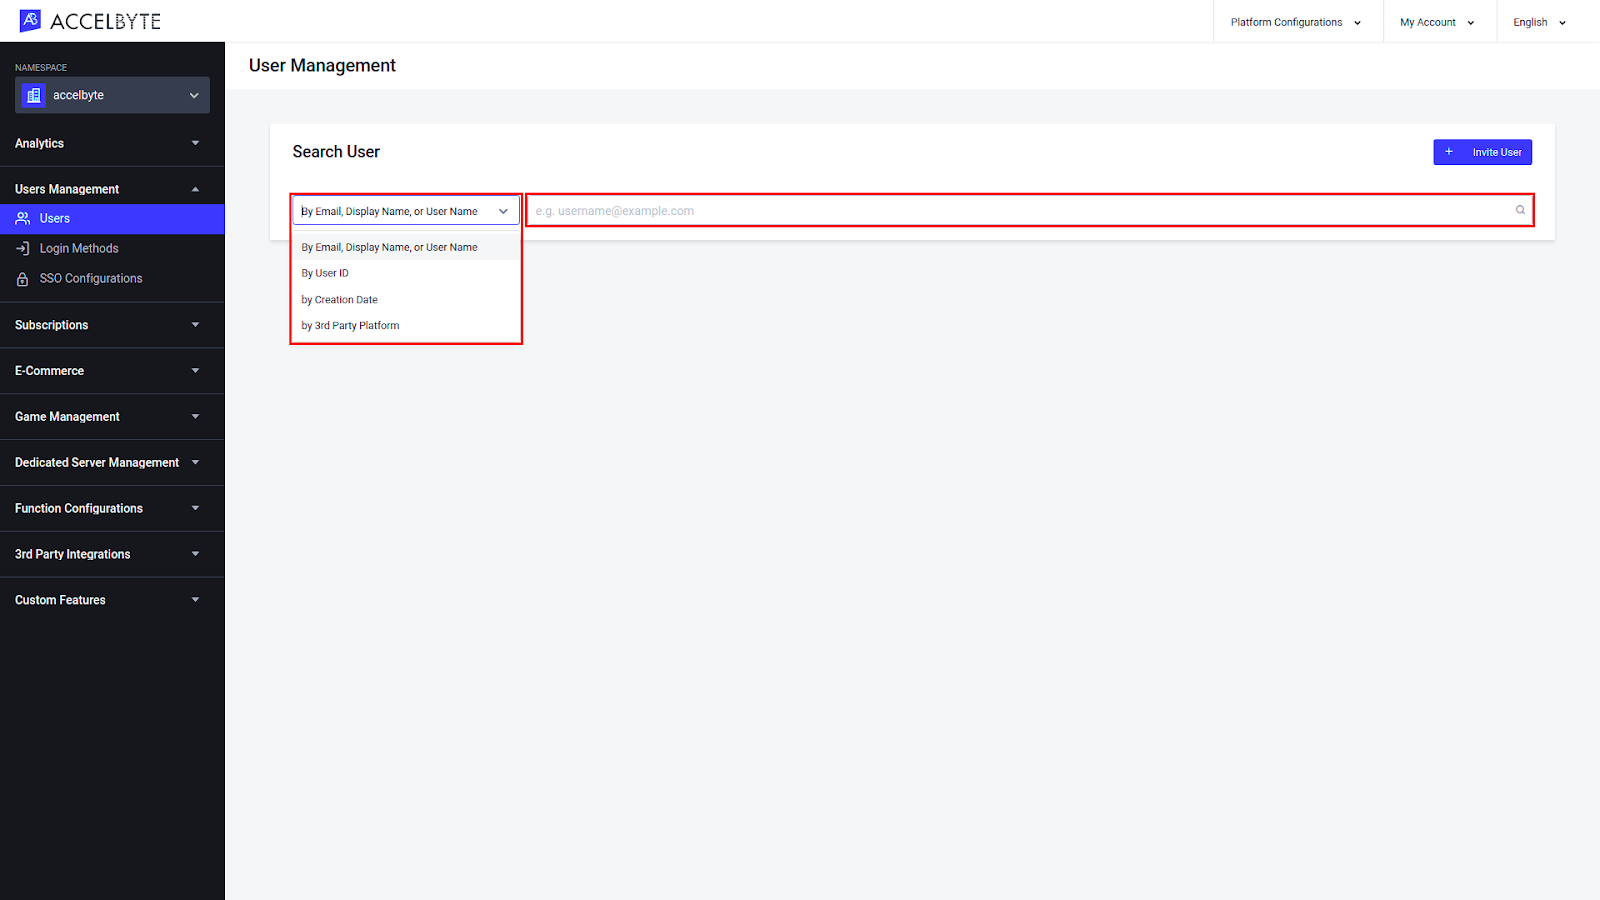
Search for the user account that you want to assign a role to using the credential for that user that you have on hand. For more information, see the Search for a User tutorial.
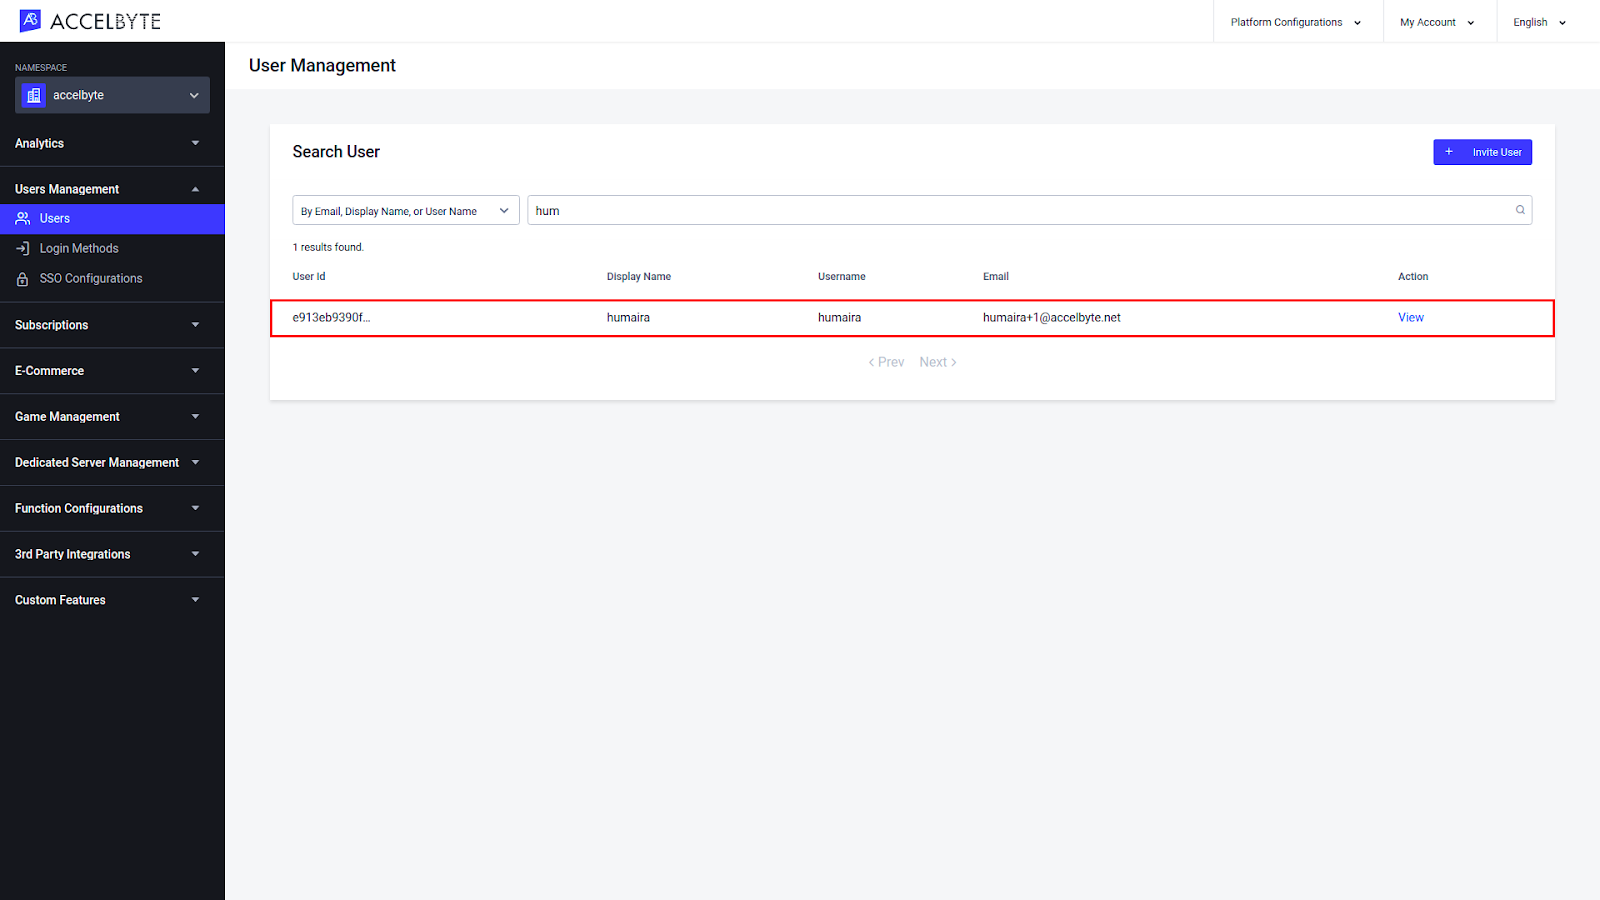
The results of your search will appear. Browse the list to find the account you're looking for and click View in the Action column of the account listing to open it.
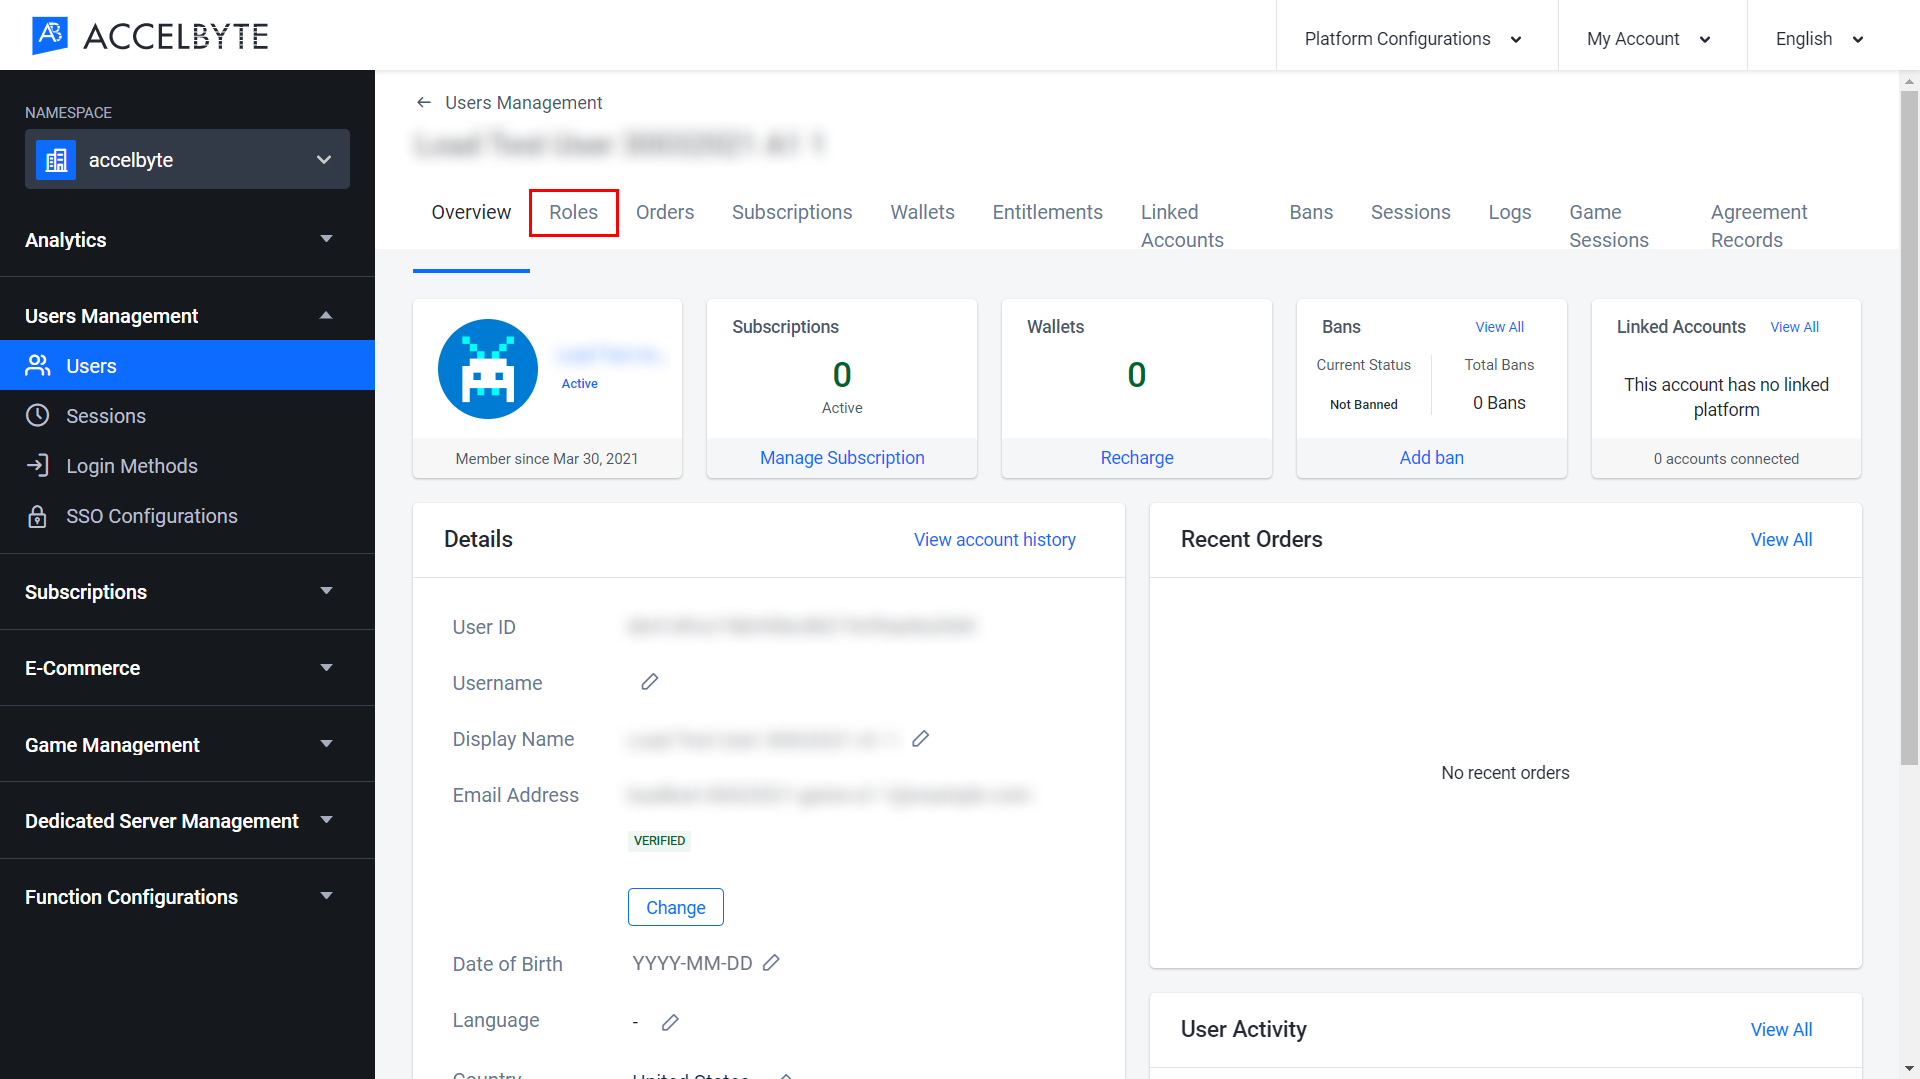
The User Overview will appear. From here, open the Roles tab from the ribbon at the top of the page.
On the Roles page, click the Add Role button.
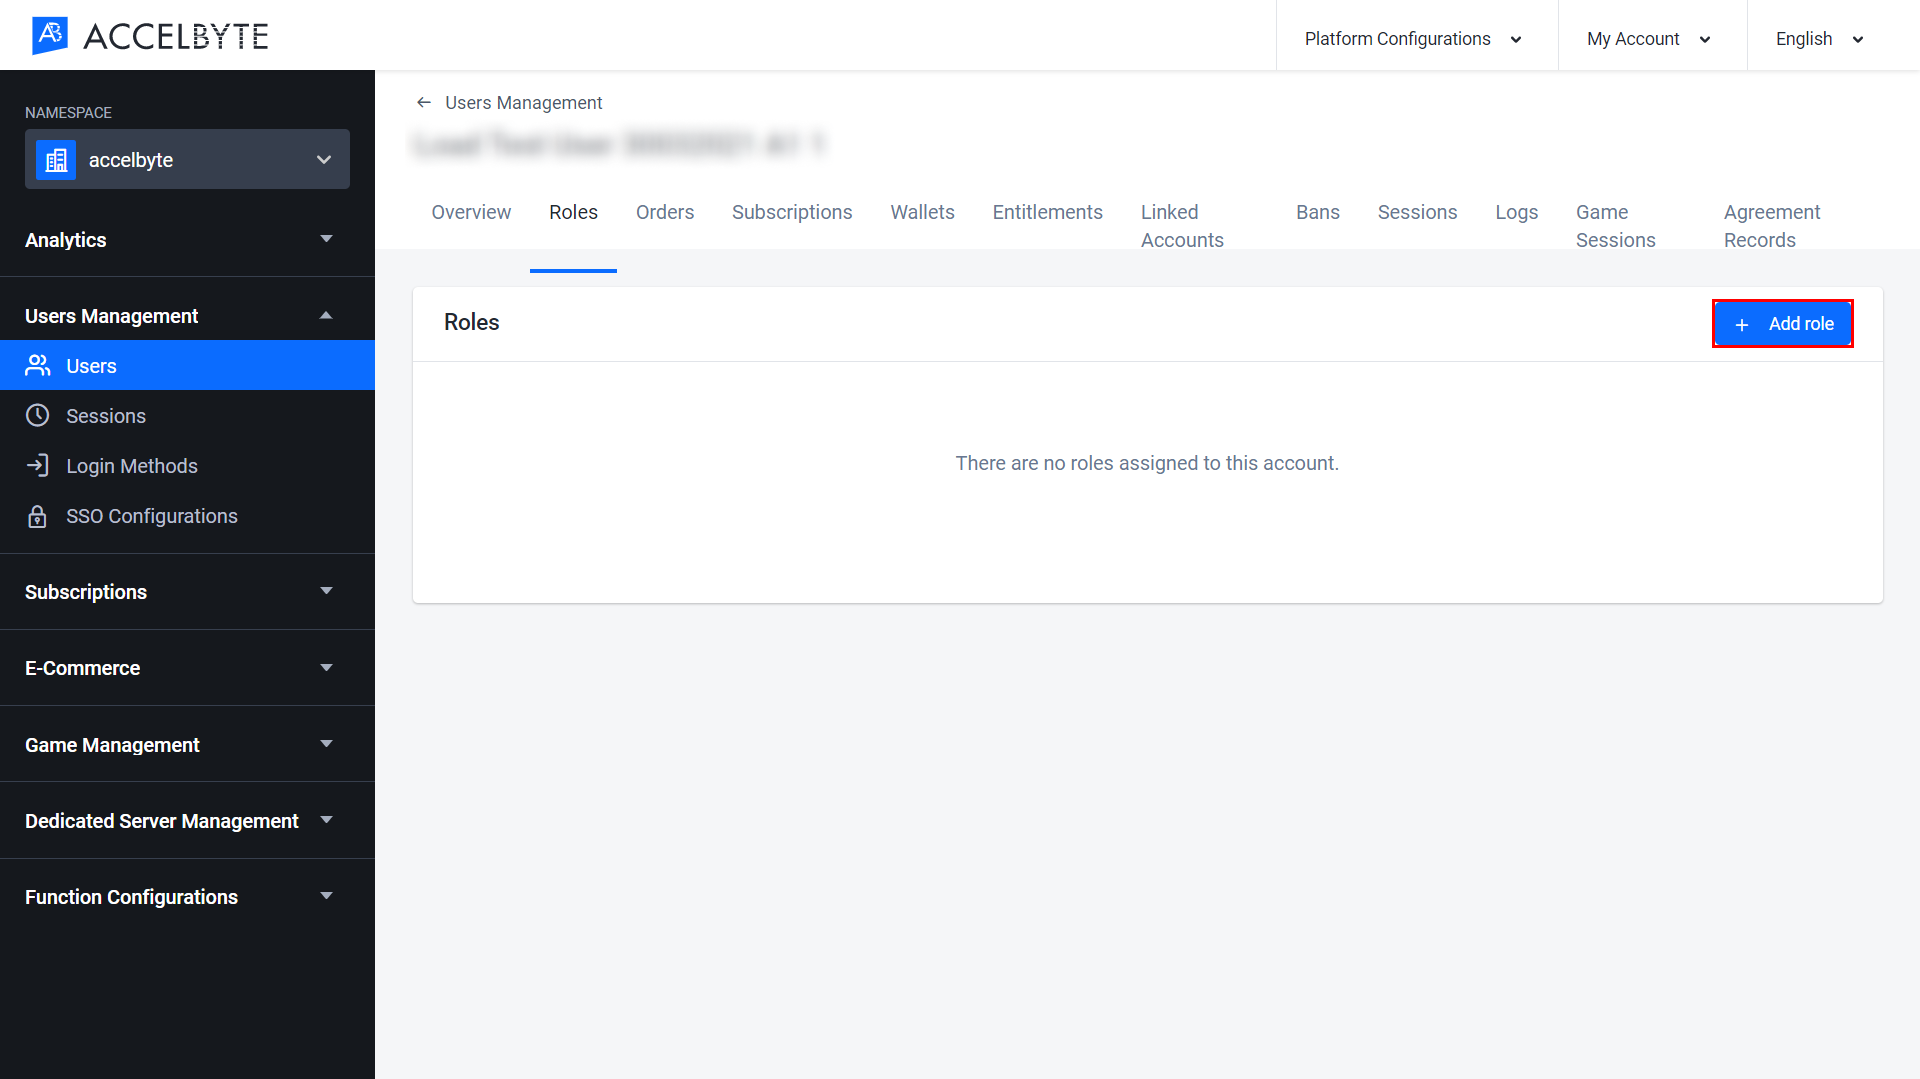
The Add Role form appears. Fill in the fields with the following information:
Select the role you want to assign to the user from the Roles dropdown menu.
Enter the namespace where the user should have this role in the Namespace field. You can enter more than one namespace.
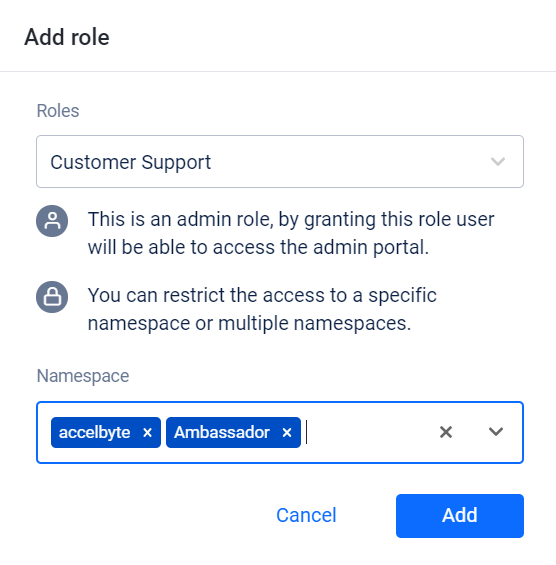
- Once completed, click the Add button. The role will be added to the user.
Related Concepts
- To learn more about permissions, see our Permissions Cloud documentation or permissions reference that includes a complete list of all permission tags for all endpoints.
- See our Accounts Cloud documentation for more information about how to create and manage user accounts.
- Before integrating our services into your game, see our Authorization & Authentication Cloud documentation.