Two-factor Authentication
Overview
AccelByte Cloud's Two-factor Authentication provides a second layer security for user accounts on our platform. When a player logs into their account with two-factor authentication enabled, they must provide both their credentials and the two-factor authentication code from their selected preferred method.
AccelByte Cloud offers two different types of two-factor authentication to choose from:
- Authenticator App: the player retrieves their real-time two-factor authentication code from an authenticator app each time they log in.
- Backup Code: a two-factor authentication code is generated from our service and stored manually by the player.
Manage Two-factor Authentication in the Admin Portal
Set Up the Authenticator App Method
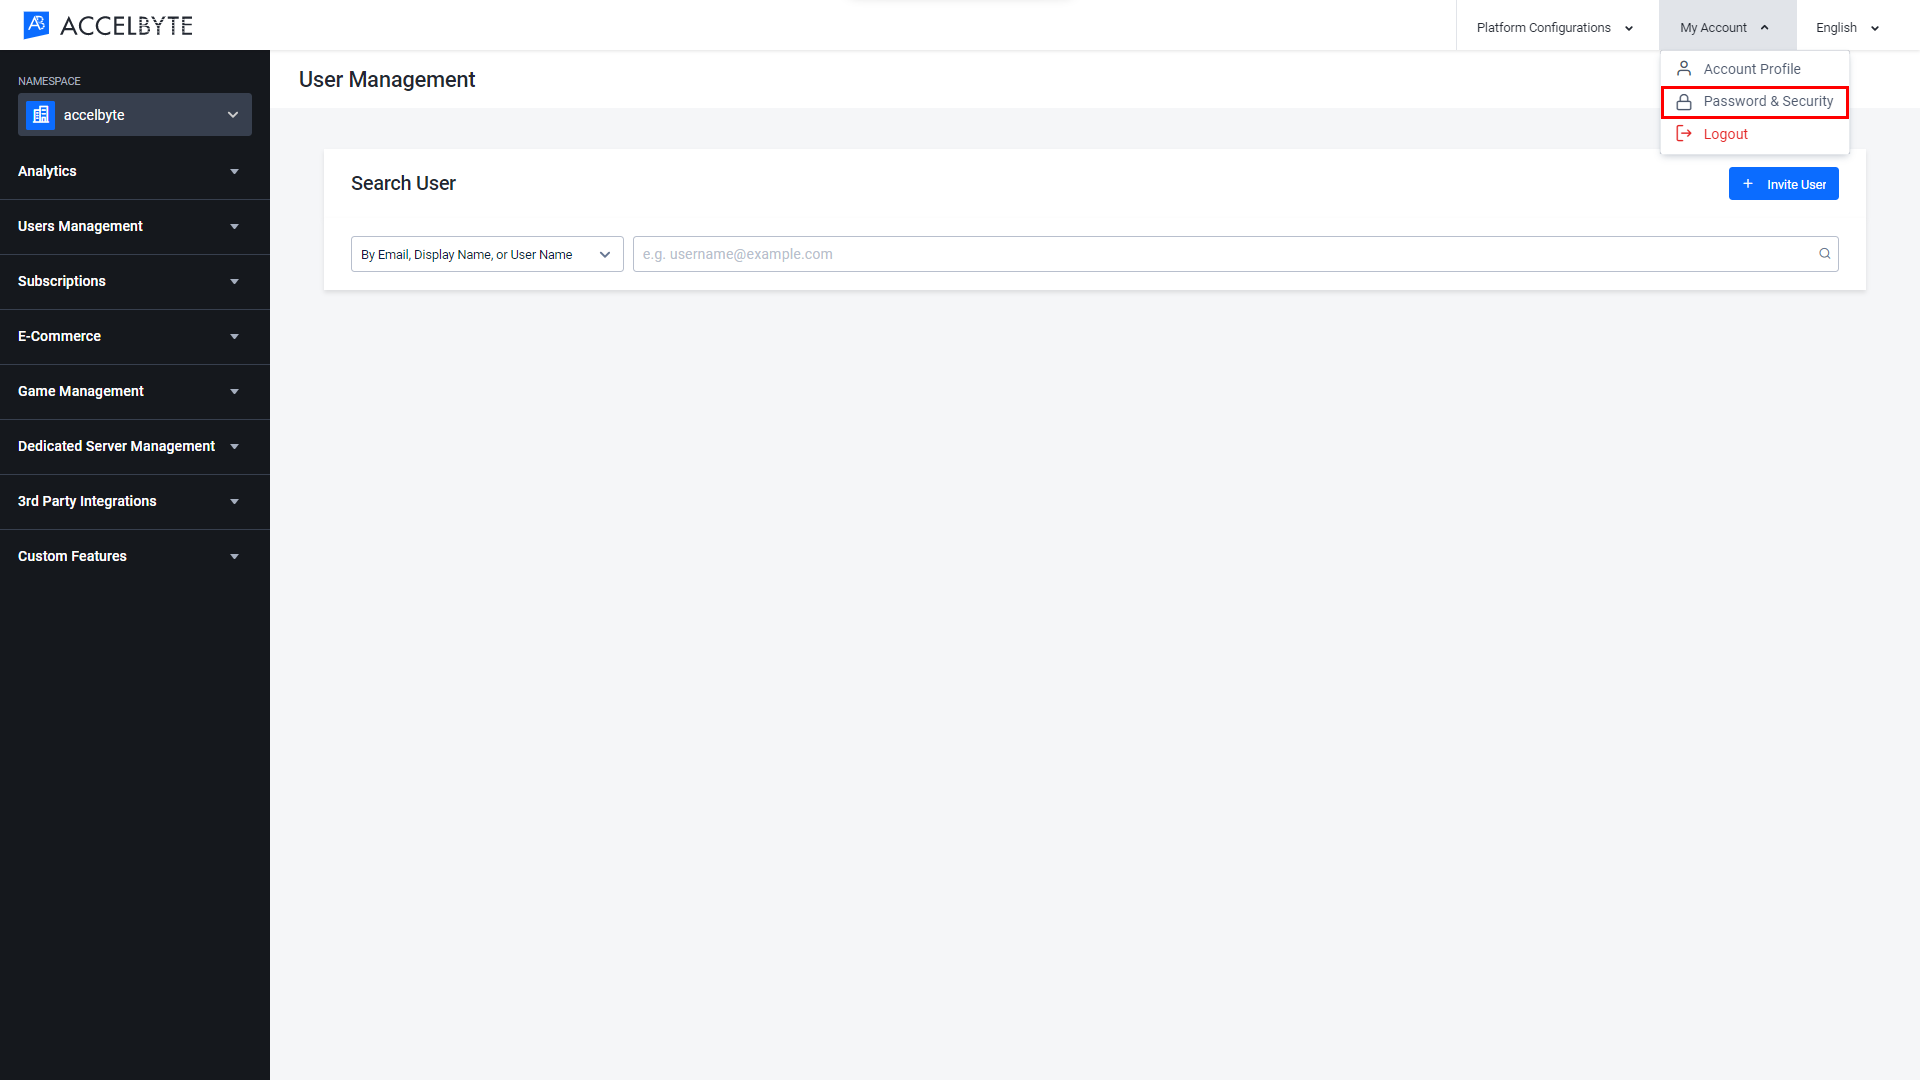
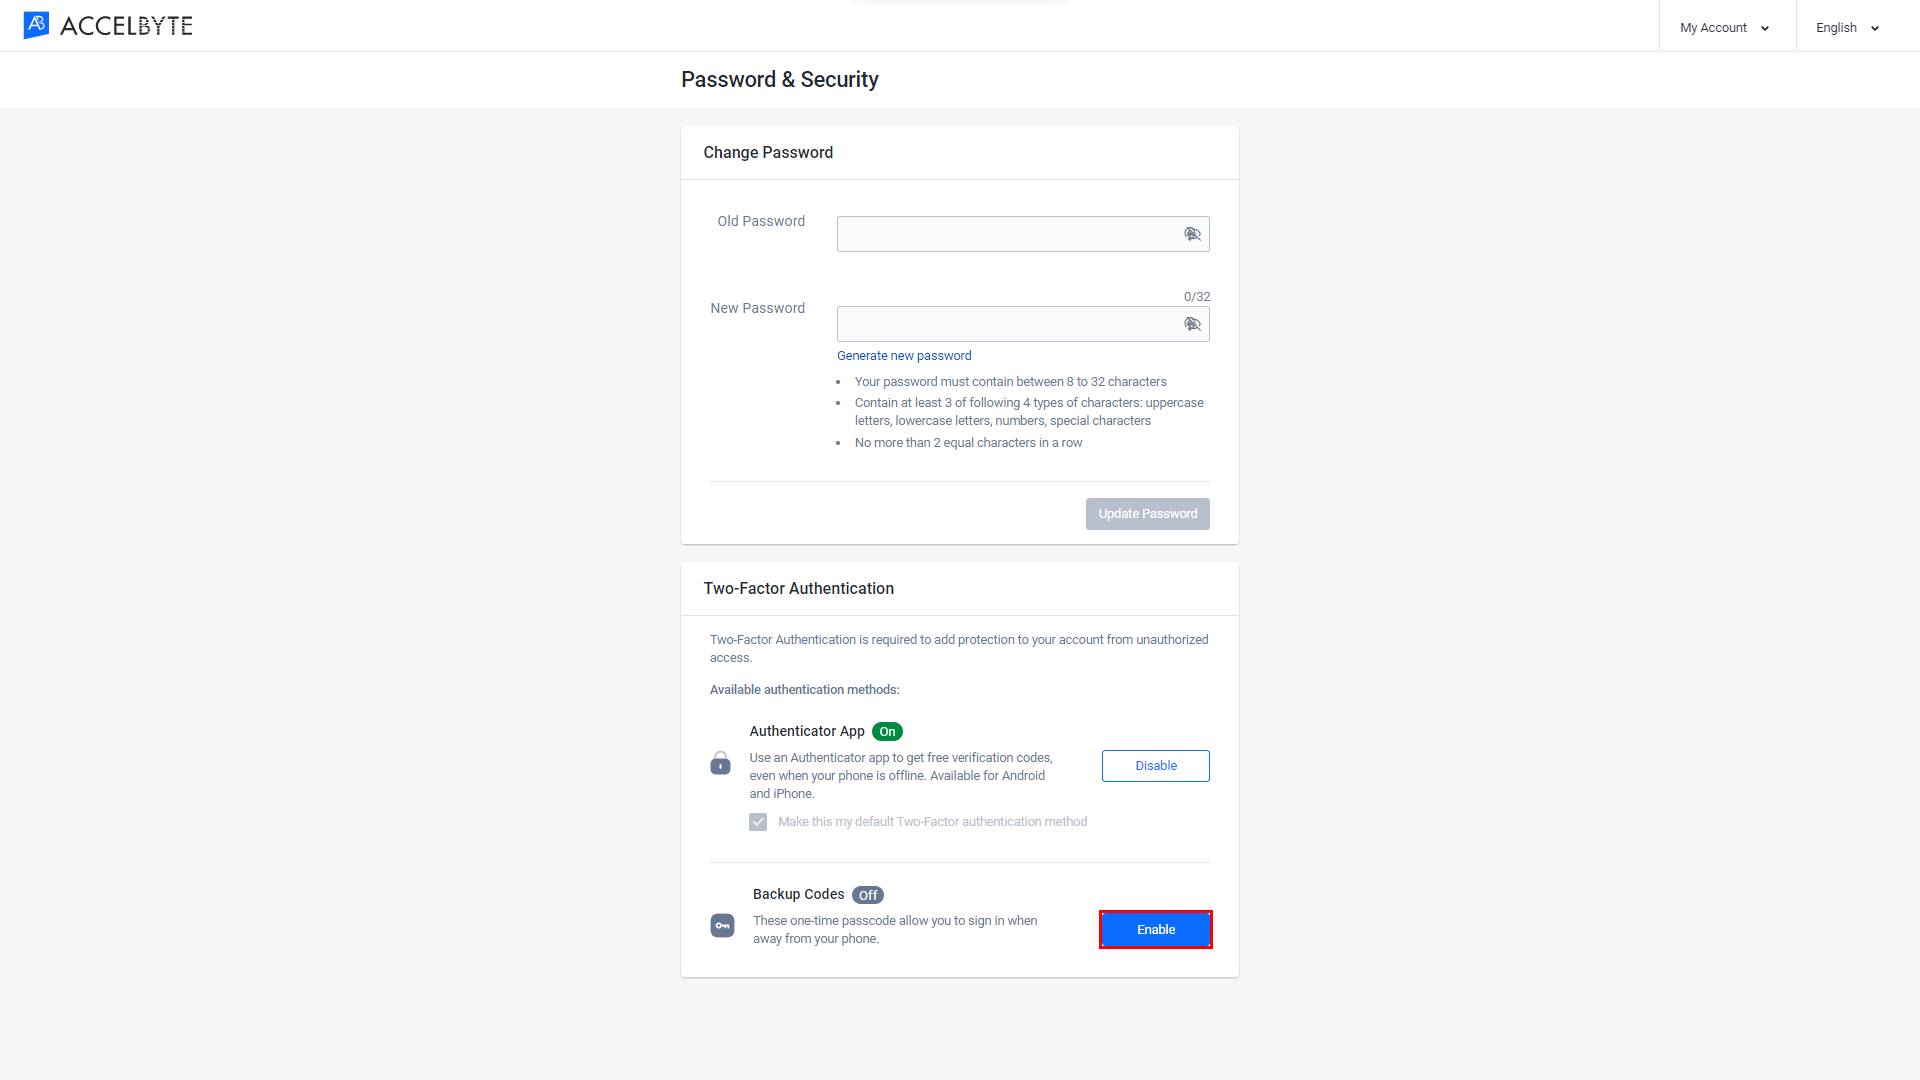
In the Admin Portal, open the My Account menu in the top-right corner of the screen and click Password & Security.

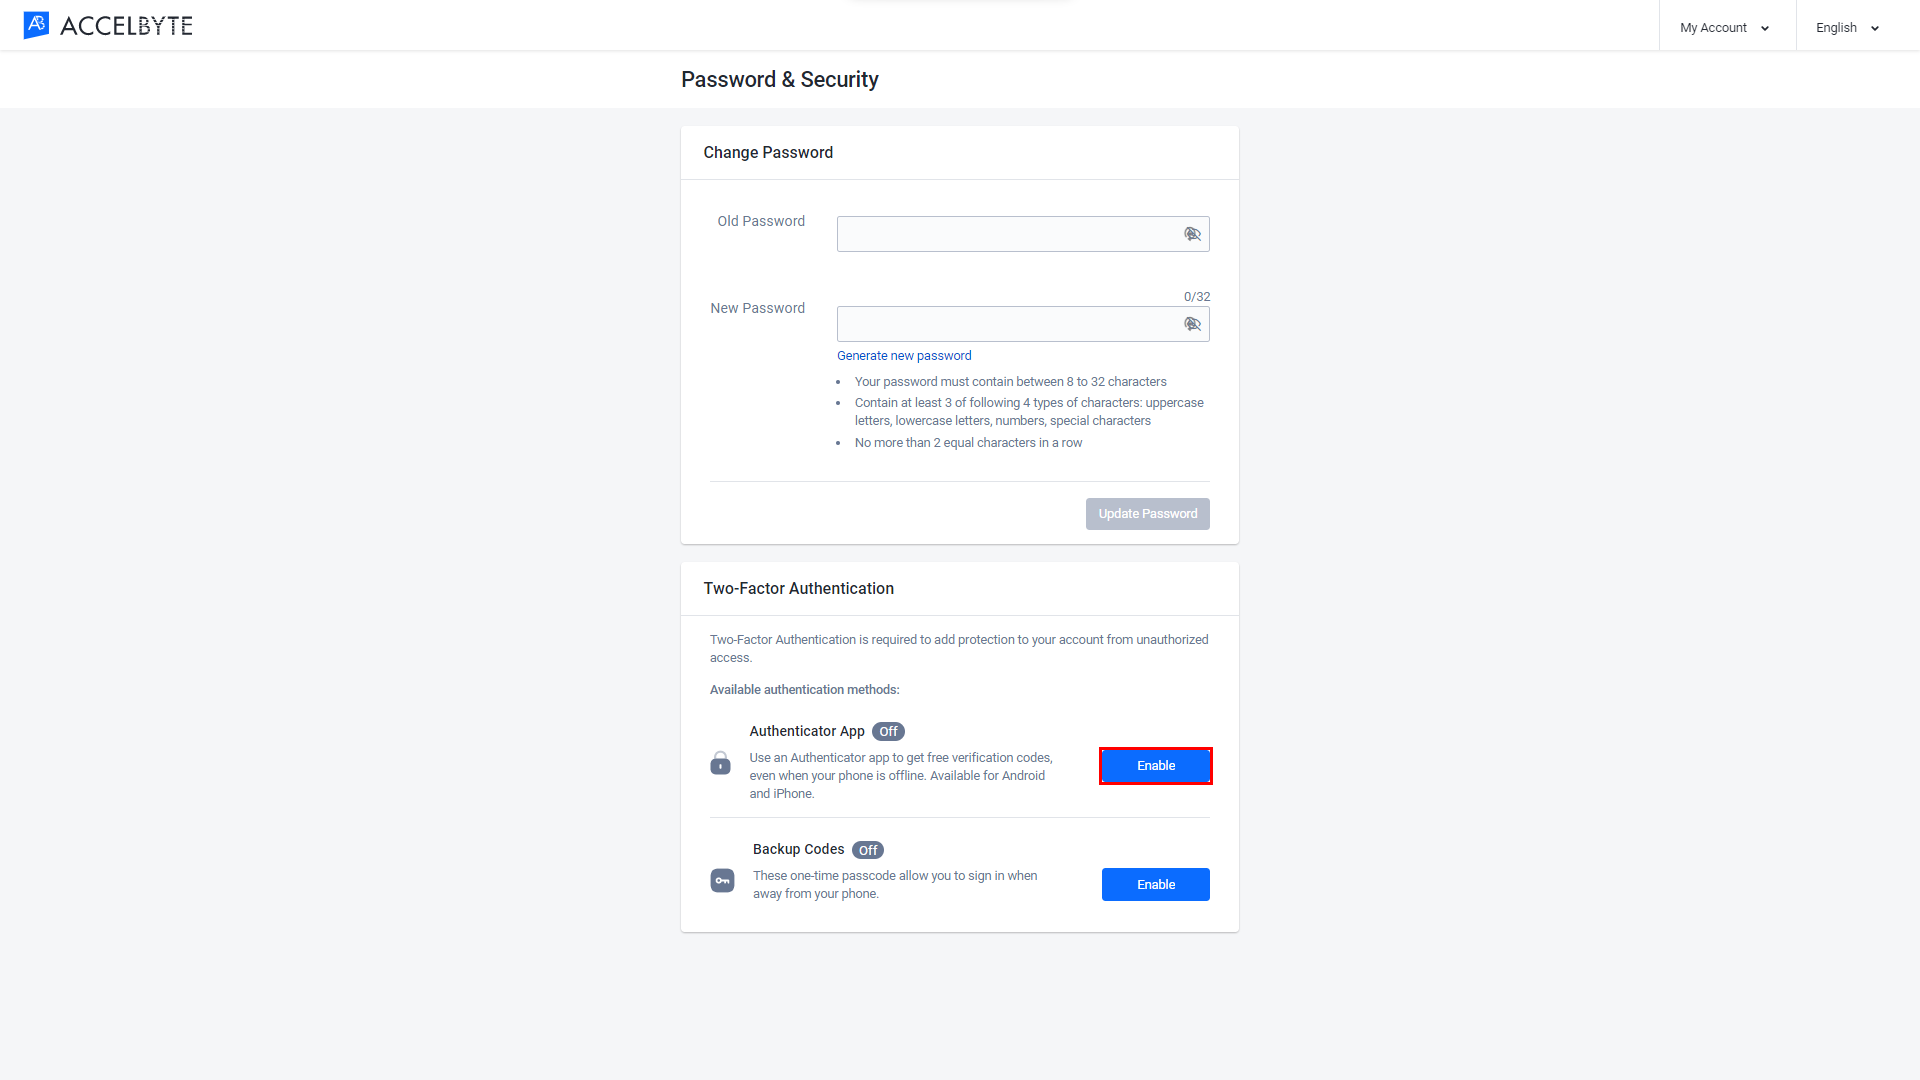
On the Password & Security page, scroll down to Two-Factor Authentication and click Enable next to the Authenticator App method.
The Enable Authenticator App form will appear. Follow the instructions provided.
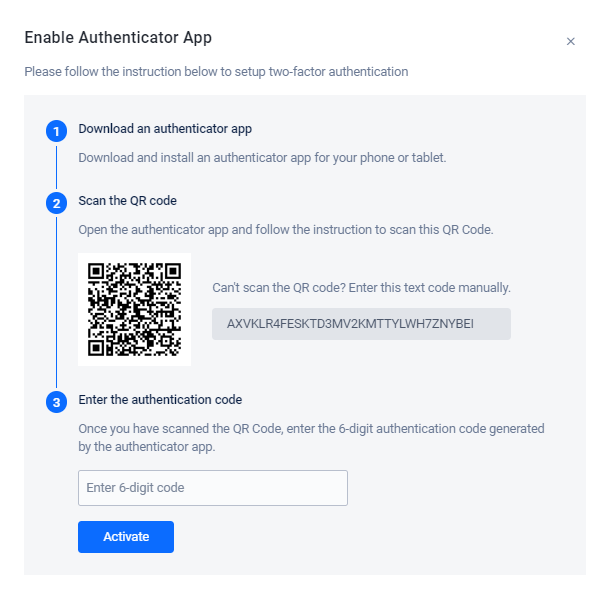
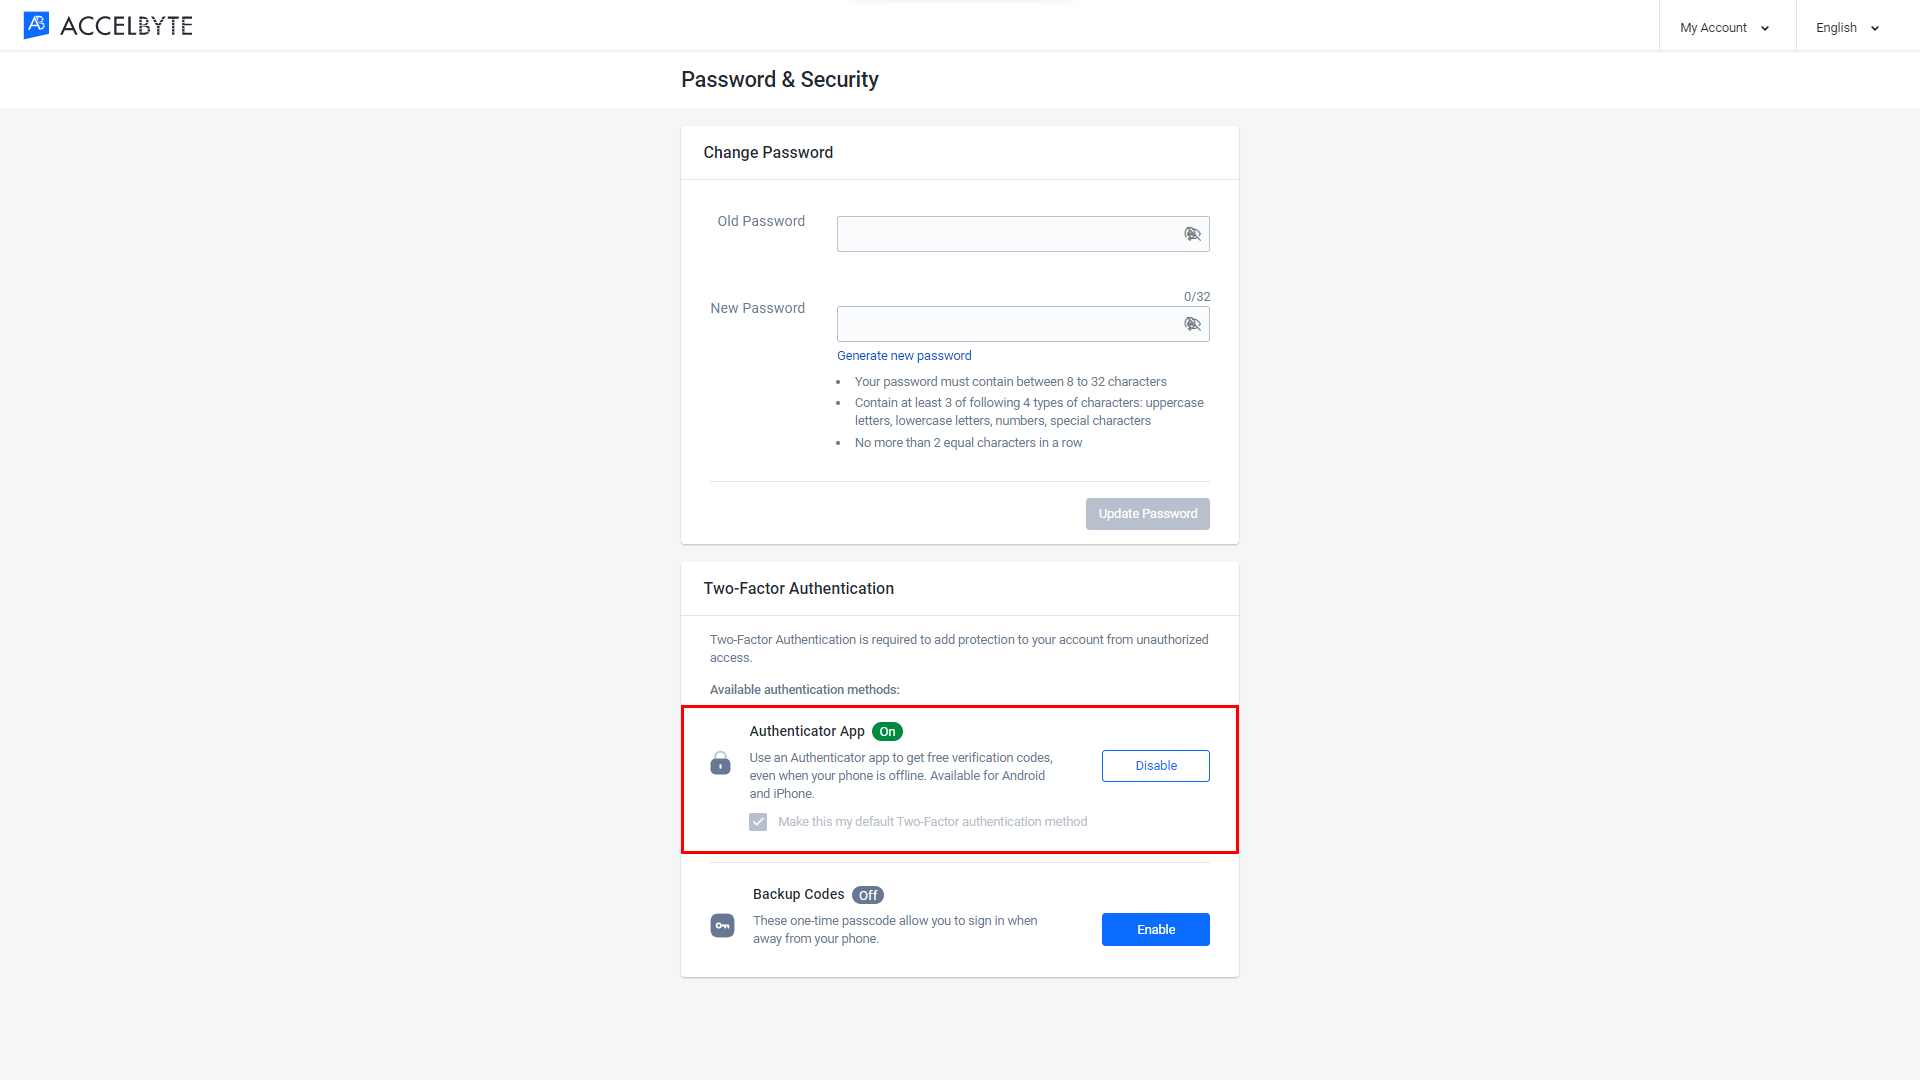
Once completed, click the Activate button.The Authenticator App method is now enabled.
Set Up the Backup Code Method
In the Admin Portal, open the My Account menu in the top-right corner of the screen and click Password & Security.
On the Password & Security page, scroll down to Two-Factor Authentication and click Enable next to the Backup Codes method.
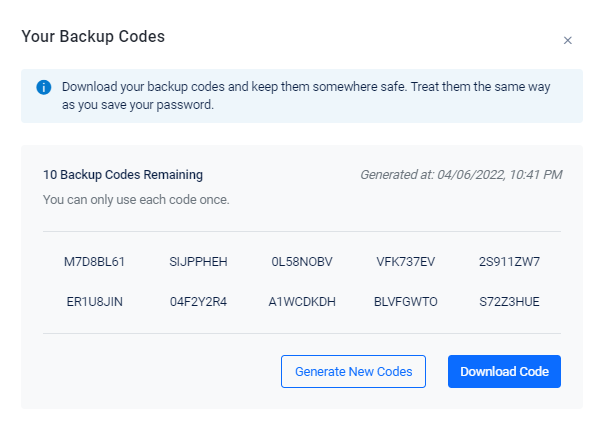
The Backup Code method is now enabled. The Your Backup Codes window will appear with 10 backup codes for you to use. Click Download Code to save your backup codes. Click Generate New Codes to generate 10 new codes for use.
NOTE
Each code can be only used once.
Set Up Default Two-factor Authentication
NOTE
You can only set a default two-factor authentication method if you have already configured both the authenticator app and backup codes methods.
In the Admin Portal, go to My Account and open the Password & Security page. Under the Two-Factor Authentication section, set the default two-factor authentication method by clicking the Make this my default Two-factor authentication method box under your preferred method.

Implement Two-factor Authentication Using the Client SDKs
Player Login with Username and Password with Two-factor Authentication Enabled
These functions allow your players to log into your game using a verified account with two-factor authentication enabled.
Third-party Authentication App
Before a player can log in, you will need to enable two-factor authentication with your third-party authentication app.
- Unreal Engine
- Unity
const FString OriginalEmail = TEXT("originalEmail@example.com");
const FString Password = TEXT("Password1");
bool bUserLoggedIn = false;

FRegistry::User.LoginWithUsername(OriginalEmail, Password,
    FVoidHandler::CreateLambda([&bUserLoggedIn]()
    {
        UE_LOG(LogTemp, Display, TEXT("Success."));
        bUserLoggedIn = true;
    }),
    FCustomErrorHandler::CreateLambda([&](int32 Code, const FString& Message, const FJsonObject& ErrorJson)
{
  FString Error = *ErrorJson.GetStringField("error");
  UE_LOG(LogTemp, Warning, TEXT("Login Failed. Error Code: %d, Message: %s, Error: %s"), Code, *Message, *Error);

  if(Error == "mfa_required")
  {
     const FString MfaToken = *ErrorJson.GetStringField("mfa_token");
     FString MfaCode = “code-from-3rd-party-apps”;
FRegistry::User.VerifyLoginWithNewDevice2FAEnabled(MfaToken, EAccelByteLoginAuthFactorType::Authenticator, MfaCode,
        FVoidHandler::CreateLambda([&bUserLoggedIn]()
        {
           bUserLoggedIn = true;
           UE_LOG(LogTemp, Log, TEXT("    Success"));
        }), FCustomErrorHandler::CreateLambda([](int32 Code, const FString& Message, const FJsonObject& ErrorJson)
        {
           FString Error = *ErrorJson.GetStringField("error");
           UE_LOG(LogTemp, Warning, TEXT("Verify 2FA Failed. Error Code: %d, Message: %s, Error: %s"), Code, *Message, *Error);
        }));
  }
}));
private string mfaToken;

  private void OnVerify2FACode(Result<TokenData, OAuthError> result)
  {
      if (!result.IsError)
      {
          // show the login result
          Debug.Log("Login successful");
      }
      else
      {
          Debug.Log("Login failed:" + result.Error.error);
      }
  }

  public void OnVerify2FA_AuthenticatorClicked()
  {
      // code got from 3rd party auth app
     string code = InputFieldGenerateKey.GetComponent<InputField>().text;
AccelBytePlugin.GetUser().Verify2FACode(mfaToken, TwoFAFactorType.AUTHENTICATOR, code, OnVerify2FACode, true);
  }

  public void OnLogin(Result<TokenData, OAuthError> result)
  {
      if (!result.IsError)
      {
          // show the login result
          Debug.Log("Login successful");
      }
      else
      {
          Debug.Log("Login failed:" + result.Error.error);

          if (result.Error.error.Equals("mfa_required"))
          {
              Debug.Log("Login failed:" + result.Error.error);
              mfaToken = result.Error.mfa_token;
          }
      }
  }

  void Start()
  {
      string email = "account_2FA@test.com";
      string password = "12345";
      AccelBytePlugin.GetUser().LoginWithUsernameV3(email, password, OnLogin);
  }
Backup Code
Before a player can log in, you will need to enable two-factor authentication with the Backup Code method and save this backup code.
- Unreal Engine
- Unity
const FString OriginalEmail = TEXT("originalEmail@example.com");
const FString Password = TEXT("Password1");
bool bUserLoggedIn = false;

FRegistry::User.LoginWithUsername(OriginalEmail, Password,
    FVoidHandler::CreateLambda([&bUserLoggedIn]()
    {
        UE_LOG(LogTemp, Display, TEXT("Success."));
        bUserLoggedIn = true;
    }),
    FCustomErrorHandler::CreateLambda([&](int32 Code, const FString& Message, const FJsonObject& ErrorJson)
{
  FString Error = *ErrorJson.GetStringField("error");
  UE_LOG(LogTemp, Warning, TEXT("Login Failed. Error Code: %d, Message: %s, Error: %s"), Code, *Message, *Error);

  if(Error == "mfa_required")
  {
     const FString MfaToken = *ErrorJson.GetStringField("mfa_token");
     FString MfaBackupCode = “user-backup-code”;
FRegistry::User.VerifyLoginWithNewDevice2FAEnabled(MfaToken, EAccelByteLoginAuthFactorType::BackupCode, MfaBackupCode ,
        FVoidHandler::CreateLambda([&bUserLoggedIn]()
        {
           bUserLoggedIn = true;
           UE_LOG(LogTemp, Log, TEXT("    Success"));
        }), FCustomErrorHandler::CreateLambda([](int32 Code, const FString& Message, const FJsonObject& ErrorJson)
        {
           FString Error = *ErrorJson.GetStringField("error");
           UE_LOG(LogTemp, Warning, TEXT("Verify 2FA Failed. Error Code: %d, Message: %s, Error: %s"), Code, *Message, *Error);
        }));
  }
}));
private string mfaToken;

   private void OnVerify2FACode(Result<TokenData, OAuthError> result)
   {
       if (!result.IsError)
       {
           // show the login result
           Debug.Log("Login successful");
       }
       else
       {
           Debug.Log("Login failed:" + result.Error.error);
       }
   }

   public void OnButtonClicked_Verify2FABackupCode()
   {
         // code/backupcode saved from player portal
         string code = InputFieldBackupCode.GetComponent<InputField>().text;
 AccelBytePlugin.GetUser().Verify2FACode(mfaToken, TwoFAFactorType.BACKUPCODE, code, OnVerify2FACode, true);
   }

   public void OnLogin(Result<TokenData, OAuthError> result)
   {
       if (!result.IsError)
       {
           // show the login result
           Debug.Log("Login successful");
       }
       else
       {
           Debug.Log("Login failed:" + result.Error.error);

           if (result.Error.error.Equals("mfa_required"))
           {
               Debug.Log("Login failed:" + result.Error.error);
               mfaToken = result.Error.mfa_token;
           }
       }
   }

   void Start()
   {
       string email = "account_2FA@test.com";
       string password = "12345";
       AccelBytePlugin.GetUser().LoginWithUsernameV3(email, password, OnLogin);
   }
Related Concepts
- Read more about Authorization and Authentication to know more about how Authorization and Authentication operate in our services.
- Read more about Third-party Logins to find out more about third-party login platforms that can be integrated with our services.