Currency
Overview
AccelByte Cloud's Currency service allows you to configure the currencies you want to accept for transactions in your Admin Portal. You can configure both real-world and virtual currencies to allow your players to transact using those currencies. You will need to set up at least one currency prior to making a store or items.
Permissions
Permissions are used to grant access to specific resources within our services. Make sure your account has the following permissions before you attempt to manage currencies in the Admin Portal. For a full list of permissions that impact currency management, see the IAM tab of the permissions reference.
| Usage | Permission Tag | Action |
|---|---|---|
| Create a Currency | ADMIN:NAMESPACE:{namespace}:CURRENCY | Create |
Permissions work slightly differently depending on whether they are assigned to IAM Clients or Roles assigned to users. For more information, read the Authentication and Authorization documentation.
Manage Currencies in the Admin Portal
Create a Currency
Creating a currency in the Admin Portal will make that currency available to your players for transactions. To create a new currency, follow the steps below:
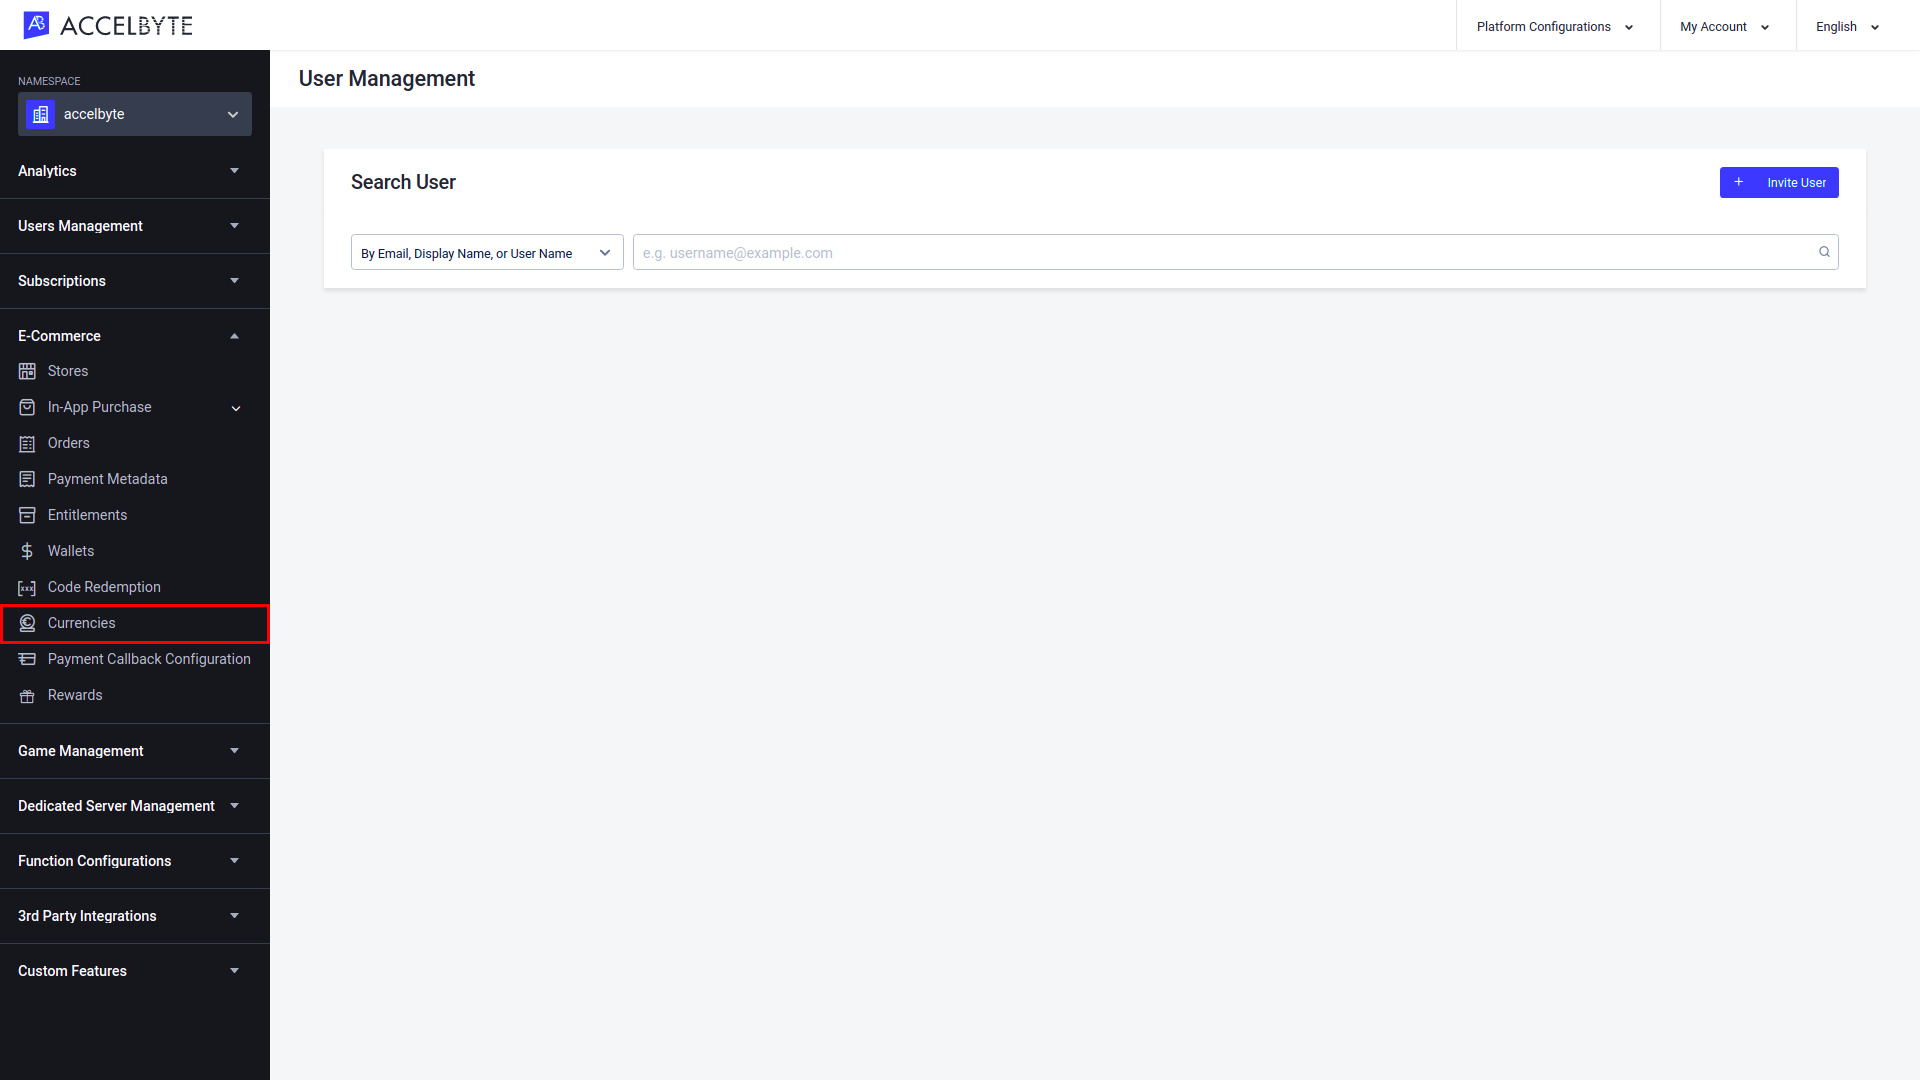
In the desired Namespace, go to the E-Commerce section and open the Currencies menu.

NOTE
If you create your currency in the Publisher Namespace, your currency will be available to be used in every namespace.
If you create your currency in a specific Game Namespace, your currency will only be available to be used in that specific namespace.
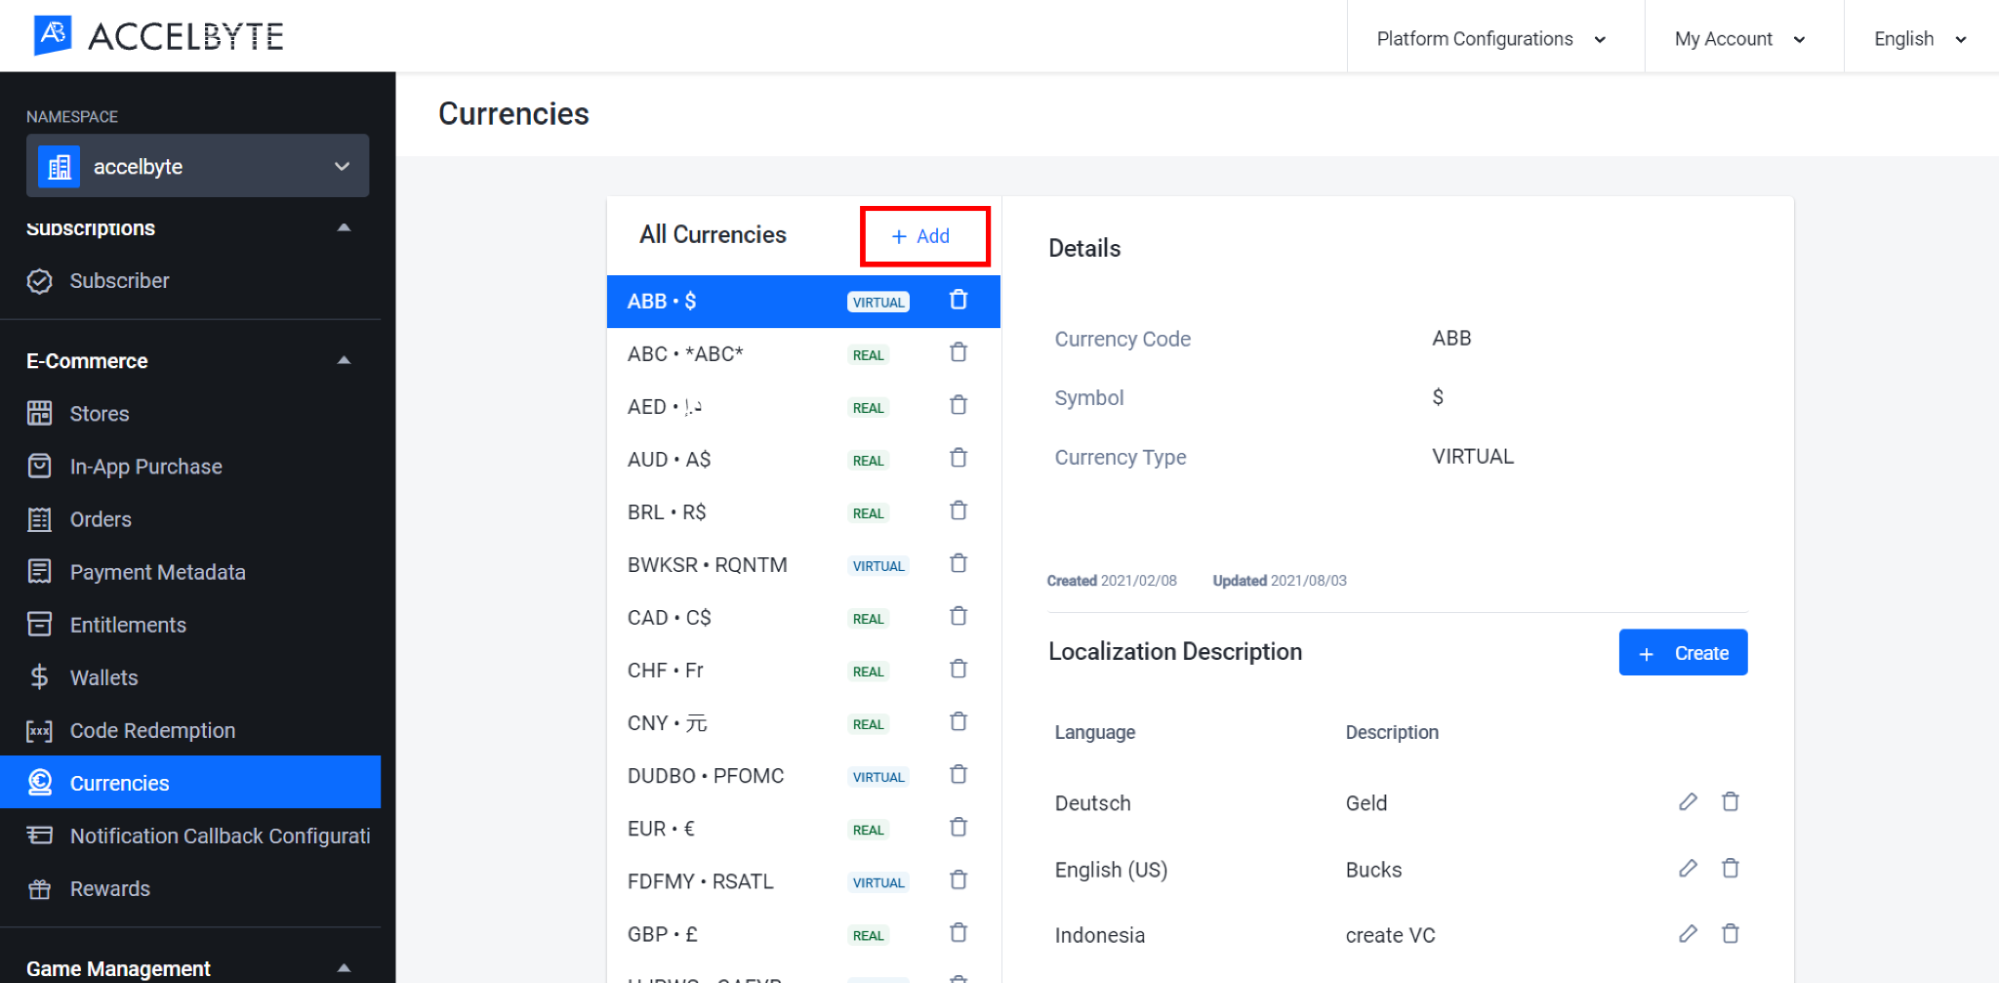
On the Currencies page, click Add to add a new currency.

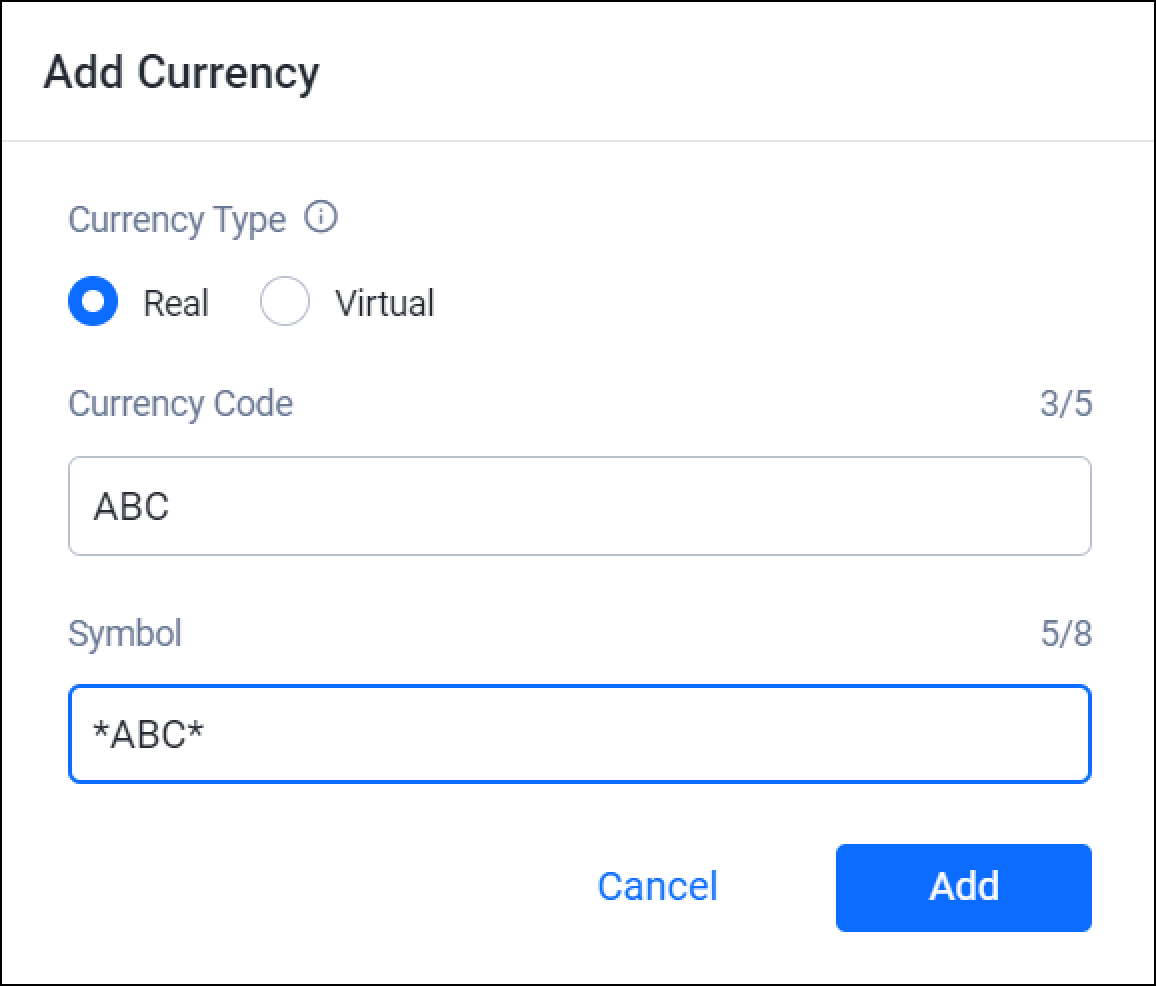
The Add Currency form appears. Fill out the required fields:
Select the Currency Type. Select Real if you want to create a real currency and Virtual if you want to create a virtual currency.
Input the unique identifying code for the currency in the Currency Code field. For real currencies, follow ISO_4217 standardization, such as USD for United States Dollar. For virtual currencies, you can create your own code.
Input the symbol associated with the currency in the Currency Symbol field, such as $. To input a symbol that isn't on your keyboard, input the Unicode for that symbol. For virtual currencies, you can input any character combination you like, up to 8 characters.

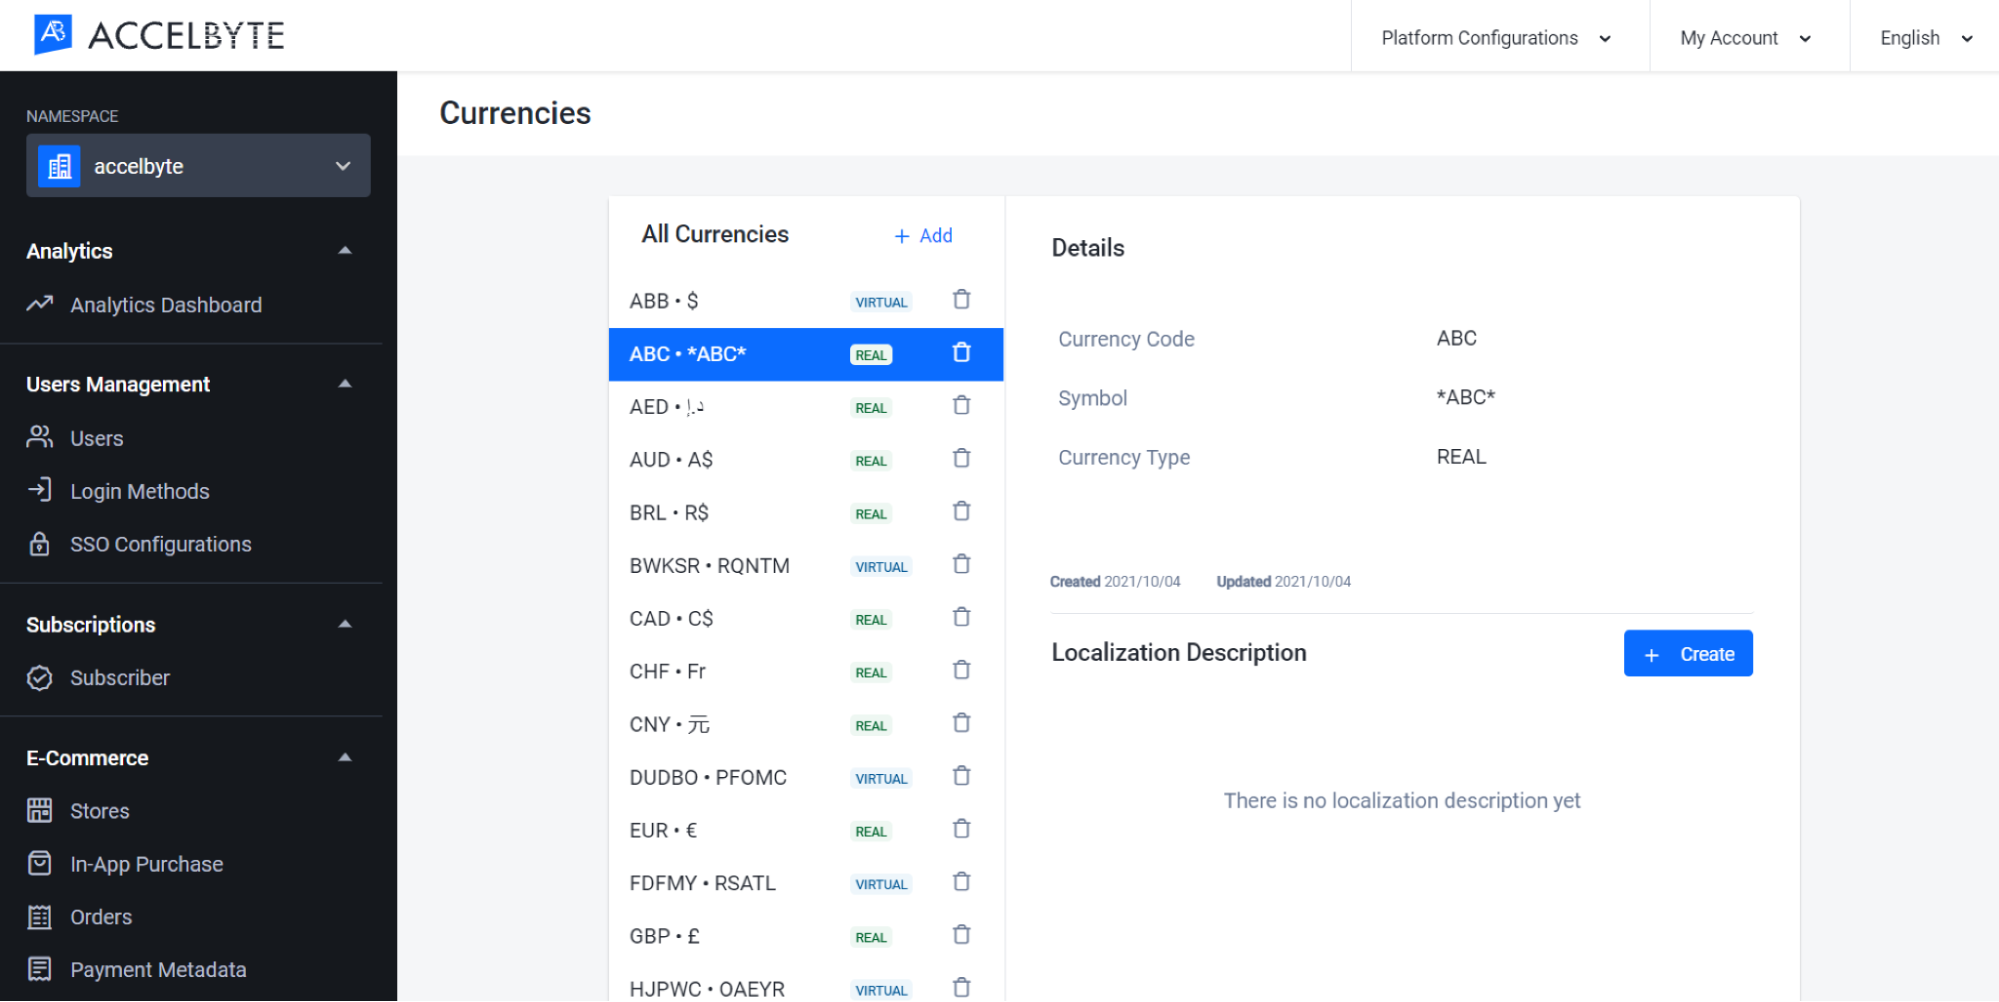
Once completed, click Add. Your new currency will be added to the list.

Implement Currencies using Client SDKs
Our SDK can also be used to allow game clients to retrieve information about the currencies you've configured in the Admin Portal.
Retrieve the List of Supported Currencies
You can use the following code to retrieve the list of currencies supported by a namespace, by inputting that namespace at the top of the code where it says MyNamespace.
- Unreal Engine
- Unity
FString Namespace = FString("MyNamespace");

FRegistry::Currency.GetCurrencyList(Namespace, THandler < TArray < FAccelByteModelsCurrencyList >> ::CreateLambda([](const TArray < FAccelByteModelsCurrencyList > & Result) {
    // Do something if GetCurrencyList has been successful
  }),
  FErrorHandler::CreateLambda([](int32 ErrorCode,
    const FString & ErrorMessage) {
    // Do something if GetCurrencyList has an error
    UE_LOG(LogTemp, Error, TEXT("Error GetCurrencyList, Error Code: %d Error Message: %s"), ErrorCode, * ErrorMessage);
  }));
string @namespace = "MyNamespace";

AccelBytePlugin.GetCurrencies().GetCurrencyList(result => {
  if (result.IsError) {
    // Do something if GetCurrencyList has an error
    Debug.Log($ "Error GetCurrencyList, Error Code: {result.Error.Code} Error Message: {result.Error.Message}");
  } else {
    // Do something if GetCurrencyList has been successful
  }
}, @namespace);
Related Concepts
- See our Cloud E-commerce documentation to learn more about how to set up your in-game or online store.