In-app Purchase Integration
Overview
AccelByte Cloud's In-app Purchase integration enables you to track player purchases and sync entitlements from third-party platforms such as PlayStation or Xbox. That way, any in-app items that are sold and granted to the player from a third-party platform will also be transferred to our platform, as long as our platform has the proper ID for the item from the platform you're using. Items that can be sold include coins, bundles, loot boxes, and in-game items, both consumable and durable.
Supported Platforms
Here's a table showing the platforms we support and the features they offer:
| Third-party Login | In-App Purchases | Entitlements | |
|---|---|---|---|
| Apple | Y | Y | N |
| Epic Online Services | Y | Y | Y |
| Google Play | Y | Y | N |
| PlayStation 4 + 5 | Y | Y | Y |
| Stadia | Y | Y | Y |
| Steam | Y | Y | Y |
| Twitch | Y | Y | Y |
| Xbox Live | Y | Y | Y |
Prerequisites
Before creating an In-App Purchase Configuration, make sure you are authorized,have registered your clients, and have configured Third-party Login of the selected Platform.
Permissions
Permissions are used to grant access to specific resources within our services. Make sure your account has the following permissions before you attempt to manage In-App Purchase Integration in the Admin Portal. For a full list of permissions that impact in-app purchase management, see the Platform/Commerce tab of the permissions reference.
To retrieve and update the configuration of the supported 3rd Party Platform, make sure you have the following permissions.
| Usage | Permission Tag | Action | Platforms |
|---|---|---|---|
| Retrieve the 3rd Party Platform Configuration | ADMIN:NAMESPACE:{namespace}:IAP:CONFIG | READ | All platforms |
| Update the 3rd Party Platform Configuration | ADMIN:NAMESPACE:{namespace}:IAP:CONFIG | UPDATE | PSN, Xbox, Steam, Stadia, Epic, Twitch, Google Play, Apple |
For other supporting permission such as Synchronizing Entitlement and Updating Business Partner Certificate Files, make sure you have the following permissions.
| Usage | Permission Tag | Action | Platforms |
|---|---|---|---|
| Entitlement Synchronization | NAMESPACE:{namespace}:USER:{userId}:IAP | UPDATE | All platforms |
| Update the Business Partner Certificate File | ADMIN:NAMESPACE:{namespace}:IAP:CONFIG | UPDATE | Xbox, Stadia and Google Play |
Permissions work slightly differently depending on whether they are assigned to IAM Clients or Roles assigned to users. For more information, read the Authentication and Authorization documentation.
Manage In-app Purchase Integration in the Admin Portal
Add a New Configuration
Follow the steps below to configure Third-party Store configuration in the Admin Portal.
Before beginning, make sure you are in the namespace you want to configure. Go to the E-Commerce section of the main menu in the Admin Portal and select In-App Purchase > Third-party Store Integrations.
NOTE
Any configurations you make in the publisher namespace will be used as the default configuration for any unconfigured game namespaces.
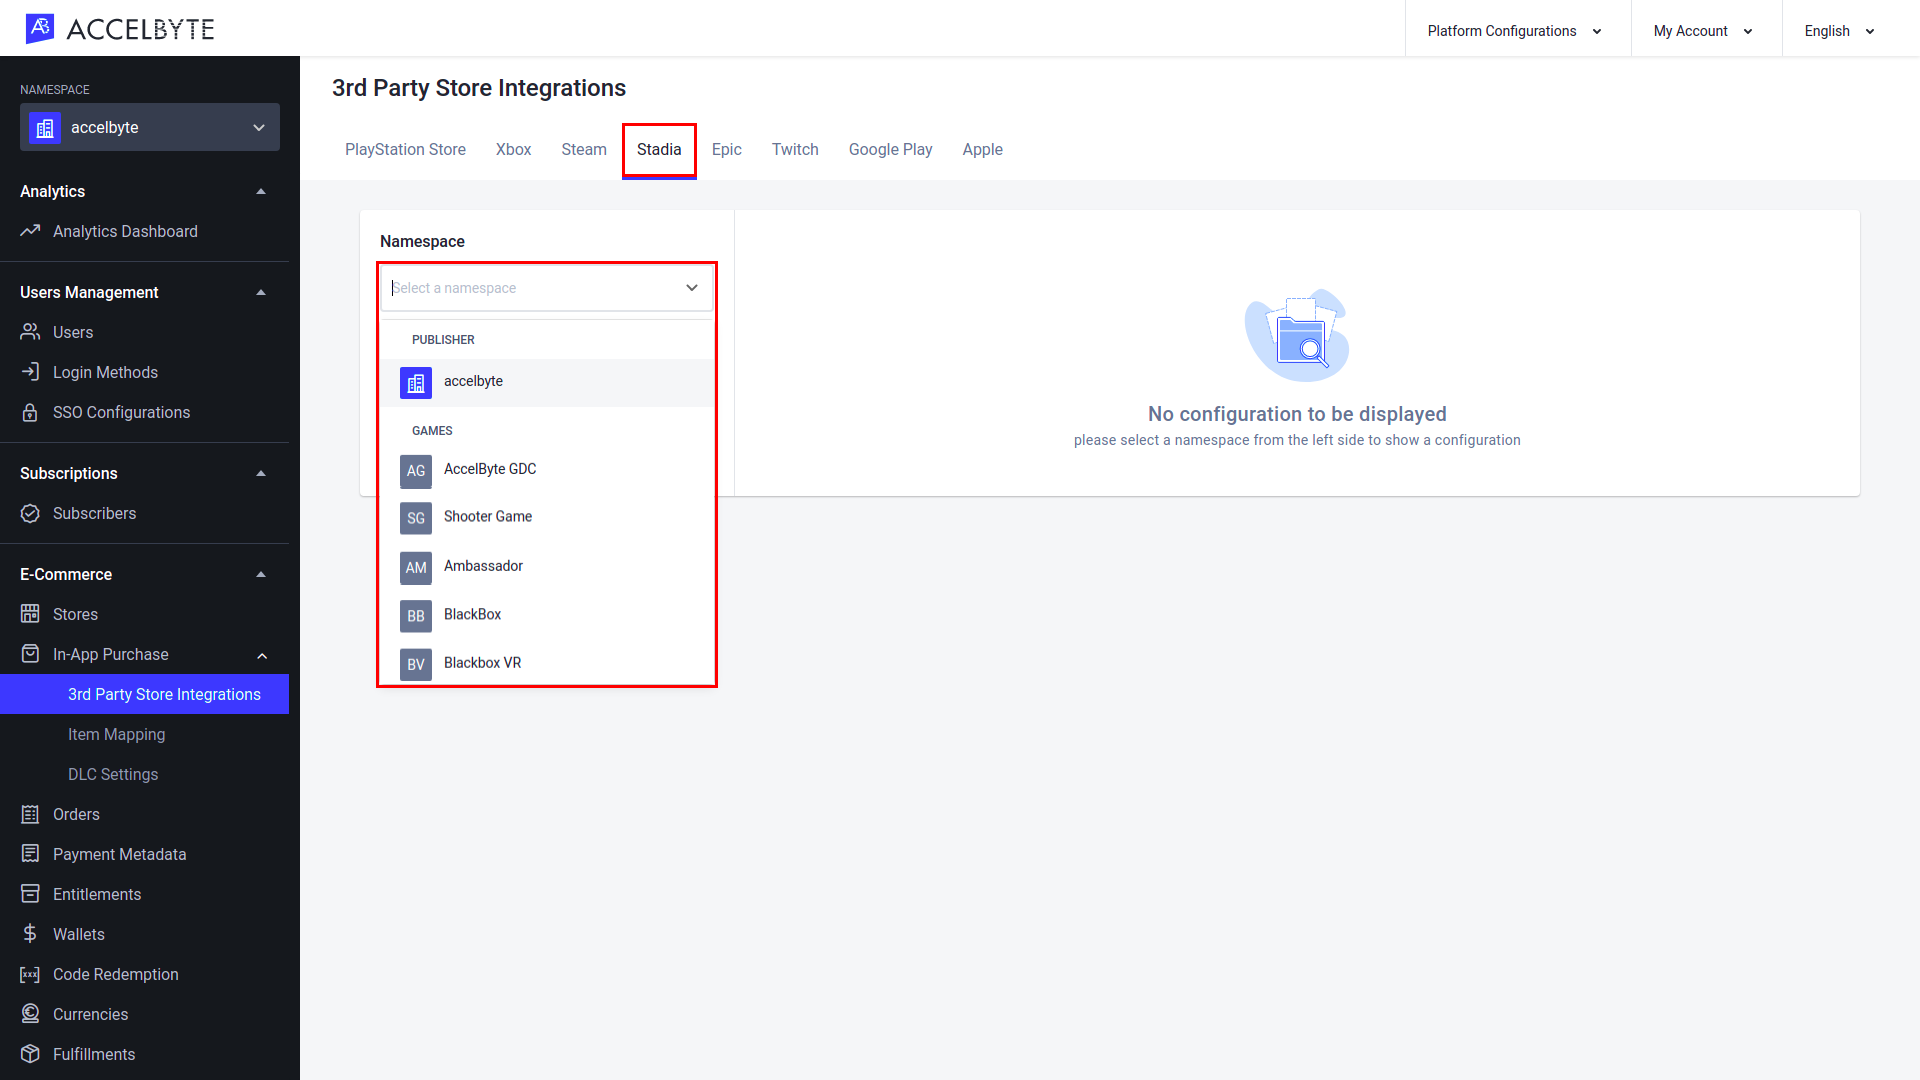
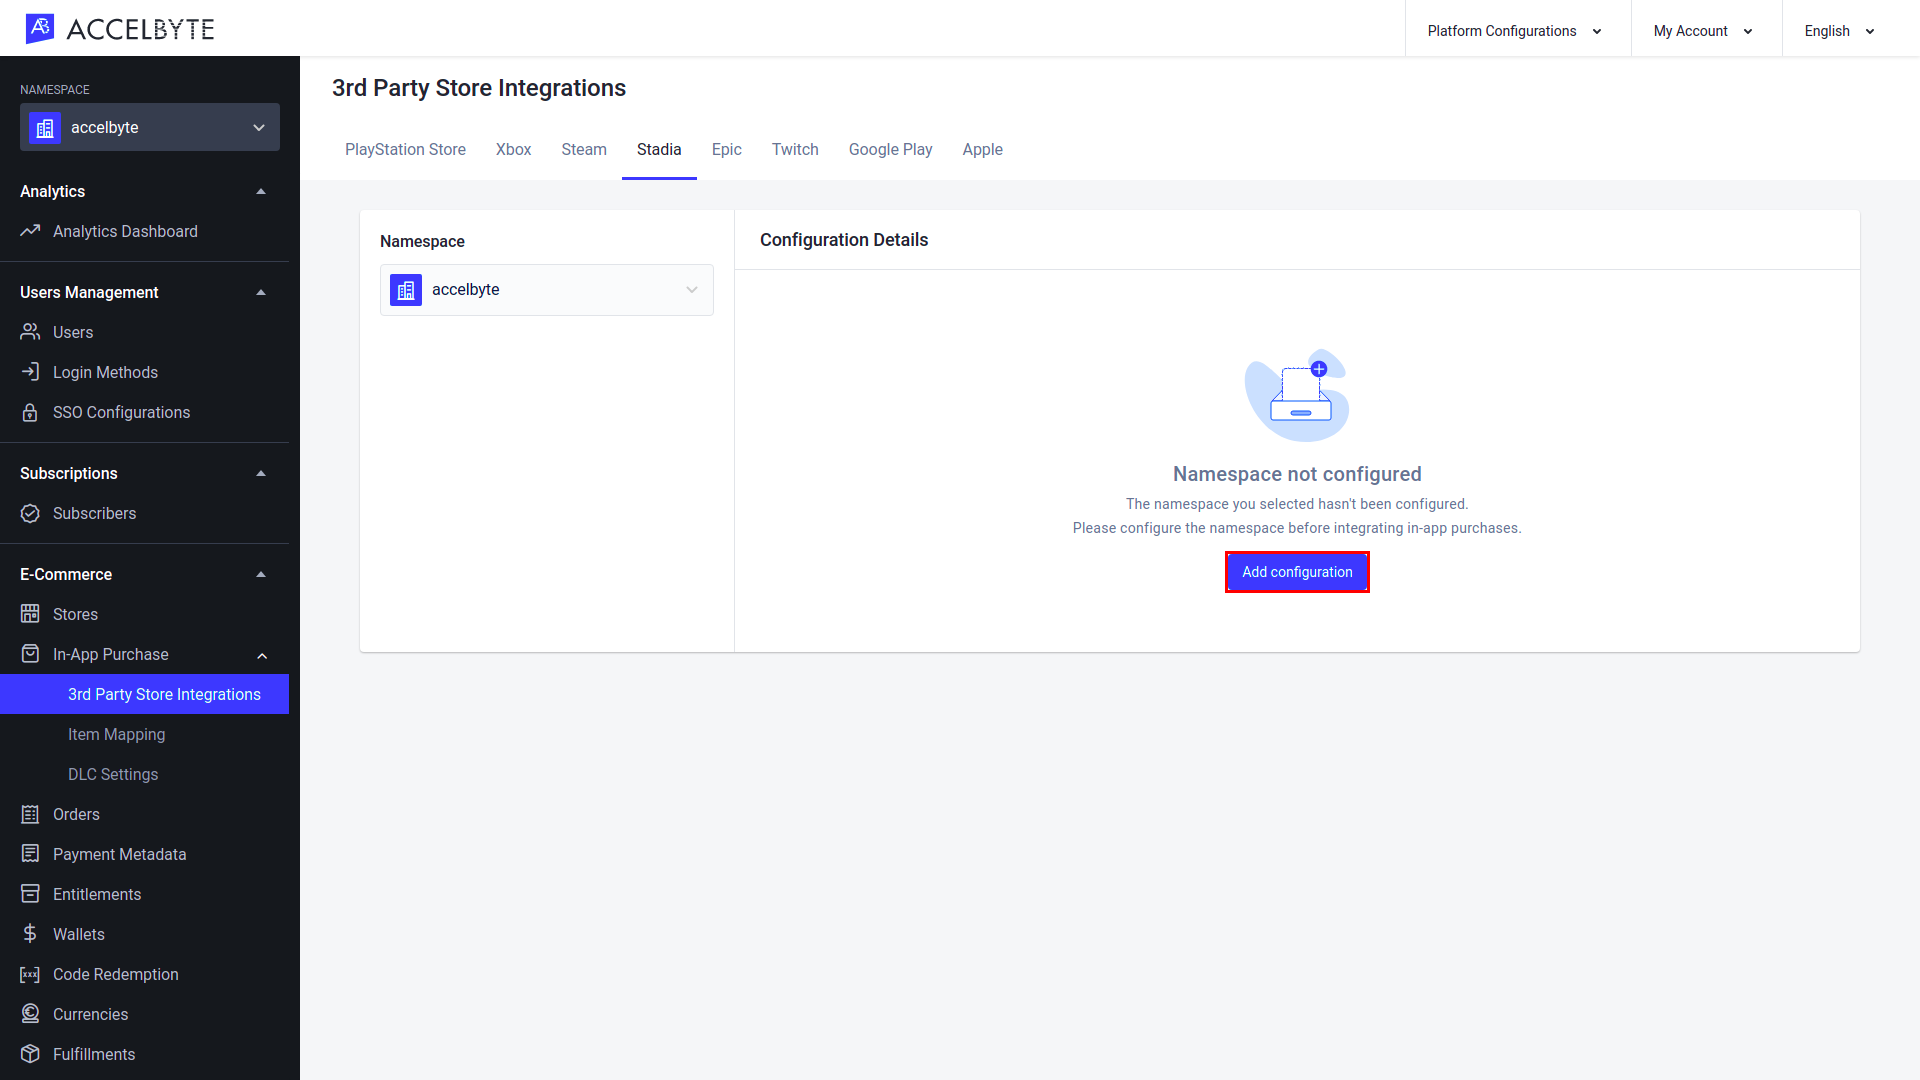
Select the platform you wish to configure from the tabs and click Add Configuration.
NOTE
Each namespace can only have one configuration per platform.
The Add Configuration popup will appear. This will be different for each platform.
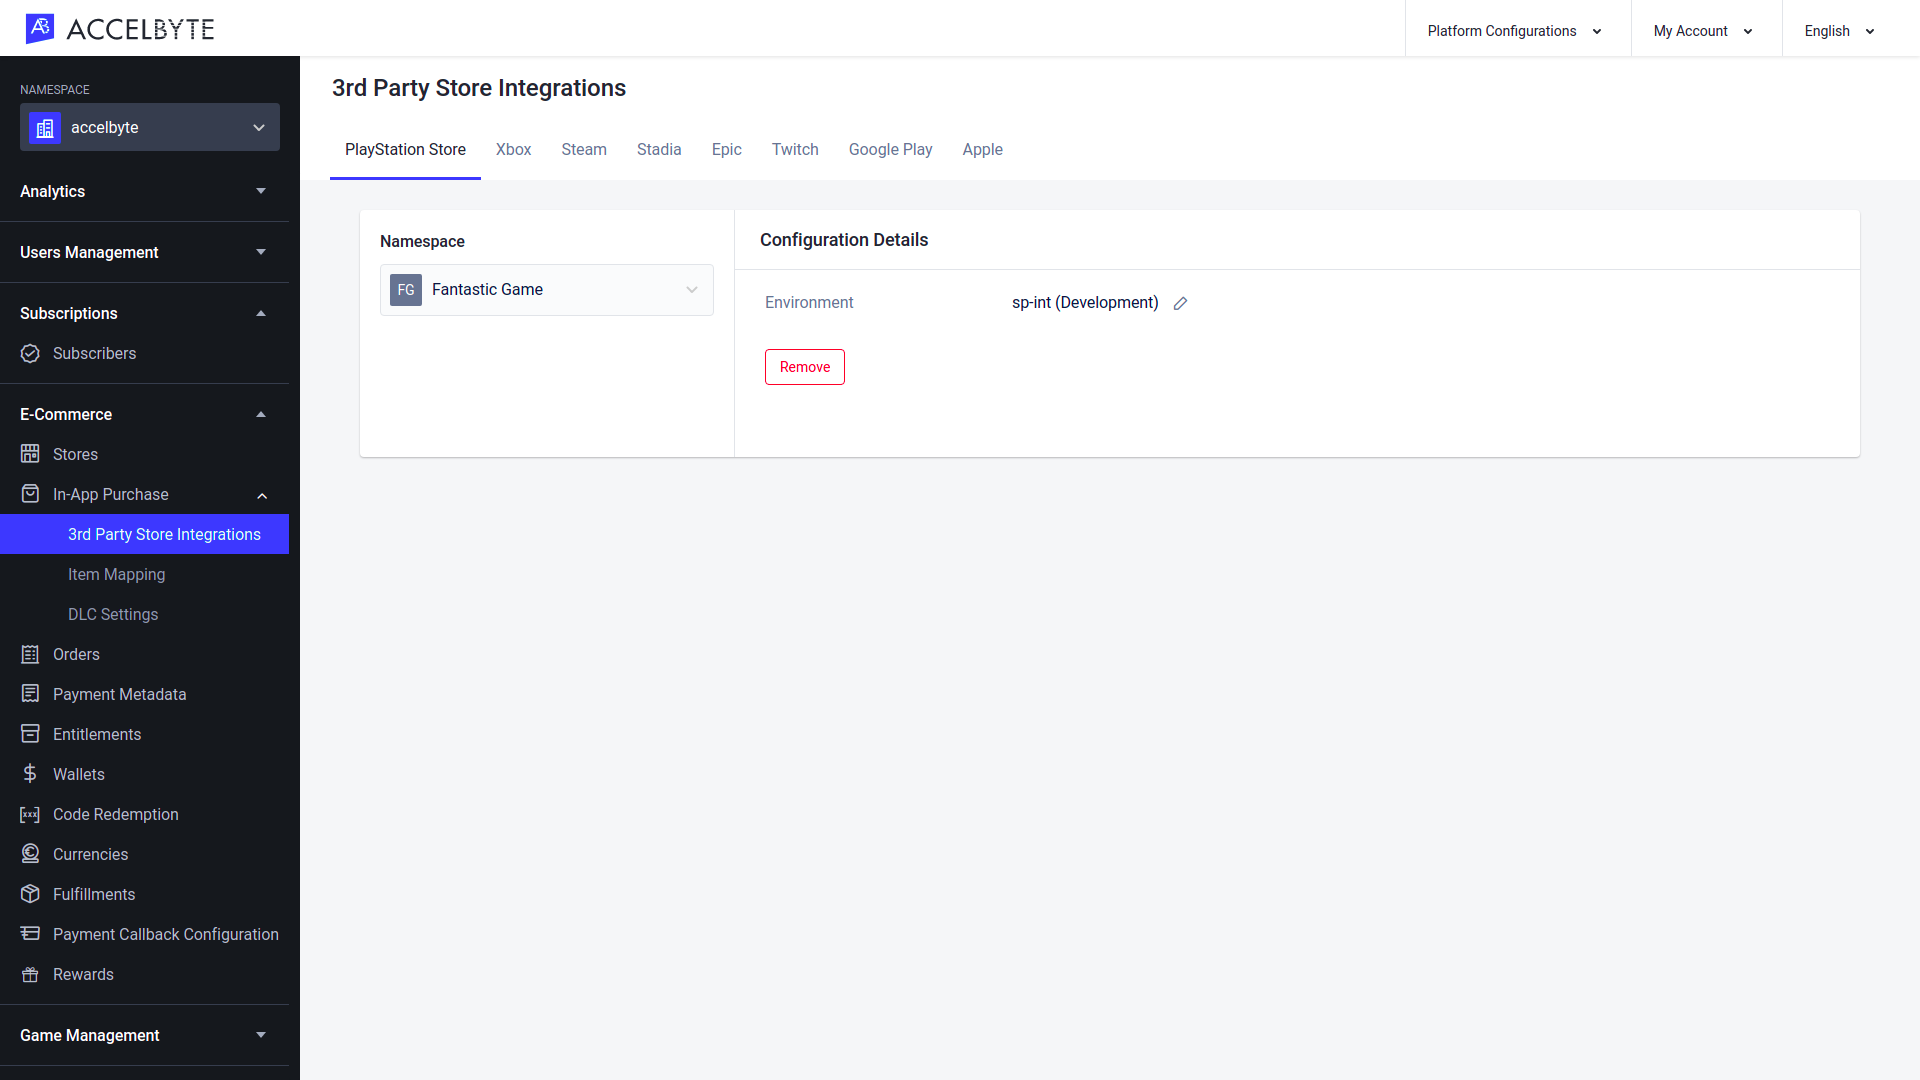
PSN
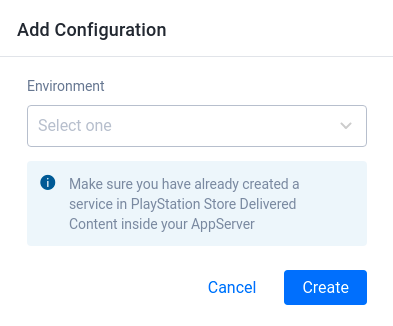
- Select the Environment you wish to work in:
- sp-int for the development environment
- prod-qa for the QA environment
- np for the live environment
Xbox
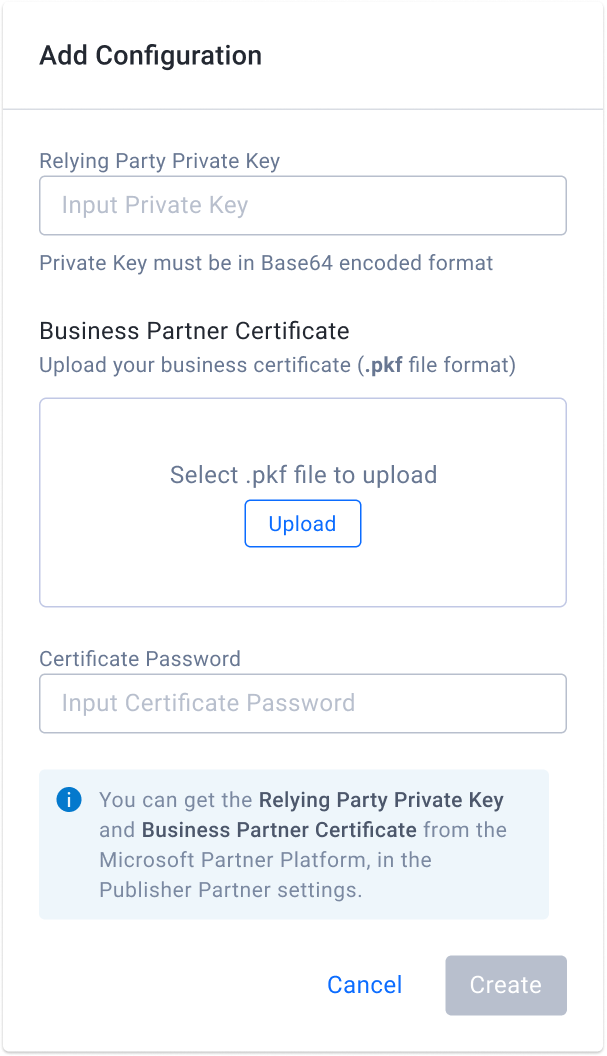
Input the Relying Party Private Key in Base64 format.
Upload your Business Partner Certificate in .pfx format.
Input your Certificate Password. This field is optional. If your certificate requires a password, you must input the password to continue.
Steam
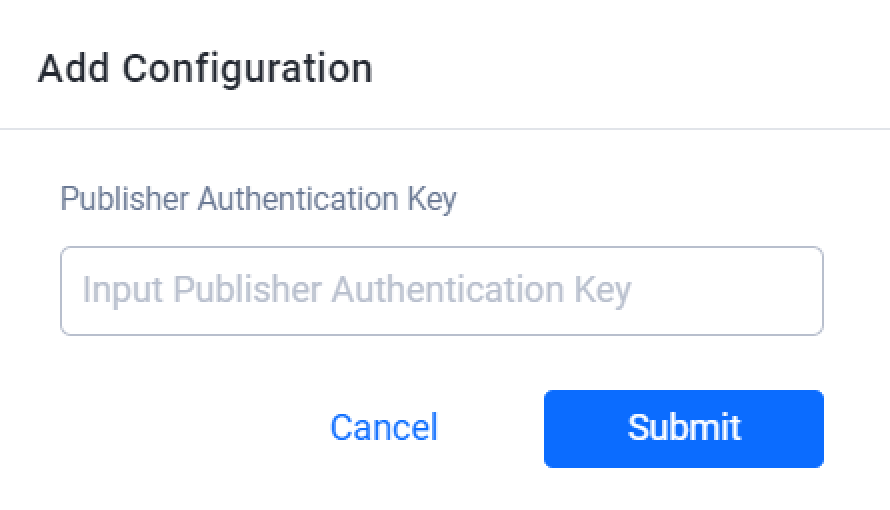
Make sure you've created an item with the same SKU in both the Steam Store and the AccelByte Platform namespace. Once completed, input the Publisher Authentication Key.
Stadia
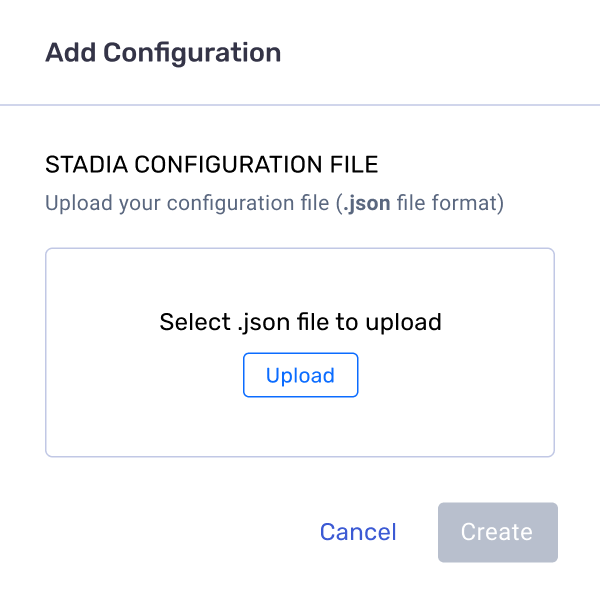
Upload your Stadia Configuration File in .json format.
Epic
Input the Sandbox ID of your Epic Developers account.

Twitch
Make sure you've completed the following the prerequisites before you begin:
Register your organization with Twitch Developer
Create a Twitch Application for Drops and configure the Drop settings
Create a Twitch Drops Reward. Be sure to specify the Reward ID so that the drop reward can be matched with your AccelByte item. The Reward ID should follow this format: {accelbyte-namespace}-{accelbyte-itemSKU}, e.g., game001-weapon001.
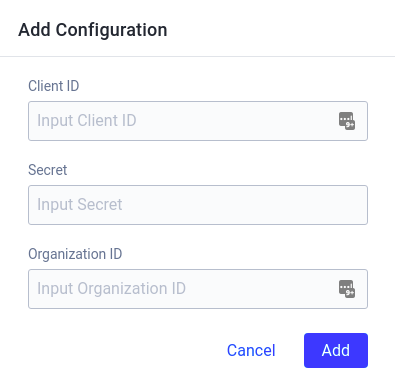
Input the Client ID and Secret you set when creating a Twitch Application for Drops.
Input your Organization ID.
Google Play
Make sure you've created your android app and set the Product ID to Publish your app in the Google Play store.
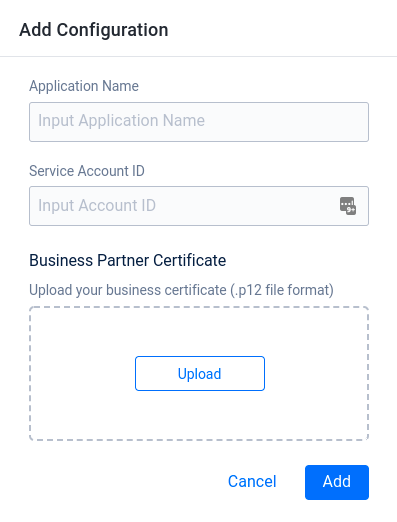
Input the Application Name you set in the Play Console.
Input your Service Account ID.
Upload your Business Certificate in .p12 format.
Apple
Make sure you've created an item in App Store Connect. Use the SKU/Item ID of this item as a Product ID to sync with your App in your namespace's store.
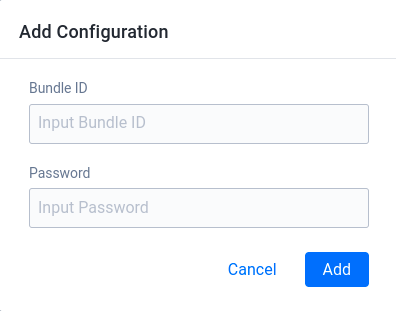
Input the Bundle ID.
Input the Password with the App-Specific Shared Secret found in your item's details in App Store Connect.
- Select the Environment you wish to work in:
Once your configuration is complete, the information you have entered will be visible under the Configuration Details section of the relevant platform. You can also edit or remove configurations on this page.
Change Your Business Partner Certificate
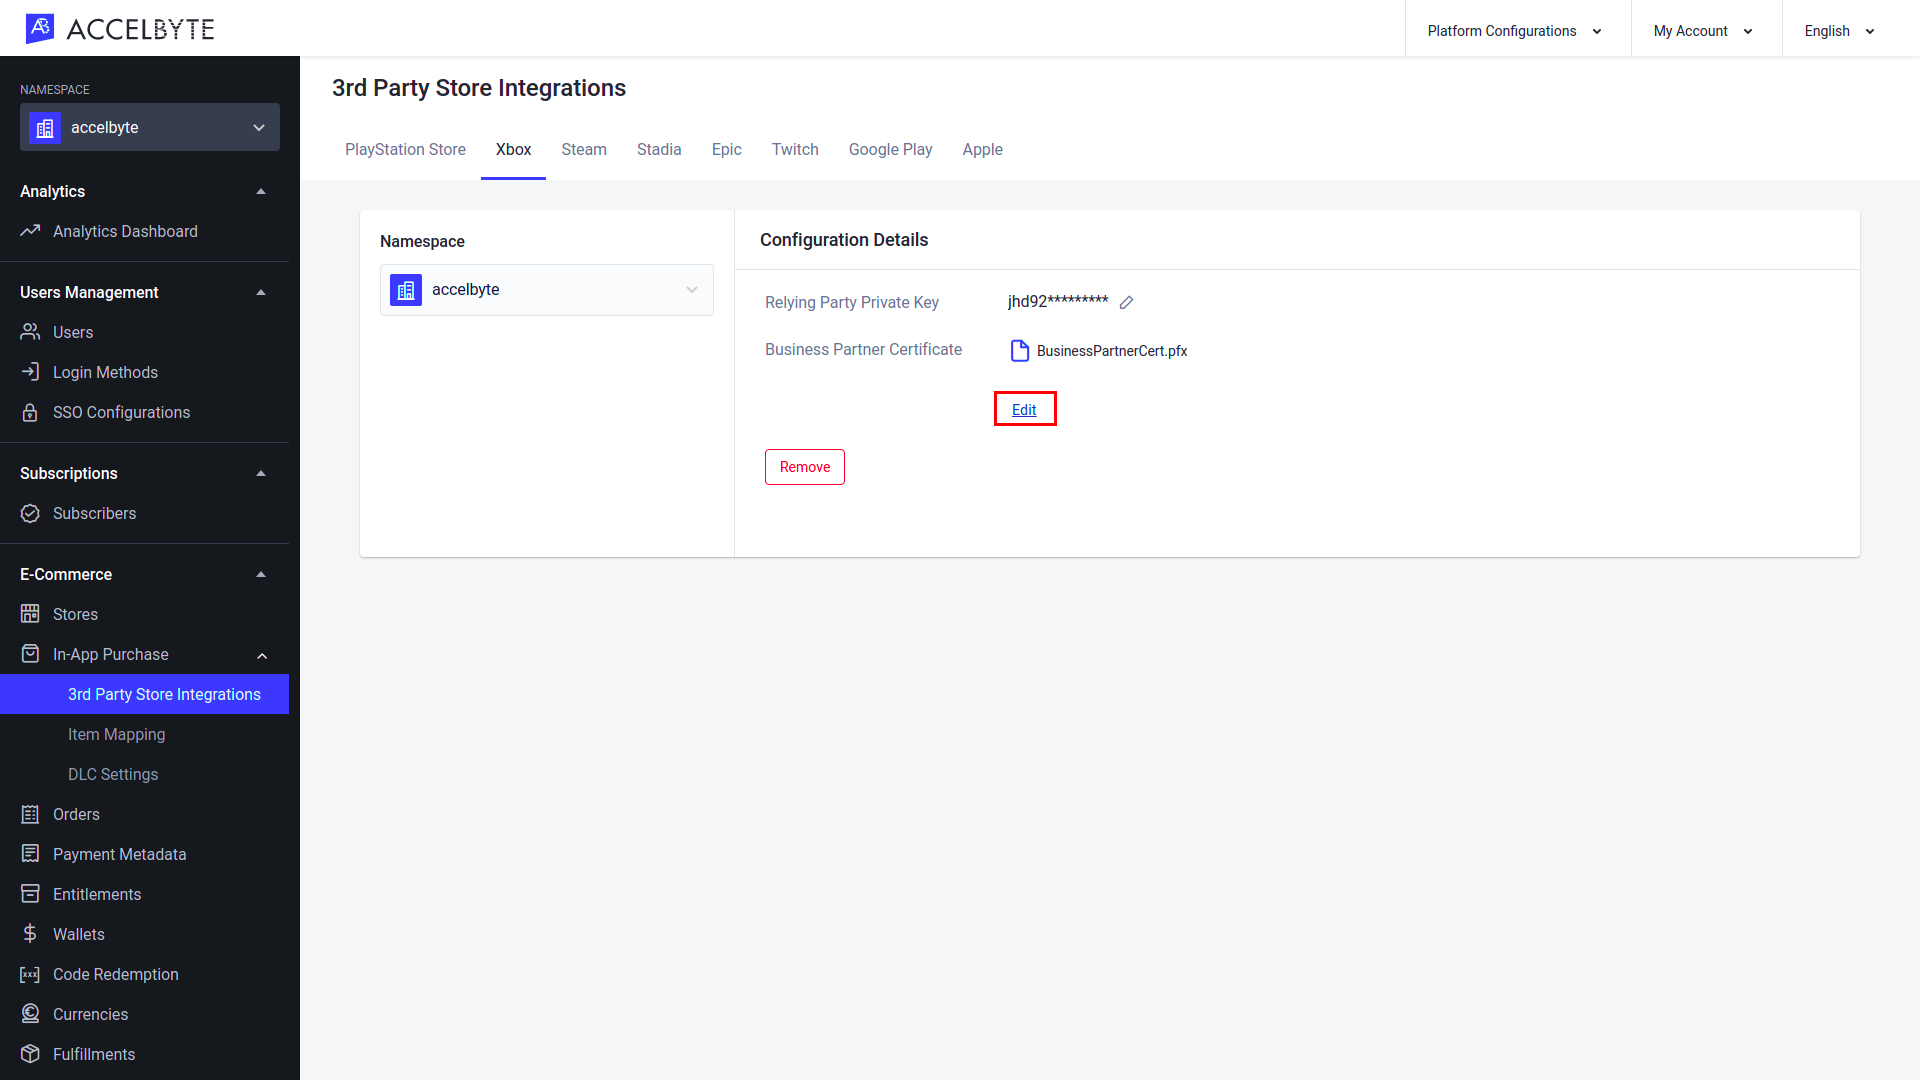
In the Admin Portal, go to E-Commerce > In-App Purchase > Third-party Store Integrations and select the namespace where your certificate belongs. Under Configuration Details > Business Partner Certificate, click Edit.
The Change Business Partner Certificate popup will appear.
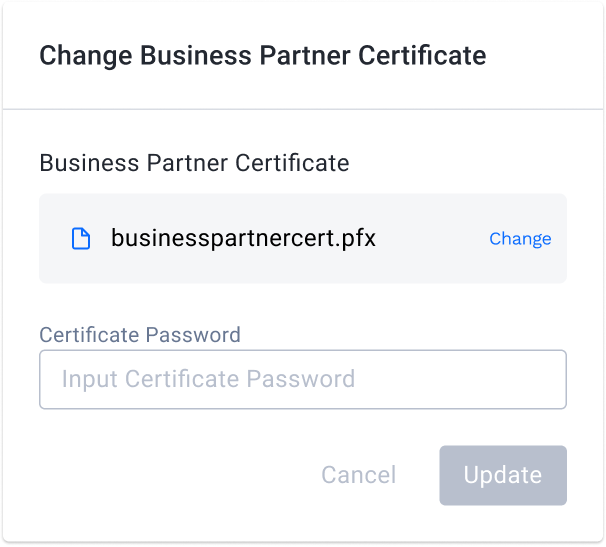
Upload your Business Partner Certificate in .pfx format.
Input your Certificate Password. This field is optional. If your certificate requires a password, you must input the password to continue.
Related Concepts
- Learn how to integrate items on the Third-party Store.
- Read more about our Cloud Entitlement service.